Light Painting Photography

For the promotion and progression of Light Painting Art and Artist.

  • Home
  • Blog
  • History
  • Artists
    • Dean Chamberlain
    • Eric Staller
    • Susan Sims-Hillbrand
    • Vicki DaSilva
    • David Lebe
    • Troy Paiva
    • Bruno Mesrine
    • Chanette Manso
    • Patrick Rochon
    • Aurora Crowley
    • LAPP-PRO
    • JanLeonardo
    • Lightmark
    • Arturo Aguiar
    • Pete Eckert
    • Trevor Williams
    • Michael Bosanko
    • Jason D. Page
    • Nocturne
    • Brian Hart
    • Jeremy Jackson
    • Janne Parviainen
    • Jadikan-LP
    • Dana Maltby
    • Lichtfaktor
    • Dennis Calvert
    • TigTab
    • Hannu Huhtamo
  • Tools
    • Light Painting Brushes Starter Kits Introduction
    • Fiber Optics Light Painting Tools for Photography
  • Tutorials
    • Beginner Light Painting Tutorials
    • Light Painting Tutorials by Artists
    • Light Painting Tool Tutorials
    • Kinetic Light Painting Tutorials
    • Light Painting with Fire Tutorials
    • How To Light Paint A Flower
    • Light Painting Photography Tutorial: The Spiked Orb
    • How To Light Paint a Faberge Orb!
    • No More Orb Feet – Light Erases Darkness
    • The Tinfoil Light Painting Technique
    • How To Light Paint A Ghost
    • Electric Orb Light Painting Tutorial
    • Spirographs and Physiograms Tutorial
    • On Camera Light Source
    • Off Camera Light Source
    • Orb Techniques
    • Steel Wool Tutorial
    • Custom White Balance
    • Omnidirectional Light Cap
    • Gel Holder
    • Simple Orb Tool
    • 4 Ways to Add Color to your Plexiglass Light Painting Brushes
    • Driving Shots at Night
    • Wire Wool Spinning
    • El Wire Tutorial
    • Light Stencils
    • Orbs
    • Dome Tutorial
    • Battery Operated Cathode
    • Light Wheel
    • Double Wheel
    • Fire Wall Tutorial
    • Fire Rain Tutorial
    • Smoke
    • How To Light Paint with the Polaroid One Step +
    • How To Focus In The Dark
    • Light Painting Tutorial The Peacock Technique
    • How To Shoot Defocused Fireworks Tutorial
    • Drone Light Painting Tutorial
    • Light Stencil By Trevor Williams
    • Andrew Whyte Dome Tutorial
    • Light Painting Workshop by Patrick Rochon
    • Rob Turney Refractographs
    • SpiroJib by Johnny Griffin
    • Lens Swap Light Painting Tutorial
    • Camera Rotation Light Painting Tutorial
  • Videos
    • Light Painting Documentaries
      • Jason D. Page Documentary
      • Ball of Light
      • Night Photography: Finding Your Way In The Dark
      • Lightpainted Reality
      • SeeMe | In Focus : Pete Eckert
      • Pete Eckert – Dancing on The Edge of Perception
    • Dean Chamberlain
    • Vicki DaSilva
    • Patrick Rochon
    • Lichtfaktor Light Painting Videos
  • Terms
  • Links
  • Connect With Us!
  • About
You are here: Home / Search for "fiber optic"

Search Results for: fiber optic

Light Painting Break Down: Janne Parviainen for “Crying Light”

June 8, 2015 by Jason D. Page

Janne Parviainen_Crying Light
From time to time we come across a light painting and just stare it wondering how the F@#! did they do that?!?! Break Down is a series if which I only ask the artist one question “How the F@#! did you make this” its up to the artist to tell as little or as much as they want. For this Light Painting Breakdown Janne Parvianinen talks us through how he created the above image titled “Crying Light”

So Janne how the F@#! did you make this?

Gear Used
Camera Sony Alpha 850
Konica Minolta 17-35mm f2.8Benro Tripod extended with work ladders and duct tapeLed Lenser P7qc
Light Painting Brushes black optic fiber
Herramientas Light Painting rgb led spray
Olight S20 Baton
Handful of cheap Chinese finger led lights in various colors

Settings:
F 18
Exposure 827 seconds
ISO 100

“Crying Light” belongs to new 3 Image series in which I combined forced perspective drawings with light paintings. The technique is quite time consuming as in this case too, with the drawing taking up to 20 hours to create and then adding the time to get the lighting and the light painted effects right, which might total about 30 hours of work for one photo. In this case I worked in three phases, creating three different photos while expanding and transforming the drawing further and further in my studio. I wanted the three photos to be kind of a continuous story so I decided to work this way.

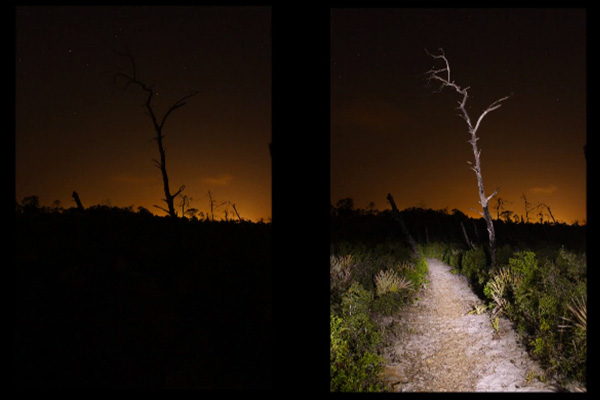
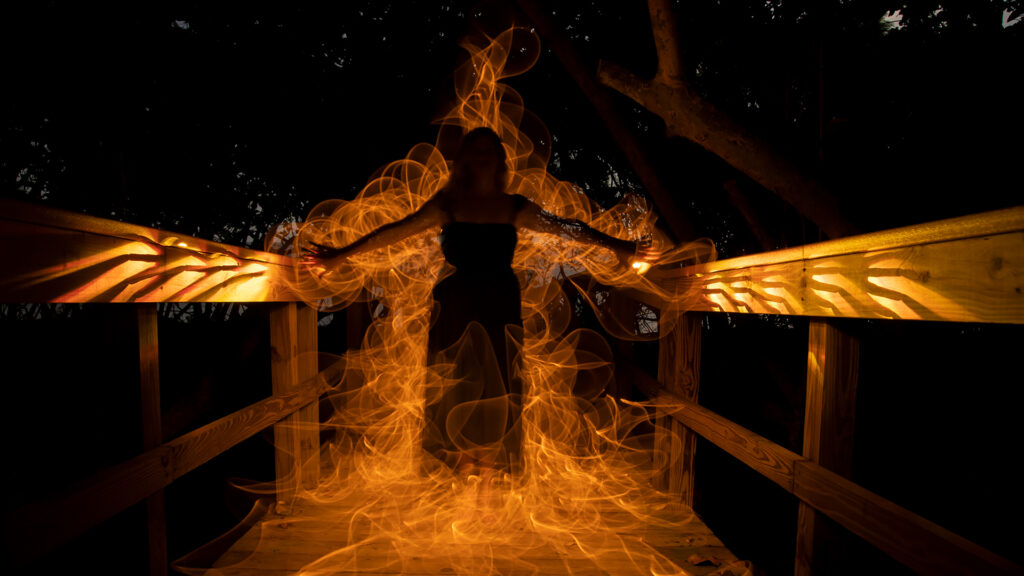
I first set up the tripod almost into the ceiling in order to get the forced perspective drawings to work on as wide area as possible. I had to continue the tripod with work ladders in which I taped it with duct tape. I splashed white paint onto the studio floor and walls in order to create the feeling of space with stars and galaxies. The first light painted version was made by lighting the paint splashes with RGBW Led Lenser and then lighting myself into the photo. Finally I painted the white fog effect with a Light Painting Brushes black fiber optic.
Janne Parviainen_Over the Oceans


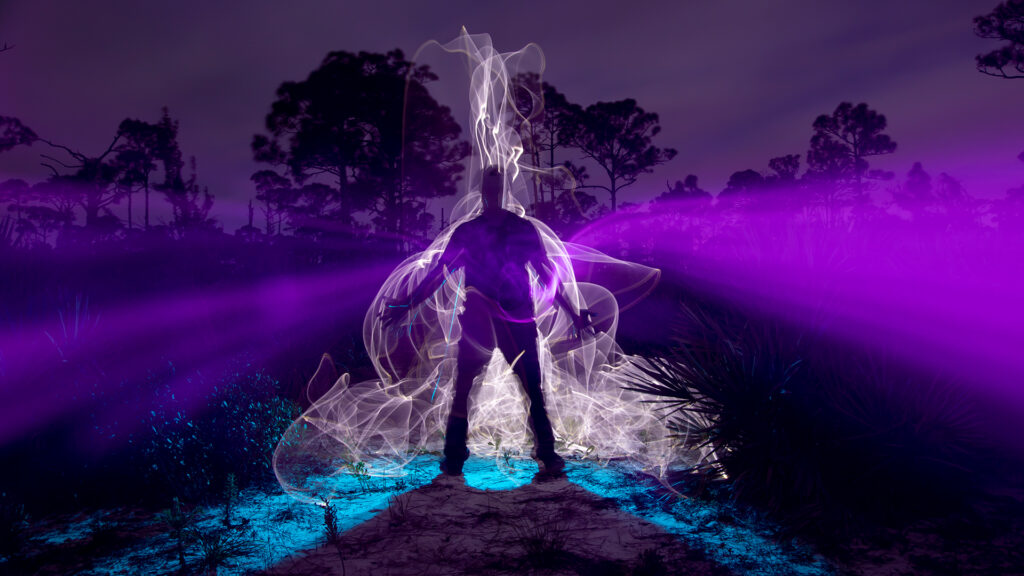
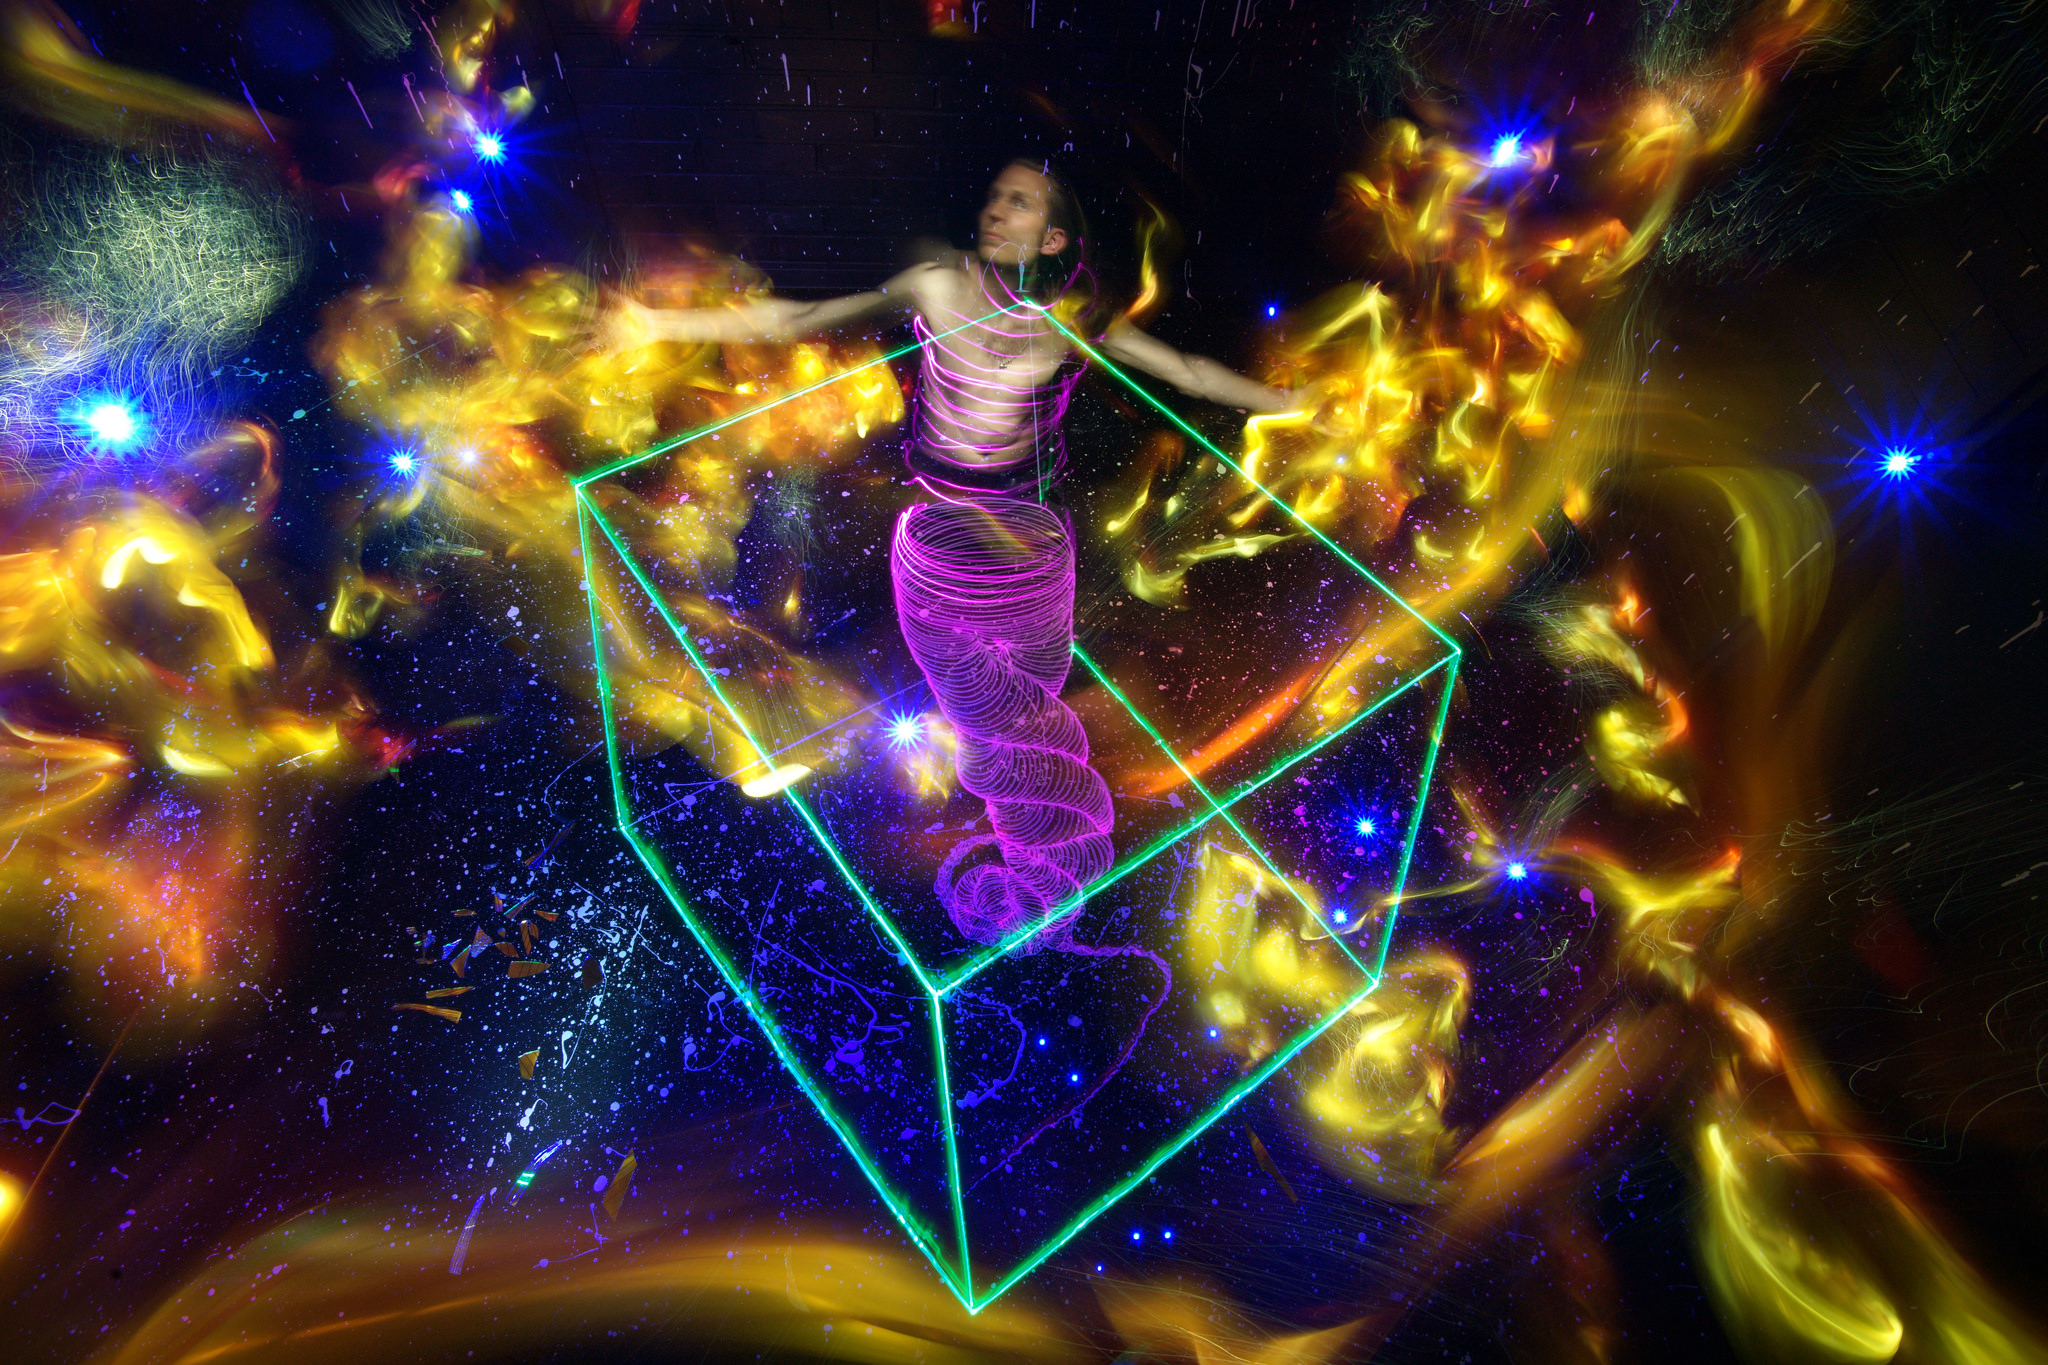
In the second version I continued the drawing with a forced perspective three dimensional cube and inside it a genie shaped tail disappearing into the distance.

Light Painting Janne Parviainen

In the light painting version I lit myself into the photo over the genie drawing and then traced half of my body with a purple colored led light. After that I colored the genie shaped drawing with the purple led in order to make it look like a continuos figure around my body. The rest of the drawing was lit with the RGBW Led lenser except the cube drawing which was lit with a green colored led light. After that I made the blue stars by pointing a blue colored led light at the camera and I created the yellow fog with a yellow plastic bag and a flashlight.
Janne Parviainen_Just a Flicker In the Distance


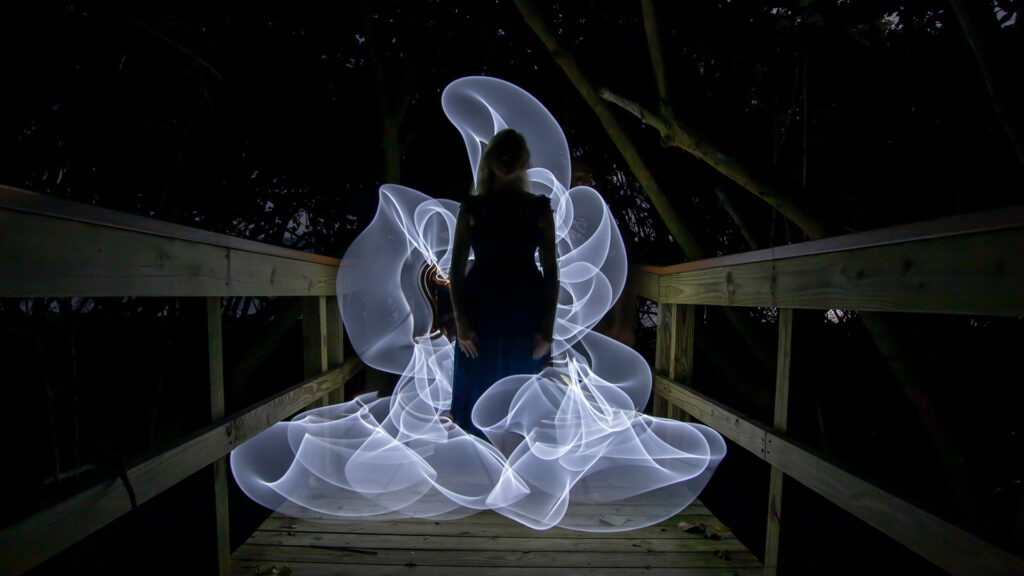
In the final version of the series I continued the drawing by transforming the genie shape into a lotus flower and then continued the sides of the cube with hundreds of characters disappearing into the distance.
Light Painting Janne Parviainen

Finally I composed a mosaic of broken mirror into one of the flowers petals in order to get the models body reflecting from it to the photo. I wanted to have as physical position as possible from the model for this photo so I asked a Finnish dancer and actor Unto Nuora to model for the photo. We worked out a position in which Unto seems to be lifted up by two of the characters in the drawing and leaning towards his broken reflection in the mirror petal. In the light painting version I first lit the model and then illuminated the flower petals with white led light. After that I lit the cube drawing with purple led light, lit the characters by Herramientas light painting’s RGB led spray and the star paint splashes with RGBW Led Lenser. Finally I continued two of the drawing characters with green colored led light in order to seem like they are continuing into three dimensional space and then painted the blue strikes with a blue plastic bag and a torch.

Janne Parviainen_Crying Light


Check out more of Janne’s mind blowing work on his Website, Facebook and Instagram.

Filed Under: Light Painting Photography

Jason D. Page

Light Painting Tutorials by Jason D. Page

Explore some of the most popular Light Painting Photography tutorials by Jason D. Page. These tutorials cover techniques for beginners and advanced artists alike, with step-by-step instructions, gear recommendations, and artistic inspiration.

How To Light Paint Tutorial

How To Light Paint

Learn the basics to start your Light Painting journey.

View Tutorial

How To Light Paint Tutorial

Fiber Optic Light Painting Portrait

Learn how to create Fiber Optic Light Painting Portraits.

View Tutorial

How To Light Paint a Flower

How To Light Paint A Flower

Learn how to create a luminous flower of light using Plexiglass Tools from Light Painting Brushes.

View Tutorial

The End Is Near

The End Is Near

Learn how to Light Paint this powerful image using color hoods, fiber optics, and a mini plexiglass diamond.

View Tutorial

How To Light Paint a Skull

How To Light Paint a Skull

Learn how to Light Paint a Skull using the Fiber Optics from Light Painting Brushes.

View Tutorial

How To Light Paint Smoke

How To Light Paint Smoke

Learn how to Light Paint a smoke or fog effect using the Light Painting Brushes Light Whip.

View Tutorial

Spiked Orb Tutorial

Spiked Orb

Learn how to Light Paint a spiked orb using plexiglass tools from Light Painting Brushes.

View Tutorial

No More Orb Feet

No More Orb Feet

Learn how to use Light to erase unwanted elements, like orb feet, from your Light Painting work.

View Tutorial

How To Light Paint a Faberge Orb

Faberge Orb!

Learn how to Light Paint a designer orb using tools from Light Painting Brushes.

View Tutorial

Portrait Tutorial

Light Painting Portraits

How to capture luminous portraits with light.

View Tutorial

Wings Tutorial

Light Painting Wings

Create angelic light-painted wings.

View Tutorial

Illuminated Being Tutorial

Light Paint an Illuminated Being

Bring light figures to life in your photos.

View Tutorial

Light Writing Tutorial

Light Writing

Write with light using precision and creativity.

View Tutorial

Spirograph Tutorial

Spirograph Light Painting

Easy and fun harmonic light painting shapes.

View Tutorial

Ghost Light Painting

Light Paint a Ghost

Create ghostly figures with light.

View Tutorial

Electric Orb

Electric Orb Technique

Light up your scenes with dynamic orb designs.

View Tutorial

Color Add-On Techniques

4 Ways to Add Color to Plexiglass Tools

Learn how to use color gels and modifiers with your Light Painting Brushes.

View Tutorial

Steel Wool Tutorial

Steel Wool Light Painting

Create fire effects with steel wool and light.

View Tutorial

On Camera Light

On Camera Light Source

Part of the Light Painting 101 series.

View Tutorial

Off Camera Light

Off Camera Light Source

Explore creative separation of subject and light.

View Tutorial

Custom White Balance

Custom White Balance

Set your color tones straight out of camera.

View Tutorial

Orb Techniques

Orb Techniques

Two ways to spin beautiful orbs of light.

View Tutorial

DIY Orb Tool

DIY Orb Tool

Build a quick and simple orb spinning tool.

View Tutorial

Omnidirectional Light Cap

DIY Omnidirectional Light Cap

A simple tool to spread light in all directions.

View Tutorial

Gel Holder

DIY Gel Holder

Organize your colored gels for quick access.

View Tutorial

Links

Looking to expand your Light Painting journey? 🌟 Below is a curated list of communities and companies that support the art of moving light through space and capturing it with a camera. From vibrant Facebook Groups to dedicated tool creators and live video apps, these links will help you grow, connect, and find fresh inspiration. 💡✨ Whether you’re just starting out or deep into your creative flow, you’ll find support and kindred spirits here. ❤️

Light Painting Facebook Groups 📘

Light Painting Brushes

Light Painting Brushes Tricks and Tips

Eric Paré Learn

Light Blading

Fiber Optic Light Painting

Light Painting Tools 🛠️

Light Painting Brushes: USA

Eric Paré’s Light Painting Tubes: Canada

Light Painting Video Software 🎥

LightMonster

Light Paint Live

Light Painting Flickr Groups 📷

Light Junkies

Light Painting – The Real Deal

Light Painting

Light Drawing

Light Painting Portraits

Light Painting with Nature

“LAPP” Light Art Performance Photography

Armed with Torches (Light Painting)

Noctography

➡️ Looking for foundational knowledge? Start with Light Painting 101

📚 Explore all our Light Painting Tutorials

Tools


Light Painting Brushes Tools for Light Painting

Light Painting Brushes are professional-grade Light Painting Tools trusted by artists worldwide. Designed for photographers of all skill levels, these tools simplify the creative process by allowing artists to easily attach a wide range of lights and light modifiers. Whether you’re just getting started or you’re a seasoned pro, the Light Painting Brushes System makes it easier than ever to create stunning Light Paintings.

Each tool can be swapped quickly mid-exposure, letting you use different colors, shapes, and textures of light in one seamless creation. Explore the full line of tools and attachments at LightPaintingBrushes.com.


Light Painting Photography Tools

Recommended Light Painting Gear

  • Universal Connector – The foundation of the LPB system.
  • Light Painting Tubes – Wide bands and ribbons of Light
  • Fiber Optics – Great for Portrait and Fire Effects
  • Plexiglass – Great for Light Sculptures
  • Light Writers – For Light Writing and Light Drawing
  • Portrait Light – For Dynamic Light Painting Portraits
  • Color Hoods – Illuminate a Scene with Color
  • Screw On Color Filters – Change the Color of any LPB Tool
  • Coast G26 – Compact flashlight perfect for beginners.
  • Coast HP7 – 530 Lumens, flood-to-spot focus, great all-around light.
  • Soonfire MX Series – Affordable, high-lumen option.
  • Nitecore SRT7 – Multi-color output, dimmable, pro-level performance.
  • COAST HL27 Headlamp – Must-have for hands-free Light Painting.
  • Adhesive Backed Gels – For colorful lighting effects.
  • Rosco Swatch Book – Hundreds of gel color options.
  • Gaffers Tape – The ultimate tool for securing gear cleanly.
  • Cinefoil (Black Wrap) – Block unwanted light and fix tricky scenes.
  • Olympus OM-D Camera – Live composite mode perfect for LP in urban scenes.
  • Polaroid OneStep+ – Fun, retro, and capable of long exposures.
  • PixelStick – Advanced programmable light wand.
  • EL Wire – Great for glowing lines and fog effects.
  • LED Flashlights from Coast – Lightweight, powerful, and versatile.
  • Roscolux Gels – Trusted by pros, excellent for precision color.
  • Duct Tape – Don’t leave home without it!
  • Canon Lenses – Fast lenses = more light = better images.
  • Poi Balls – Traditional and fire-ready Light Painting gear.
  • Gorilla Tape – Heavy-duty backup tape.
  • ND Filters – Shoot in daylight or with bright lights.
  • Glow Sticks – Inexpensive, colorful, and versatile.
  • Light Painting Swords – Great for dramatic shapes and neon effects.
  • Universal Connector – The foundation of the LPB system.

New to Light Painting? Start with our Light Painting 101 Guide for a full introduction to the art form.

Terms

Light Painting Terms and Definitions

The descriptions of the photographic terms listed below are general definitions and how they relate to Light Painting Photography. This Light Painting Dictionary is not yet complete—please contact me if you have terms to suggest.

What Is Light Painting?

Light Painting is an art form. It is the intentional movement of light, through space, over time. The Light Painting Art Form is captured using the photographic technique of Long Exposure Photography. Just as a canvas captures the brush strokes of a traditional painter, the open shutter of a camera is the canvas that captures the movement of light through space and time. Light Painting is a form of performance art, visual storytelling, healing, and self-expression. It is created with purpose, intention, and movement. The camera becomes a canvas, and light becomes the paint.

The Three Main Light Painting Techniques

  • Light Drawing – The light source is seen by the camera (e.g., orbs, shapes, light writing).
  • Light Painting – The light source is hidden, and only the projected light is captured (e.g., portraits, landscapes).
  • Kinetic Light Painting – The lights remain stationary while the camera itself is moved (e.g., camera rotation, zoom bursts).

The common denominator among all Light Painting techniques is that they use the photographic method of long exposure to capture the Light Painting Art Form.

✅ What Is a Light Form?

In the art of Light Painting, a Light Form refers to the visual shape or structure created by moving light through space during a long exposure. Whether it’s an Orb, a Flower, or an abstract trail of color, each Light Form is a unique expression of movement, timing, and intention.

Light Forms are defined by:

  • The Light Painting Technique used (e.g., Light Writing, Light Painting, or Kinetic),
  • The Tools or Modifiers used to shape the light,
  • And the creative vision of the artist.

Just as a painter chooses different brush strokes to create texture on canvas, a Light Painting Artist uses tools, movement, and light to bring a Light Form to life within the camera frame.

✅ What Is a Light Painting Tool?

A Light Painting Tool is any object or attachment used to shape, direct, color, or control light in the creation of a Light Painting image. These tools are used during long exposure photography to sculpt light into intentional forms, transforming movement into visual art.

Light Painting Tools may include:

  • Custom light modifiers like plexiglass shapes, fiber optics, or diffusers,
  • Flashlights or light-emitting devices.
  • DIY objects that guide, reflect, or refract light.
  • Or any handmade or manufactured attachment used for artistic effect.

The Tool becomes an extension of the artist’s hand, like a brush to a painter, used to paint with light in three-dimensional space. Each Light Painting Tool offers a unique way to manipulate light and craft expressive Light Forms, such as orbs, flowers, trails, or illuminated figures.

While many tools can be used in Light Painting, the brand Light Painting Brushes® represents a trusted system of modular Light Painting Tools specifically designed to empower creative freedom and consistent results.

3 Essentials: To create a light painting photograph you need three essentials camera, tripod, and a light source.

Auto Focus: Auto focus is allowing the camera to do the focusing for you. Generally you depress the shutter release half way to achieve auto focus. In light painting photography auto focus is rarely used.

Ambient Light: The natural light of a scene. Some examples in light painting photography would be streetlights and the moon. A general rule of thumb when light painting is to set your camera to get a proper exposure exposure for the amount of ambient light in your scene and then work from there with your handheld light sources.

AF Sensor: This is the sensor used to detect focus in the camera.

Aperture: Also know as F-stop the aperture is the adjustable opening in the camera lens used to control the amount of light reaching the film or sensor.

Backlight: Light that is coming from behind the subject of the light painting.

Batteries: Essential to light painting photography, batteries are used to power everything from the camera to the tools.

Blur: Not sharp. Not focused. A blurry shot can ruin a night of light painting photography common causes are bumping the camera, wind, or excess movement of the subject. That being said our can also be a desired effect in your Light Painting Photography.

Brush: In Light Painting Photography a brush can be anything from a flashlight to a strobe. A brush can be used to write or paint with light.

Bulb: Bulb is a shutter speed setting where the shutter stays open for as long as the shutter release is depressed. The bulb setting is also active when using a cable release or a timer remote control.

Cable Release: A cable device used for releasing the shutter so that you do not have to touch the camera. Helps to reduce blur in light painting photography.

Camera Painting: A light painting photography technique in which the camera is moved to create the design within the image and the lights in the scene stay stationary. This technique can be combined with other light painting techniques. Common forms of Camera Painting are Camera Toss and Camera Rotation.

Camera Rotation: This is when the camera is physically rotated during a long exposure. There are several different techniques for camera rotation, some combine other light painting techniques such as lens capping. A detailed tutorial on Camera Rotation can be found HERE.

Camera Toss: This is a kinetic light painting technique in which the artist opens the shutter and actually throws the camera into the air. This is one of the more dangerous light painting photography techniques.

CMOS: Complementary Metal-Oxide Semiconductor. This is a type of image sensor.

CMYK: Stands for Cyan, Magenta, Yellow, and Black.

Color Balance: This is the accuracy in which the colors that are captured to the camera actually match the original scene.

Color Temperature: This refers to the color of the light source. Color temperature is rated on the Kelvin scale. Color temperatures over 5,000K are known as cool colors, these would be the blues and whites. Colors with lower temperatures are called warm colors, these would be the yellows and reds.

Contrast: Contrast is the difference in the light and dark values. The fewer gray values in an image the higher the contrast.

Depth of Field: Also referred to as DOF, the depth of field is the distance between the farthest and nearest points that are in focus. Several different factors can affect the DOF such as focal length and aperture. shooting with your aperture opened up say at 2.8 will generally give you a shallower depth of field than shooting F22.

Diffraction: Bounced light used in light painting photography to fill an area or to diffuse the light source.

Diffusion: Diffusion is a material that softens the light source. In light painting photography diffusion is often used on flashes and torches.

DOF: Depth of Field

DSLR: Stands for Digital Single Lens Reflex Camera

Dynamic Range: Is the ratio between the maximum and minimum measurable light intensities. light painting photography images will have varying degrees of dynamic range.

Duct Tape: This along with gaffers tape can be your best friend in light painting photography. Duct tape is a pressure sensitive tape made of cloth. It can be used to make a light stencil light tight, fix a broken tripod, or hold a light in position.

Exposure: This is the amount of light that reaches the film or sensor of the camera.

Fill Flash: Fill flash is a technique by which the light painting photographer uses a flash to fill in a broad area with light. Think of this as your largest paintbrush.

F-Stop: F-stops are the numbers located on the outside of a lens. They are the measurement of the aperture opening, the larger the F-stop the smaller the opening of the lens. The larger f-stop the less light will reach the film or sensor. The smaller the F-stop the larger the opening of the lens, this will allow more light to reach the film or sensor. In light painting photography higher f-stops allow for longer exposures and the use of brighter lights.

Filters: Filters can refer to any number of items used to change the color or other characteristics of an image.

Flare: Flare refers to the reflected light from lens elements. Lens flares happen in light painting photography when a bright light is used in front of or on-camera.

Flash: Also known as a strobe. A flash is a light that produces a bright burst of light. Very widely used in light painting photography for numerous applications.

Flash Box: Also known as a light stencil a flash box is used in light painting photography to create stencil type elements of light. A flash is placed into the back of the light tight box, when the light is flashed on-camera the translucent elements of the box are captured by the camera.

Flashlight: This is by far the most common tool in light painting photography. A flashlight is a portable, handheld, electric powered light source. Flashlights are used for both on and off camera light painting photography. A flashlight is also known as a torch.

Focal Length: This is the distance between the back of the lens element and the focal plane.

Focal Plane: This is the area of the camera where the lens focuses on the film or sensor.

Focus: Moving the camera in a way that creates a sharp image.

Gels: Thin flexible sheets of polycarbonate of polyester. They are also known as colored gels or lighting gels they are used in light painting photography to produce colors when lights are shined through them.

Highlights: The bright to white range of tones in an image.

Gaffers Tape: A strong cloth, pressure sensitive tape similar to duct tape. Gaffers tape is preferred to duct tape in light painting photography due to the synthetic rubber adhesive that allows it to be removed without leaving a sticky residue behind.

Histogram: A graphic representation of the range of tones from dark to light in a photo.

Incidental Light: Light measured as it falls onto the surface, rather than reflected light.

Illuminate: To light a scene in light painting photography.

IS: Image Stabilizer. This feature compensates for camera shake.

ISO: This is basically a measurement of film speed or the films sensitivity to light. Light painting photography is generally created at lower ISO settings to reduce noise. Generally the dimmer the light source the higher the ISO that may need to be used.

JPEG: This is a standard for compressing image data created by the Joint Photographic Experts Group. JPEG is a known as a lossy format meaning that each time the information gets copied image quality is lost.

Key Light: The main light source used to create a light painting photograph.

Kinetic Photography: Is a light painting photography technique in which the artist opens the shutter for an extended period of time and moves the camera to create the desired image. Some kinetic photography techniques include shaking the camera, twisting the camera, and throwing the camera into the air, also known as a camera toss.

LAPP: Stands for Light Art Performance Photography.

LCD: Stands for Liquid Crystal Display. Generally on the back of a camera, when you use the LCD to review your light paintings it is important to consider the brightness of the LCD.  The brightness of your LCD can make your images look much different on the back of your camera than they do on a computer.

LED: Stands for Light Emitting Diode. LED’s are extremely popular among light painting photographers for their versatility, portability, brightness, and longevity.

Lens: An optical device used to control and focus light.

Lens Capping: This is when the lens of the camera is covered during a long exposure. This technique can be used in multiple ways one common way lens capping is used is in conjunction with the technique of Camera Rotation.

Lens Flare: Lens flare is a light element that will show up in your images usually when shooting directly into a strong light. For instance if you are creating a light drawing using a bright flashlight on camera and you shine the light directly into the lens it will produce a lens flare. The physical cause of lens flare is the reflection of light within the lens elements.

Lens Hood: Put on the end of a lens to reduce lens flare.

Lens Swapping: This is the technique of using multiple different lenses during the same long exposure. A detailed tutorial on lens swapping can be found HERE.

Light: One of the most essential elements in light painting photography. Light is electromagnetic radiation that is visible to the human eye.

Light Art: Light Art is a form of visual art where the main medium of expression is light. Light painting photography is a form of light art.

Light Art Performance Photography: Also known as LAPP is a performance with light that is captured by the open shutter of a camera. It could be said that Light Art Performance Photography is a specialized version of Light Painting in that the light movements are generally choreographed and rehearsed prior to the exposure.

Light Bleed: Unwanted light that is showing through. Light bleed is a common occurance in light painting photography when using light stencils. Gaffers tape can solve this problem.

Light Drawing: This is an art form where the artist generally uses handheld light sources on-camera to create light designs, the light drawing is captured to a camera using the photographic technique of long exposure photography. Also known as light graffiti and light writing.

Light Graffiti: This is an art form where the artist generally uses handheld light sources on-camera to create light designs, the light drawing is captured to a camera using the photographic technique of long exposure photography. Also known as light drawing and light writing.

Light Painting: Light Painting is an art form where the artist uses hand held light sources to selectively illuminate parts of a scene during a photographic exposure. The light painting art form is captured to a camera using the photographic technique of long exposure photography. There is no photo editing. All light painting images are created in real time and captured to the camera in one single photographic frame.

Light Painting Photography: Light Painting Photography is an art form where the artist uses hand held light sources to selectively illuminate parts of a scene during a photographic exposure. The light painting art form is captured to a camera using the photographic technique of long exposure photography. There is no photo editing. All light painting images are created in real time and captured to the camera in one single photographic frame.

Light Writing: This is an art form where the artist generally uses handheld light sources on-camera to create light designs, the light drawing is captured to a camera using the photographic technique of long exposure photography. Also known as light drawing and light graffiti.

Long Exposure: This is the photographic technique of capturing an image by leaving the shutter of the camera open for an extended period of time. Most light painting photography can be described as long exposure photography. Long Exposure photography is also known as slow shutter and open shutter photography.

Manual: Manual is a setting on higher end cameras that allows the photographer to have full control over the camera setting such as aperture, shutter speed, and white balance. A camera with manual controls will help you produce greater light painting photography.

Manual Focus: Turning off the cameras auto focus and adjusting the focus for yourself. Manual focusing is the best way to create a sharp image in light painting photography.

Megapixels: A megapixel is one million pixels. This number refers to the number of sensor elements your digital camera contains. Generally speaking the greater the number of megapixels the better the quality of the image your camera can produce. Also the greater number of megapixels your camera contains the larger you can print your images.

Noise: Noise are the red, green, blue, or purple pixels that can show up on your image. These discolored pixels, or noise, appear when the camera’s image processor does not interpret them correctly. They are common in light painting photography.

Neutral Density Filter: Also known as ND filters, they are dark, color neutral filters that are used as a way to control the amount of light reaching the film or sensor. ND filters can be used in day light painting photography or when the light source is extremely bright.

Off-Camera: This is term describes a light source that is used to light the scene from either behind the camera or off to the side. The source of the light is not scene in the final image.

On-Camera: This term describes any light source that is used to light the scene in front of the camera. A on-camera light source will be scene in the final image.

Open Shutter: This is the photographic technique of capturing an image by leaving the shutter of the camera open for an extended period of time. Most light painting photography can be described as open shutter photography. Open Shutter photography is also known as slow shutter and long exposure photography.

Over-Exposure: This is when the highlighted areas of an image lose their detail. In light painting photography this happens when the cameras setting are not correct or when the light source is to intense.

Panoramic: This is an image that is more rectangular than a standard 35mm film frame. A 3:1 ratio is a good place to start for panoramic images.

Photoshop: This word has no place in light painting photography. It is evil and should never be spoken.

Pixel: A pixel is a picture element, a single point in a raster image. Digital photographs are made of millions of pixels.

Prism: A piece of transparent material that is capable of bending light.

Projector: A projector is a device that is used to project an image. Projectors can be used in light painting photography for patterns and other applications.

RAW: Raw is an image format comprised of the data that comes directly off the image sensor with no in-camera processing.

Reciprocity: This refers to the relationship between the intensity of the light source and the time that it has to react with the film or sensor.

Recycling Time: This is the amount of time that it takes a flash to recharge so that it can fire again.

Reflector: A tool for redirecting light

RGB: Red, Green, and Blue.

Saturation: The richness of the colors in an image.

Sensitivity: This refers to the ISO. It is the measurement of the film or sensors sensitivity to light.

Sharpness: The clarity of detail in an image. In light painting photography a sturdy tripod is essential to achieve a sharp image.

Shutter: The mechanical device in the camera that controls the amount of time light is aloud to reach the film or sensor.

Shutter Speed: This is the measurement of time that the shutter of the camera is left open. The slower the shutter speed the longer the exposure time. Light painting images can use shutter speeds of one second to several hours.

Slave: A slave is a light sensitive device that is used to sync strobes and flashes with out the use of cords.

Slow Shutter: This is the photographic technique of capturing an image by leaving the shutter of the camera open for an extended period of time. Most light painting photography can be described as slow shutter photography. Slow Shutter photography is also known as open shutter and long exposure photography.

Soft Focus: This is an effect created by diffusing an image through the use of filters.

SOOC: Straight out of Camera. A purest form of light painting photography is SOOC.

Speed: This is the sensitivity to photosensitive material such as film or the image sensor. Also known as ISO.

Spirograph: A spirograph is a geometric drawing technique that creates mathematical curves and shapes known as hypotrochoids and epitrochoids. In light painting photography spirograph images are created with a light source hanging from a string.

Stencil: In light painting photography a stencil is an image cut out of some material that is light proof and allows light to only penetrate thru the sections that are cut out. Creating a physical negative. It is the same technique used in street art only instead of paint, light painters use light.

Stencil Box: Also known as a flash box a stencil box is used in light painting photography to create stencil type elements of light. A flash is placed into the back of the light tight box, when the light is flashed on-camera the translucent elements of the box are captured by the camera.

Sticks: Sticks are another word for tripod.

Strobe: A strobe is also called a flash, generally strobes are off camera light sources and they can be used to illuminate a scene or freeze motion.

Tack Sharp: A tack sharp image is one that is sharp even when viewed at its largest size.

Timer Remote Control: Much like a cable release this is a remote switch that allows the photographer to open the shutter without touching the camera. A timer remote has additional features such as a self-timer, interval timer, long exposure timer and an exposure count setting.

Tone: This is the measurement of gray values in a photograph.

Torch: A torch is a portable, handheld, electric powered light source. Torches are used for both on and off camera light painting photography. Torches are also known as flashlights.

Tripod: One of the three essential for light painting photography. In light painting photography a tripod is a 3 legged device used to hold the camera steady while the shutter is open. Tripods are also known as sticks.

Tungsten: Tungsten refers to the metal filament used in light bulbs. When electrical current is applied tungsten bulbs give off a reddish/yellow colored light, great for creating warm feeling light painting photography images.

Under Exposed: This happens when too little light reaches the film or sensor. The results of an under-exposed image in light painting photography are a dark image.

Viewfinder: The optical viewing device for framing and focusing in a camera.

Vignetting: This is when you create an image and there are dark spots on the outside edges. Vignetting can be cause by several different factors such as improper lens fitting or filters.

White Balance: In light painting photography white balance refers to the color temperature of the light source. The temperature of the light source is rated in Kelvin degrees, the whiter the light the higher the temperature. Most higher end cameras will offer you several preset choices for your white balance as well as letting you select a custom white balance.

Wide Angle Lens: A wide angle lens allow the artist to capture more of the image from a close disance. As a general rule if you are shooting with a DSLR 35mm camera a wide angle lens can be described as any lens under 50mm.

Zoom Lens: A zoom lens is a lens that has a variable focal length. Zoom lenses can be used in light painting photography to create color streaks on skylines as well as various other applications.

Zoom Pull: This is where the camera is intentionally zoomed in and/or out during a long exposure photograph or light painting. This can give the effect of motion in an otherwise still image.

How to Light Paint a Smoke or Fog Effect

How to Light Paint a Smoke Effect with the Light Whip

Light Painting Tutorial Light Painting a Smoke Effect

In this Light Painting Photography Tutorial, I show you how to Light Paint a smoke or fog effect using the Light Whip from Light Painting Brushes. This is a simple and effective Light Painting technique that adds dynamic atmosphere to your images.

The key to success is slow, smooth movement. By gently waving the Light Whip through space, you can create the illusion of smoky light trails that swirl and drift like fog. This versatile technique works beautifully for Light Painting Portraits, abstracts, and environmental compositions.

If you enjoy this effect, be sure to also check out the related tutorial: How To Light Paint a Ghost, which also uses the Light Whip to achieve hauntingly beautiful results.

Light Painting Smoke Effect Example Images

Light Painting a Smoke Effect Example 1

Light Painting a Smoke Effect Example 2

Light Painting a Smoke Effect Example 3

Light Painting a Smoke Effect Example 4

How To Light Paint A Ghost

Ghost Light Painting Tutorial by Jason D. Page

Ghost Light Painting Created By Jason D. Page

In this Light Painting Photography Tutorial, Jason D. Page shows how to create a Ghost using the Light Whip from Light Painting Brushes.
These apparitions are relatively simple to create — just remember to keep your motions slow and smooth for the best results!


Ghost Light Painting by Jason D. Page


Light Painting Rainbow Ghost


3 Ghost Light Painting

Light Painting Contest Winner, November 2015

December 3, 2015 by Jason D. Page

Light Painting Contest 10 November 2015

And the winner for the November 2015 Light Painting Contest Themed “Portrait” is… Vincent Delesvaux, a.k.a. Diliz This beautiful Light Painting Photograph was created at F-5.0, ISO 100, during a 116 second exposure.

Vincent said this about the image:
“I remember now” has been made at one oclock in my home in 2012, with my ex girlfriend Cosima that I’ve met in Dharamsala, India.

We’ve been using an African mask, a scarf, électroluminescent wire and a little bit of optic fiber and the spotlight shifter 1.0 that I’ve diffused to be used at f/5.

I start to paint the back of Cosima with EL wire taking it with two hands in every end to get a better control of the shapes and a little bit of optic fiber… Then I used the spotlight shifter diffused to paint the right side of the mask and the bottom and both hands close to the face, taking care of not putting light on the left side to allow space for the second cycle and the other half face of the model. After that she took the mask off, join her hands and I light painted them and the left side of her face.

That’s it. Pretty easy!”

I don’t know about “easy” but it sure is incredible! For this fabulous creation Vincent will receive a LPP prize pack filled with treasures from our sponsors below. Make sure to check out more of Vincent’s Light Painting work on his website www.diliz-light.com and his Facebook Page HERE!

Light-Painting-Brushes-Banner

Click here to see the current contest theme and find out how to enter to win your LPP prize pack!

Filed Under: Light Painting Contest, Light Painting Contest Winner, Light Painting Photography

« Previous Page

Copyright © 2026 · News Pro Theme on Genesis Framework · WordPress · Log in