Light Painting Photography

For the promotion and progression of Light Painting Art and Artist.

  • Home
  • Blog
  • History
  • Artists
    • Dean Chamberlain
    • Eric Staller
    • Susan Sims-Hillbrand
    • Vicki DaSilva
    • David Lebe
    • Troy Paiva
    • Bruno Mesrine
    • Chanette Manso
    • Patrick Rochon
    • Aurora Crowley
    • LAPP-PRO
    • JanLeonardo
    • Lightmark
    • Arturo Aguiar
    • Pete Eckert
    • Trevor Williams
    • Michael Bosanko
    • Jason D. Page
    • Nocturne
    • Brian Hart
    • Jeremy Jackson
    • Janne Parviainen
    • Jadikan-LP
    • Dana Maltby
    • Lichtfaktor
    • Dennis Calvert
    • TigTab
    • Hannu Huhtamo
  • Tools
    • Light Painting Brushes Starter Kits Introduction
    • Fiber Optics Light Painting Tools for Photography
  • Tutorials
    • Beginner Light Painting Tutorials
    • Light Painting Tutorials by Artists
    • Light Painting Tool Tutorials
    • Kinetic Light Painting Tutorials
    • Light Painting with Fire Tutorials
    • How To Light Paint A Flower
    • Light Painting Photography Tutorial: The Spiked Orb
    • How To Light Paint a Faberge Orb!
    • No More Orb Feet – Light Erases Darkness
    • The Tinfoil Light Painting Technique
    • How To Light Paint A Ghost
    • Electric Orb Light Painting Tutorial
    • Spirographs and Physiograms Tutorial
    • On Camera Light Source
    • Off Camera Light Source
    • Orb Techniques
    • Steel Wool Tutorial
    • Custom White Balance
    • Omnidirectional Light Cap
    • Gel Holder
    • Simple Orb Tool
    • 4 Ways to Add Color to your Plexiglass Light Painting Brushes
    • Driving Shots at Night
    • Wire Wool Spinning
    • El Wire Tutorial
    • Light Stencils
    • Orbs
    • Dome Tutorial
    • Battery Operated Cathode
    • Light Wheel
    • Double Wheel
    • Fire Wall Tutorial
    • Fire Rain Tutorial
    • Smoke
    • How To Light Paint with the Polaroid One Step +
    • How To Focus In The Dark
    • Light Painting Tutorial The Peacock Technique
    • How To Shoot Defocused Fireworks Tutorial
    • Drone Light Painting Tutorial
    • Light Stencil By Trevor Williams
    • Andrew Whyte Dome Tutorial
    • Light Painting Workshop by Patrick Rochon
    • Rob Turney Refractographs
    • SpiroJib by Johnny Griffin
    • Lens Swap Light Painting Tutorial
    • Camera Rotation Light Painting Tutorial
  • Videos
    • Light Painting Documentaries
      • Jason D. Page Documentary
      • Ball of Light
      • Night Photography: Finding Your Way In The Dark
      • Lightpainted Reality
      • SeeMe | In Focus : Pete Eckert
      • Pete Eckert – Dancing on The Edge of Perception
    • Dean Chamberlain
    • Vicki DaSilva
    • Patrick Rochon
    • Lichtfaktor Light Painting Videos
  • Terms
  • Links
  • Connect With Us!
  • About
You are here: Home / Blog

The Ball Of Light Tool from Denis Smith

December 16, 2016 by Jason D. Page

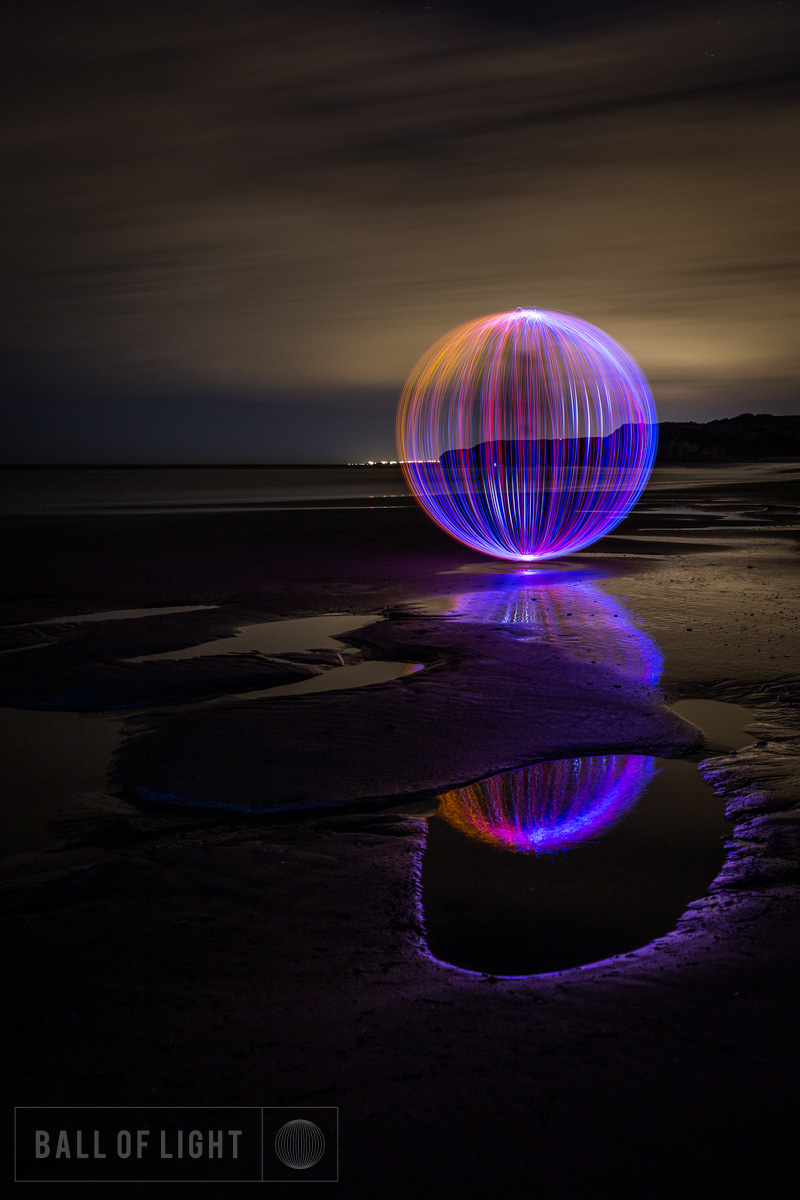
If you spend 5 minutes talking to Light Painting Photographer Denis Smith you will know his love of Light Painting is immense and his enthusiasm for sharing the Art Form is just as big! Denis is known for his “Ball Of Light” that he has created all over Australia and the world. Denis began Light Painting in 2009 and it literally changed his life, more of that here. For the past few years Denis has been sharing his passion with his Light Painting workshops and now he has created the ultimate light orb spinning device called “The Ball Of Light Tool” that will spread the light even more! Check out the video below and read on for all the details.

Interview with Light Painter Denis Smith:

LPP ∇ Hey Denis congratulations on the launch of your Ball of Light Tool! This thing looks like a beast!

DS ∇ Thanks mate. It has been a real labour with many, many versions, prototypes and variations before I was happy to share it with the world.

LPP ∇ Can you tell me about it! It looks like a bit of a modular system with different heads and cables, all attached to some sort of control box?

DS ∇ My very first orb tool was simply a tennis ball on the end of a piece of string with some LED’s sticking out of the ball. It was great, and really reliable, but it meant that for each color I wanted, I had to have a full set up of string, battery and “head”. Of course this became a tangled mess every night. Way back in 2010 I devised a system of connecting different heads to the battery pack via a cable. This meant that I could have a bag of different colours, the cables were replaceable, as these were the most unreliable, and a replaceable, battery pack. It completely changed the way I painted with light.

LPP ∇ So you can switch out different colored heads, thats cool how many colors are available?

DS ∇ This is the really fun part. The Ball of Light Tool ships with 2 colours that I choose, and will be clearly shown on the shop, then I will be making up all sorts of colors that will be available to purchase. We have been sending a lot of packs out with up to 5-6 heads. At this stage we have about 10, but this will grow quickly. Not only will there be different colors, but we will have a variety of heads specifically designed for extreme conditions. These will include “ultra bright” heads for use in really bright urban areas. There will also be runs of “limited edition” heads when I find some crazy LED’s or material to use.


LPP ∇ What does the main control box do exactly?

DS ∇ The controller serves several purposes. It holds the 9v battery. Over the years I have experimented with all sorts of power supplies and batteries. But this is perfect, just the right current, ultra-compact and lasts for ages. The controller also allows you to control the “brightness” of the head. This is really the huge one. Traditionally you had to make your camera settings based on the brightness of the tool so that is wasn’t over or under exposed. This meant that your background was immediately secondary. Anyone who follows my work knows it is all about the background. Whether that is in a bright street scene, or under the full moon. Being able to adjust the brightness of the tool means that you are able to easily make creative choices based on the bigger picture. Of course there is a button to activate the head. I have used the absolutely best quality components I could find for the controller. I want these to work for years.


LPP ∇ That on/off button and brightness control are gonna be great! It also looks like it has a wrap or wrist strap, what is this about?

DS ∇ Traditionally you hold the cable in your hand and spin it while turning. This causes 2 things to happen. You can damage your finger pretty quickly. There are all sorts of ways to overcome this. You can wear gloves, or tape up your finger. I have also seen some pretty ingenious ways to grip the cable. But it is difficult to get away from the fact that the cables break pretty quickly where you grip them. Over the years I have devised a grip and method of attaching it to the cable that, if you watch the tutorial video, it will last for a long time and removes the possibility of blisters. In fact, it makes the process incredibly comfortable. We even shot some ultra-slow motion video for the tutorial showing exactly how I hold the grip and position the cable, that was fun.

LPP ∇ I saw one of your videos where you are smacking the heads with hammer, you put these things through some pretty rough testing can you tell me a little about that?

DS ∇ Oh yes. I have designed the head so that you can smack it against the ground, break off an LED or even hit yourself on the head with it, and the thing will keep on working. We were mucking around in the studio one day and I made the comment that you could beat the shit out of it with a hammer and it would still work. So we picked one head and gave it a shot. We ended up using the same head for about 6 videos, throwing it around outside and snapping off LEDS while it was still on. It was so much fun and in the video you can see the whole head deforming and it still bounced back.

LPP ∇ Why did you decide to build this tool?

DS ∇ Light Painting has exploded in popularity in the past few years. Back in the day, as you would remember, we had to learn how to solder, drill and work out what resistors had to go with what current and so on. It was so much fun. There have been some incredibly good videos out there showing how to make a simple orb tool, achievable by most. But I have been increasingly asked from all over the world, and by a lot of very experienced light painters, to make a tool to sell. The reality is there are a huge amount of people who simply cannot make these tools. There are also a lot of people who don’t have the time. My goal is to share the joy of light painting with as many people as possible. And If by creating a simple to use, reliable and fun tool that allows more people to get out and at least try, then this seems a great way.

LPP ∇ How long have you been working on this?

DS ∇ I decided about a year ago that this was going to happen. I thought it would be really easy. Just replicate what I used and get it out there. It turned out to be a much, much bigger project. I realized pretty quickly that the overall build quality needed to be much higher than my tool. I also realized that it had to be cost effective for people. The time spent designing the product, sourcing the right components, then building testing, modifying, testing, changing, pricing etc simply took and astonishing amount of time. Not mention money.

LPP ∇ I know the quality of this product was really important to you, but with quality comes a higher cost, how did you balance the quality and cost out when you were developing the tool?

DS ∇ Great question, this was probably the hardest part of the whole process. I had a target price that I knew would be achievable to the average Light Painting enthusiast. But I was not going to compromise on the quality of the design or components. I spent so much time ordering, waiting for and putting the parts together then head out testing. This was a recurring pattern for months until I knew I could package up and send out a kit feeling proud, and genuinely excited for the person at the other end. There have been people questioning the price but once people think hard about the time I have spent (astronomical), the money I have invested (substantial) and the passion there is in each kit (there is love in those boxes!) it pretty quickly evens out. I am completely stoked with where the price ended up. It is a great balance. Obviously there will be those who disagree, but you cannot please everyone. I was out with someone last night who bought a pretty basic torch for the same price recently. I was so nervous the day we opened up sales. 24 hours later I was completely satisfied that we had hit the sweet spot. We got hammered!


LPP ∇  Here is the best question… where can we get one?

DS ∇ We have opened up a shop so people can head over and check out the tool there, CLICK HERE TO GO TO THE SHOP! Soon we will be adding a bunch of other products including the Light Painting Brushes system which I am also excited about.

LPP ∇ Thank you for taking the time to answers some questions, it looks like you have really thought of everything to create the ultimate orb spinner! I hope The Ball Of Light Tool is a great success and helps with the continued growth of the Light Painting Art Form!

DS ∇ Thank you.

Filed Under: Light Painting Photography

Fiber Optic Light Painting Tutorial by Maria Saggese

December 9, 2016 by Jason D. Page

If you are not following the Light Painting Photography of Maria Saggese you are missing out on some incredible and inspiring work. One particular style of Light Painting Maria has become know for her beautiful work with Fiber Optics creating images that are instantly recognizable as her own! I asked Maria if she would share some tips about these awesome works of art and she went far beyond that providing a full tutorial to share! Read on below for the tutorial and if you find it inspiring as I know you will, please make sure to tag #MariaSaggese when posting any images on social media you create using this technique so Maria can see what you are creating!

Light Painting Fiber Optic Tutorial by Maria Saggese
In this tutorial I am going to explain how to create beautiful silhouettes with fiber optic using Light Painting Brushes system. I will explain how I set up my camera and I will share my technique to create double silhouettes in the same frame. I will also share how to obtain an overlapping effect and a double exposure “evanescence” effect all during a single long exposure photograph!

Equipment required:
Camera with bulb mode (or Long Exposure)
Tripod Remote or Cable Shutter Release
Fiber Optics + Universal Connector
Torch or Flashlight RGB Flashlight
or LED Flashlight with Colored gels

The tools that I use are the Light Painting Brushes Fiber Optics: There are two versions of the fiber optics a Black & White they both attach to just about any flashlight using the Universal Connector.

To change fiber’s colors I use a Led Lenser P7QC flashlight with 4 colors or the 10 color “Color Shine RGB Flashlight”. You can also customize the color’s fiber by placing some colored gels over any torch you attach to the fiber optics using the Universal Connector.

Set up
Set up is simple – just the camera on a tripod focused on the area where my model is.

To focus I turn on the studio lights, focus on the model with the focal length that I am going to use in my picture then I turn off the studio lights. After focusing with the lights on I switch the camera’s focus to manual focus, this will make sure the camera will remain in focus when the lights are off and starting the exposure.

The camera settings that normally I use are:
BULB Mode
F/11-F/13
ISO ranging from 200-400
White Balance: Daylight
RAW format

Technique
After starting the exposure, I go behind the model, I turn on my flashlight moving the tips of fiber with a slight movement to outline the figure as a “cloud” or an aura. Starting from the model’s face I slowly outline all parts of the body all the way down to the feet. The most important thing is not to paint with the fibers behind the same area several times, otherwise you will not have a defined silhouette.

Settings for this image: 40 Sec Exposure, F/11, ISO 200. Created using the White Fiber Optic.

To get more cloudy or smoky effect I increase the speed of painting with fiber even light painting in front of the model as seen in the image below.

Settings for this image: 50 Sec Exposure, ISO 200, F/10. Created using the White Fiber Optic.

How to create double silhouette
During the same exposure, I first create a silhouette using the techniques described above with one color using the fibers, then I turn off my torch. The model has to move to a new position to reflect on the opposite side. I choose a different color (or the same) to create a second silhouette that will overlap with the first one created.

Settings for this image: 61 Second Exposure, F/11, ISO 200. Created using the White Fiber Optic.

Settings for this image: 140 Second Exposure, F/13, ISO 200. Created using the White Fiber Optic.

Double exposure
To create my double exposure effect I first create my silhouette and then I turn off my torch. Then without a model in the scene I illuminate the background or, in this case, the bed, to obtain an overlapping and “evanescence” effect during the same exposure.
Settings for this image: 54 Second Exposure, F/13, ISO 400. Created using the Black Fiber Optic.

Settings for this image: 60 Second Exposure, F/11, ISO 200. Created using the White Fiber Optic.

White or Black Fiber?
Personally I love the white one, because the fiber is completely illuminated and not just the tips, with this I get a more nuanced effect, while the black one has a more contrasted and “Scratched” effect. The result is a little bit different for each tool so you can try both and choose your favorite effect.
Settings for this image: 35 Second Exposure, F/13, ISO 200. Created using the White Fiber Optic.

Settings for this image: 35 Second Exposure, F/13, ISO 200. Created using the Black Fiber Optic.

If you try this technique please share your work on Facebook and Instagram using the hastag #mariasaggese

You can find more of Maria’s absolutely beautiful work at the links below:
Facebook
Instagram
Website

Filed Under: Light Painting Photography, Light Painting Tutorials

Light Painting The Big Light Man Party

November 30, 2016 by Jason D. Page

light-painting-riders-of-light-the-big-party

Incredible Light Painting work by Ivan Boluda and Riders of Light is nothing new but this right here is even more extraordinary!  So the theme of this months Light Painting Photography contest is “Light Man” or “Light Woman” and when Ivan saw the theme he sent me this completely mind boggling image to share with everyone for inspiration.

Called “The Big Party” this image explores what might happen in abandon buildings while no one is watching. Ivan said “Taking advantage of the congress Inight 2016 in Madrid, with many national artists that flocked to the capital, we decided to gather a group of artists and friends for a fun night Photo creating this work in a location that we had previously visited.”

riders-of-light-abandon-building-spain-pano

The big party, has a total of 129 Light Men “having fun and dancing” and was created by non-stop work of a team of Spanish Light Painters in the city of Madrid.

This incredible Light Painting Panoramic photograph is composed of 3 shots horizontally and then united with Ptgui software.

The exposure time for each image was approximate 25 minutes shot at ISO 400 –  F 5.6

CLICK THE IMAGE BELOW AND IT WILL TAKE YOU TO THE ATTACHMENT PAGE WHERE YOU CAN DOWNLOAD THE HIGH-RES VERSION TO SEE IT IN FULL SIZE WOW!!!

light-painting-riders-of-light-the-big-party

Directed by Riders of Light

Created by Light Painters:

Javier, Jiménez, Ivan Lucio, Iván barco, Frodo Álvarez, Jorge Echeverría, Natalie Valdivieso, Esther Noemi, Alexandra Lunar,Robe Alonso, Roberto García Sanz, Xavier Vázquez, Carles Calero, Sergi Boix, Victor Frances, Augusto LLacer, Maite Castelló, Carles Domenech.

Filed Under: Light Painting Photography

Light Painting Stop Motion by Aty Lightgraff

November 22, 2016 by Jason D. Page

light-painting-by-aty-lightgraff-img_4


Everybody loves light painting even Art Toys created by Aty Lightgraff! In this Stop Motion Light Painting animation Aty Lightgraff plays out what it would be like if these toys came to life to create some light paintings. Over 1850 individual frames comes together to bring this piece to life. As the title states this is just the beginning so hopefully we will get to follow the progress of these light painting characters with more to come soon. Enjoy…

The Adventures of Paper Crew # 1 “The Begining” -Light Painting / Stop Motion / Art Toyz

Music by Vf’Z
Vf’Z Facebook

Check out more from Aty Lightgraff Here:
Facebook
Flickr

Filed Under: Light Painting Photography, Light Painting Video

Light Painting Photography at PHOTOKINA! Part 2

November 9, 2016 by Jason D. Page

photokina2016

This is second of a 2 part series of articles about Light Painting at Photokina! In Part 1 of the Photokina Light Painting series I interviewed the main organizer of “Photokina Event- World LightArt ” and “The Photokina – LightArt Congress (PhoLAC)” Jan Leonardo Wöllert. Here in Part 2 I wanted to get another perspective of the event from two of the Light Painting artist that were invited, Pala Teth and Mart Barras! I asked them to each select a single image from the event and tell me why this was their favorite image. Getting two extremely talented photographers to select just one image from an event all about Light Painting Photography was not easy but thankfully these two were able to narrow it down and share their personal stories about the event.

Pala Teth:
The PhoLAC congress was fantastic, with a lot of highlights, like the amazing improvised collaboration with an authentic and original Ball of Light from Denis Smith (Australia) combined with the famous light skeletons from Darren Pearson (USA) in the middle of a park in Köln (Germany). This example is for me a fantastic symbol of the relationships that the Light Painting creates between people, over the borders and the continents. And there were so many crazy moments like this one during the congress! But the most impressive image for me is when I saw the Light Painting pictures selected by the PhoLAC team all over the huge official screens in all the entrances and halls of the Photokina (190 000+ visitors). The picture I selected was taken by Sven Gerard of a Light Painting by Mafu Fuma, from Aurora Movement. This image by Mafu is one from his portfolio that won the special prize at the International Light Painting Award 2016 and was projected onto one of the giant screens at Photokina!

light-painting-by-mafu-fuma-1

As a European photographer, Photokina is for me the Mecca of the Professional Image and Photography Business (yes, with capitals, you know what I mean…). The Light Painting was there, everywhere, on big screens. The first time I’ve seen one of these screen, I had to stop and watch. I was like a child, amazed by the show. It has made me really proud of our art form! The Light Painting produces spectacular, impressive, colourful, attractive and eye-catching images. It was clearly visible that these images are able to compete with the splendid images used by the brands for their marketing needs. For me, the fact to show these LP images in the Photokina has added a huge load of credibility to our art form.

Mart Barras:
The photo I’ve chosen for you is one that myself, Phill Fisher and Kim von Coels (The Krumble Empire) created at the PhoLAC After Fun party hosted by Karin Brodowsky on the Friday evening. I love it because after such a great day, we all had the chance to hang out, share amazing food and drink, talk and most of all Light Paint together. A perfect end to a perfect day, old friends and new celebrating together our art-form, something I’ll remember forever 🙂

light-painting-by-mart-barras

To be fair all the photos I took are special for me, for different reasons so it was hard to pick. I have a great one of Denis Smith running around the hall, just before he went on for his speech. Dennis really summed the whole trip up for me, with his energy and obvious passion for light painting, something which we all feel about our art form and was present throughout all the speeches and visible in the work and time and effort that Jan and his team had put into the event.

Check out part 1 HERE.


Filed Under: Light Painting Photography

« Previous Page
Next Page »

Copyright © 2026 · News Pro Theme on Genesis Framework · WordPress · Log in