
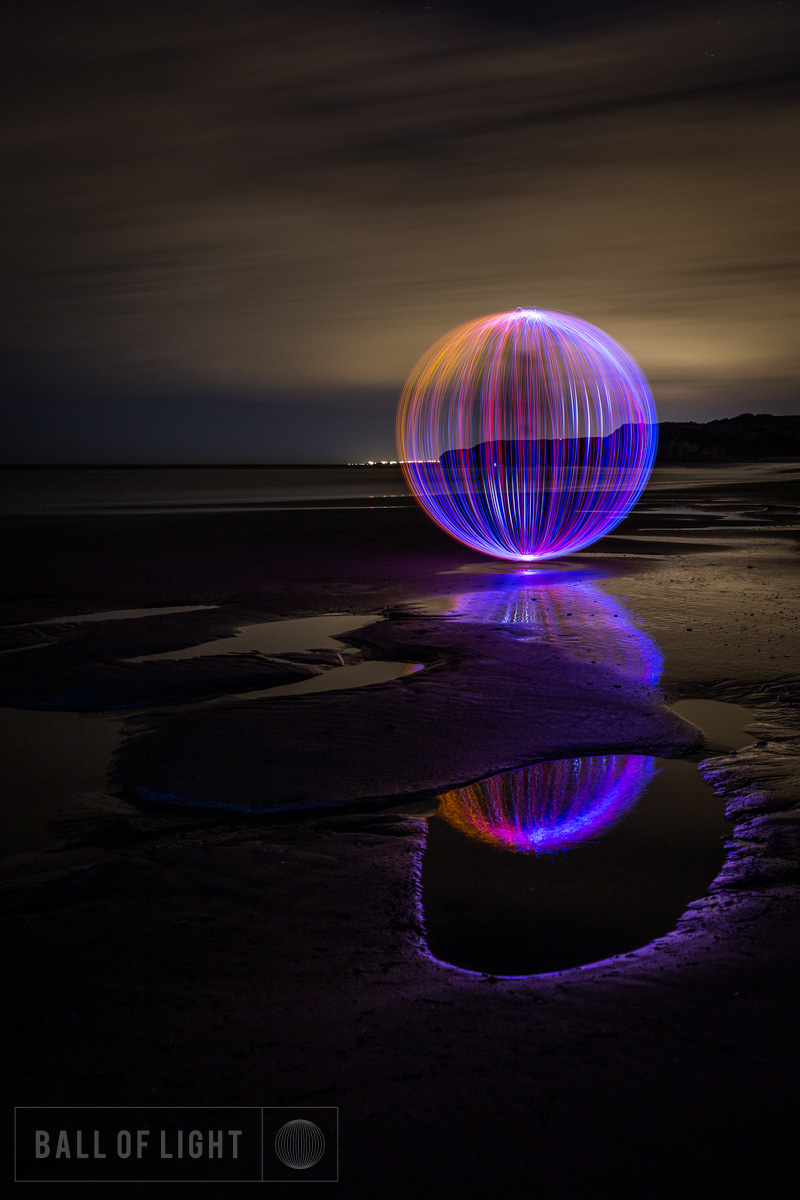
If you spend 5 minutes talking to Light Painting Photographer Denis Smith you will know his love of Light Painting is immense and his enthusiasm for sharing the Art Form is just as big! Denis is known for his “Ball Of Light” that he has created all over Australia and the world. Denis began Light Painting in 2009 and it literally changed his life, more of that here. For the past few years Denis has been sharing his passion with his Light Painting workshops and now he has created the ultimate light orb spinning device called “The Ball Of Light Tool” that will spread the light even more! Check out the video below and read on for all the details.
Interview with Light Painter Denis Smith:
LPP ∇ Hey Denis congratulations on the launch of your Ball of Light Tool! This thing looks like a beast!
DS ∇ Thanks mate. It has been a real labour with many, many versions, prototypes and variations before I was happy to share it with the world.
LPP ∇ Can you tell me about it! It looks like a bit of a modular system with different heads and cables, all attached to some sort of control box?
DS ∇ My very first orb tool was simply a tennis ball on the end of a piece of string with some LED’s sticking out of the ball. It was great, and really reliable, but it meant that for each color I wanted, I had to have a full set up of string, battery and “head”. Of course this became a tangled mess every night. Way back in 2010 I devised a system of connecting different heads to the battery pack via a cable. This meant that I could have a bag of different colours, the cables were replaceable, as these were the most unreliable, and a replaceable, battery pack. It completely changed the way I painted with light.

LPP ∇ So you can switch out different colored heads, thats cool how many colors are available?
DS ∇ This is the really fun part. The Ball of Light Tool ships with 2 colours that I choose, and will be clearly shown on the shop, then I will be making up all sorts of colors that will be available to purchase. We have been sending a lot of packs out with up to 5-6 heads. At this stage we have about 10, but this will grow quickly. Not only will there be different colors, but we will have a variety of heads specifically designed for extreme conditions. These will include “ultra bright” heads for use in really bright urban areas. There will also be runs of “limited edition” heads when I find some crazy LED’s or material to use.


LPP ∇ What does the main control box do exactly?
DS ∇ The controller serves several purposes. It holds the 9v battery. Over the years I have experimented with all sorts of power supplies and batteries. But this is perfect, just the right current, ultra-compact and lasts for ages. The controller also allows you to control the “brightness” of the head. This is really the huge one. Traditionally you had to make your camera settings based on the brightness of the tool so that is wasn’t over or under exposed. This meant that your background was immediately secondary. Anyone who follows my work knows it is all about the background. Whether that is in a bright street scene, or under the full moon. Being able to adjust the brightness of the tool means that you are able to easily make creative choices based on the bigger picture. Of course there is a button to activate the head. I have used the absolutely best quality components I could find for the controller. I want these to work for years.


LPP ∇ That on/off button and brightness control are gonna be great! It also looks like it has a wrap or wrist strap, what is this about?
DS ∇ Traditionally you hold the cable in your hand and spin it while turning. This causes 2 things to happen. You can damage your finger pretty quickly. There are all sorts of ways to overcome this. You can wear gloves, or tape up your finger. I have also seen some pretty ingenious ways to grip the cable. But it is difficult to get away from the fact that the cables break pretty quickly where you grip them. Over the years I have devised a grip and method of attaching it to the cable that, if you watch the tutorial video, it will last for a long time and removes the possibility of blisters. In fact, it makes the process incredibly comfortable. We even shot some ultra-slow motion video for the tutorial showing exactly how I hold the grip and position the cable, that was fun.

LPP ∇ I saw one of your videos where you are smacking the heads with hammer, you put these things through some pretty rough testing can you tell me a little about that?
DS ∇ Oh yes. I have designed the head so that you can smack it against the ground, break off an LED or even hit yourself on the head with it, and the thing will keep on working. We were mucking around in the studio one day and I made the comment that you could beat the shit out of it with a hammer and it would still work. So we picked one head and gave it a shot. We ended up using the same head for about 6 videos, throwing it around outside and snapping off LEDS while it was still on. It was so much fun and in the video you can see the whole head deforming and it still bounced back.

LPP ∇ Why did you decide to build this tool?
DS ∇ Light Painting has exploded in popularity in the past few years. Back in the day, as you would remember, we had to learn how to solder, drill and work out what resistors had to go with what current and so on. It was so much fun. There have been some incredibly good videos out there showing how to make a simple orb tool, achievable by most. But I have been increasingly asked from all over the world, and by a lot of very experienced light painters, to make a tool to sell. The reality is there are a huge amount of people who simply cannot make these tools. There are also a lot of people who don’t have the time. My goal is to share the joy of light painting with as many people as possible. And If by creating a simple to use, reliable and fun tool that allows more people to get out and at least try, then this seems a great way.
LPP ∇ How long have you been working on this?
DS ∇ I decided about a year ago that this was going to happen. I thought it would be really easy. Just replicate what I used and get it out there. It turned out to be a much, much bigger project. I realized pretty quickly that the overall build quality needed to be much higher than my tool. I also realized that it had to be cost effective for people. The time spent designing the product, sourcing the right components, then building testing, modifying, testing, changing, pricing etc simply took and astonishing amount of time. Not mention money.
LPP ∇ I know the quality of this product was really important to you, but with quality comes a higher cost, how did you balance the quality and cost out when you were developing the tool?
DS ∇ Great question, this was probably the hardest part of the whole process. I had a target price that I knew would be achievable to the average Light Painting enthusiast. But I was not going to compromise on the quality of the design or components. I spent so much time ordering, waiting for and putting the parts together then head out testing. This was a recurring pattern for months until I knew I could package up and send out a kit feeling proud, and genuinely excited for the person at the other end. There have been people questioning the price but once people think hard about the time I have spent (astronomical), the money I have invested (substantial) and the passion there is in each kit (there is love in those boxes!) it pretty quickly evens out. I am completely stoked with where the price ended up. It is a great balance. Obviously there will be those who disagree, but you cannot please everyone. I was out with someone last night who bought a pretty basic torch for the same price recently. I was so nervous the day we opened up sales. 24 hours later I was completely satisfied that we had hit the sweet spot. We got hammered!


LPP ∇ Here is the best question… where can we get one?
DS ∇ We have opened up a shop so people can head over and check out the tool there, CLICK HERE TO GO TO THE SHOP! Soon we will be adding a bunch of other products including the Light Painting Brushes system which I am also excited about.
LPP ∇ Thank you for taking the time to answers some questions, it looks like you have really thought of everything to create the ultimate orb spinner! I hope The Ball Of Light Tool is a great success and helps with the continued growth of the Light Painting Art Form!
DS ∇ Thank you.