Light Painting Photography

For the promotion and progression of Light Painting Art and Artist.

  • Home
  • Blog
  • History
  • Artists
    • Dean Chamberlain
    • Eric Staller
    • Susan Sims-Hillbrand
    • Vicki DaSilva
    • David Lebe
    • Troy Paiva
    • Bruno Mesrine
    • Chanette Manso
    • Patrick Rochon
    • Aurora Crowley
    • LAPP-PRO
    • JanLeonardo
    • Lightmark
    • Arturo Aguiar
    • Pete Eckert
    • Trevor Williams
    • Michael Bosanko
    • Jason D. Page
    • Nocturne
    • Brian Hart
    • Jeremy Jackson
    • Janne Parviainen
    • Jadikan-LP
    • Dana Maltby
    • Lichtfaktor
    • Dennis Calvert
    • TigTab
    • Hannu Huhtamo
  • Tools
    • Light Painting Brushes Starter Kits Introduction
    • Fiber Optics Light Painting Tools for Photography
  • Tutorials
    • Beginner Light Painting Tutorials
    • Light Painting Tutorials by Artists
    • Light Painting Tool Tutorials
    • Kinetic Light Painting Tutorials
    • Light Painting with Fire Tutorials
    • How To Light Paint A Flower
    • Light Painting Photography Tutorial: The Spiked Orb
    • How To Light Paint a Faberge Orb!
    • No More Orb Feet – Light Erases Darkness
    • The Tinfoil Light Painting Technique
    • How To Light Paint A Ghost
    • Electric Orb Light Painting Tutorial
    • Spirographs and Physiograms Tutorial
    • On Camera Light Source
    • Off Camera Light Source
    • Orb Techniques
    • Steel Wool Tutorial
    • Custom White Balance
    • Omnidirectional Light Cap
    • Gel Holder
    • Simple Orb Tool
    • 4 Ways to Add Color to your Plexiglass Light Painting Brushes
    • Driving Shots at Night
    • Wire Wool Spinning
    • El Wire Tutorial
    • Light Stencils
    • Orbs
    • Dome Tutorial
    • Battery Operated Cathode
    • Light Wheel
    • Double Wheel
    • Fire Wall Tutorial
    • Fire Rain Tutorial
    • Smoke
    • How To Light Paint with the Polaroid One Step +
    • How To Focus In The Dark
    • Light Painting Tutorial The Peacock Technique
    • How To Shoot Defocused Fireworks Tutorial
    • Drone Light Painting Tutorial
    • Light Stencil By Trevor Williams
    • Andrew Whyte Dome Tutorial
    • Light Painting Workshop by Patrick Rochon
    • Rob Turney Refractographs
    • SpiroJib by Johnny Griffin
    • Lens Swap Light Painting Tutorial
    • Camera Rotation Light Painting Tutorial
  • Videos
    • Light Painting Documentaries
      • Jason D. Page Documentary
      • Ball of Light
      • Night Photography: Finding Your Way In The Dark
      • Lightpainted Reality
      • SeeMe | In Focus : Pete Eckert
      • Pete Eckert – Dancing on The Edge of Perception
    • Dean Chamberlain
    • Vicki DaSilva
    • Patrick Rochon
    • Lichtfaktor Light Painting Videos
  • Terms
  • Links
  • Connect With Us!
  • About
You are here: Home / Search for "fiber optic"

Search Results for: fiber optic

Light Painting Brushes Universal Connector Compatible Flashlight Guide – 2019

September 23, 2019 by Jason D. Page

Light Painting Brushes Flashlight Guide

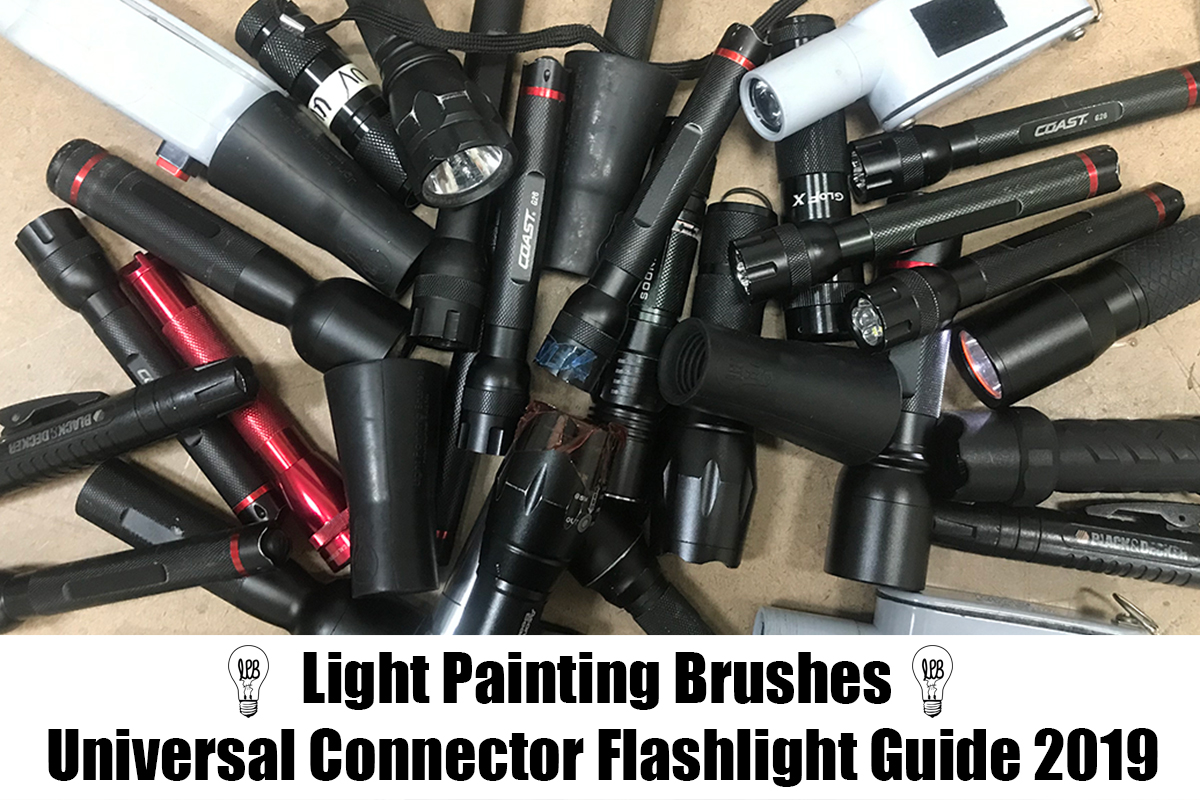
This guide written by Stephen Knight is a follow up to the 2018 guide to flashlights compatible with the Light Painting Brushes Universal Connector. Some new flashlights have been added, and a few discontinued ones removed. This article covers flashlights that fit the Universal Connector which allows for a .975″ to 1.5″ (25-38mm) head diameter range. An addition to this years guide is an asterix (*) denoting that the light has internal recharging options (i.e. you don’t need to use a seperate charger).

Foreword
It should be noted that the maximum output in lumens stated by manufacturers are rarely sustained, and most flashlights reduce in brightness at anything between 30 seconds and a few minutes. Be aware that some cheap flashlights (particularly on eBay, Amazon, various Chinese electronics companies) have highly exaggerated lumen ratings.

Whilst lumens (lm) are generally used to describe output, the peak beam intensity in candela (cd) also needs to be considered. The higher the peak beam intensity per lumen (“throwy” light), then generally the better the flashlight is for illuminating longer tools such as the Light Swords,. A lower peak beam intensity per lumen (“floody” light), then generally the better the flashlight is for more even illumination of tools such as Fiber Optic Brushes and Plexiglass blades. Zoom lights allow for more flexibility, especially for controlled illumination purposes, but are far from essential. Experimentation is the key to see what works the best.

Switch location is also something that needs to be considered so that you can turn a flashlight on or off, or change modes during a light painting scene. Most (but not all) flashlights in this article either have tail switches or accessible side switches.

AA/AAA Battery Flashlights
Lights that use commonly found AA and AAA (alkaline or rechargeable NiMH) batteries are popular with many light painters, and those new to flashlights. However maximum output is less than most li-ion battery based lights. These lights are better in darker ambient light conditions. Recommended zoom lights include the Ledlenser P7-2017 (450 lm) and MT6 (600lm), Coast G32 (355lm), G50 (355lm), HP5R (185lm), Polysteel 200 (320lm), Polysteel 400 (375lm), and TX9R (300lm). Recommended non-zoom lights include the Coast G26 (120lm), Energizer Vision HD 2AA (400lm) and 3AAA (250lm), and Zanflare F2 (200lm). The Nitecore SRT3 (180lm) is discontinued but still available in a few places. Plenty of cheap AA or AAA flashlights available from hardware stores will also fit, but won’t be particularly bright.

Li-ion Battery Flashlights – approx. 1000 lumens
Lithium ion based flashlights (usually using rechargeable 18650 batteries, but increasingly 20700/21700/26500) allow for much higher brightness, but also result in more heat. They all have lower output modes for situations when less output is more desirable, such as moonlit nights. Li-ion battery flashlights are usually much better value for money than AA or AAA based lights, but usage requires knowledge of the risks of using li-ion batteries. Bright non-zoom li-ion lights that are in the 1000 lumens range (+/-250lm) include the Convoy S2+, S3, M1, and M2, Thorfire TK15S, VG10S, and VG15S, Sofirn SP31 and SF36, Atactical/Wowtac A1S*, Thrunite TC12v2*, Eagtac P25LC2, Soonfire DS31*, Klarus XT11S*, Nitecore P10GT, P12GT, MT22C, SRT5, Nextorch TA30, Folomov 18650S*, Zanflare F1*, Olight M1X and M2T, TLF/BLF FW1A. These will usually run close to maximum brightness for at least a couple of minutes before automatic or manual brightness step-down, allowing for use in longer light painting scenes. Zoom lights that can reach 1000 lumens include the Ledlenser P7R* and MT10*, Walther Pro SL66r*, Wowtac A3S*, and Klarus FX10*.

Li-ion Battery Flashlights – 1500 to 2000 lumens
These are great in high ambient brightness situations, but can step-down in brightness after around 30 seconds due to the large amount of heat produced. These lights may (briefly) provide up to a 1 stop photographic exposure advantage compared to previously mentioned 18650 flashlights. Recommended flashlights in the 1500-2000 lumens range include the Klarus XT2CR*, XT11GT*, 360X1*, Olight M2R*, Convoy S11 and S21A.

Flashlights with mode memory
Mode memory allows a flashlight to be turned on in the previously used mode. This avoids having to fumble through modes during a light painting scene. Flashlights with reliable mode memory include the Thorfire TK15S, VG10S, and VG15S, Sofirn SP31 and SF36, Atactical A1S*, Thrunite TC12v2*, Nitecore P10GT, MT22C, SRT5, and Folomov 18650S*.

Flashlights with momentary switches
Momentary switches (also known as “forward clicky”, “tactical”, or “temporary” switches) allow for more control over on and off, with a half press of the switch. These are very useful for light drawing or light writing. Lights with momentary on high mode only include the Ledlenser P7.2 and P7-2017, Olight M2R* and M2T, Klarus XT2CR*, XT11GT*, 360X1*, and FX10*.

Lights with momentary on all memorised (non-flashing) modes, allows for momentary functionality to be used in a range of different ambient lighting conditions, making the lights much more useful. Flashlights with this functionality include the Thorfire TK15S and TK18, Sofirn SP31, Atactical/Wowtac A1S*, Soonfire DS31*, Thrunite TC12v2*, Fenix PD35TAC, plus the Nitecore P10GT, P12GT, MT22C and SRT5.

For lights that additionally have momentary for single frequency strobe, keep reading…

Light Painting by Stephen Knight

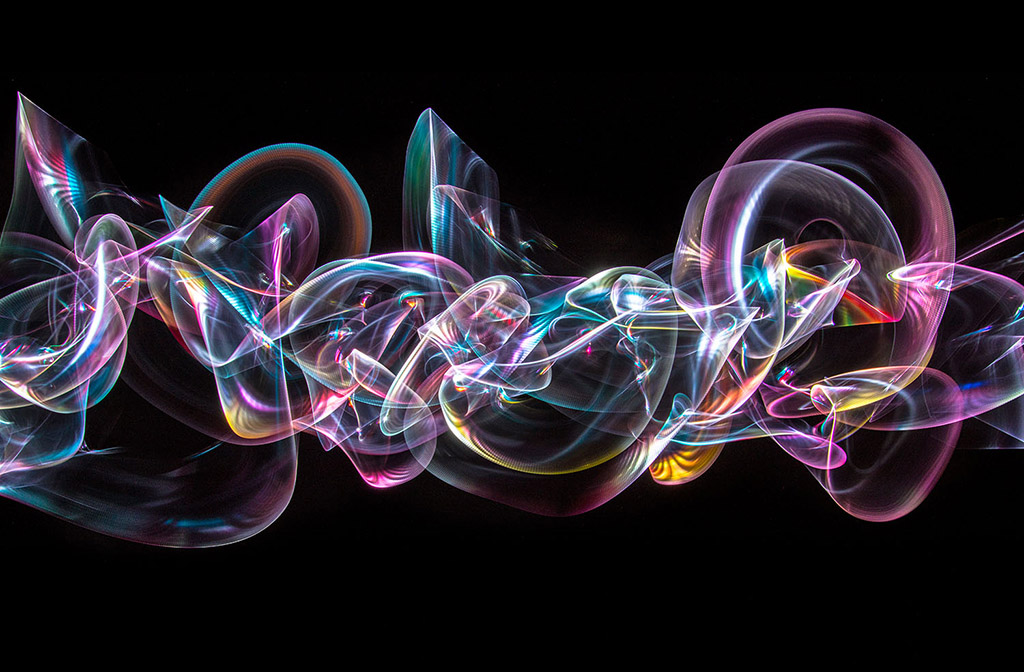
Using momentary switches for creating bubble effects.

Flashlights with Strobes
Flashing modes can add to the creativity in light painting scenes. Lights with single frequency strobes are generally preferred by light painters. Options include the Convoy S2+ (10Hz with older 3/5 mode user interface), Convoy T2 (7.5Hz), Thrunite TC12v2* (12.5Hz), Atactical/Wowtac A1S* (12.5Hz), Zanflare F1* (10Hz), Ledlenser M7RX* (20Hz), plus Walther Pro PL50, PL55r*, PL60, and SL66r* (20Hz).

A few flashlights have a bike flash mode that can create interesting pulse effects. Examples are the Convoy S2+ Desert Tan (with newer Biscotti user interface), Thorfire TK15S and TK18, and the TLF/BLF FW1A.

The combination of single frequency strobes and momentary functionality allows for fantastic creative control. Flashlights with both include the Olight M1X, M2R* (9Hz), Nitecore P10GT (10Hz with 33% on time), Nitecore MT22C (19.5Hz with 33% on time), Nitecore SRT5 (22Hz with 25% on time), Nextorch TA15 and TA30 (10Hz). The Light Excursion Deluxe RGB has momentary control for strobes in multiple colours (up to 6Hz with 25% on time). The Nitecore P10GT and MT22C can also be controlled by remote pressure switches for more creative freedom. The TLF/BLF FW1A has variable strobe frequency, choice of different strobe modes, and new models include momentary functionality, but is only suitable for advanced li-ion flashlight users.

Light Painting by Stephen Knight

Flashlights with momentary function on any mode and strobe are useful for light drawing.

Flashlights with Rotary or Ramping Controls
Rotary or ramping controls allow for fine adjustment of brightness. These flashlights also have momentary functionality too! Options include the Thorfire TK18 (ramping), Nitecore P26, MT22C (rotary dial), SRT3, and SRT5 (rotary head). However you need to be careful with the P26 and MT22C that the dial does not turn when pushing the light into the connector.

RGB / Colour Changing Flashlights
Many light painting tools are available with, or can be used with high quality colour gels or filters, reducing the need for flashlights with coloured LEDs. However, colour changing flashlights can add to creativity. Lights with colour changing (but not colour mixing) options include the popular Ledlenser P7QC (RGBW), Ledlenser T2QC (RGBW), and Coast TX100 (RW-Cyan). The Light Excursion Sport RGB(W) has momentary controls for individual RGB(W) channels, which can be combined for some colour mixing. Lights with single colour LEDs include Jaxman E2L Color (R,G,B,Y) and Maglite XL50 Spectrum Series (R,G,B).

Light Painting by Stephen Knight

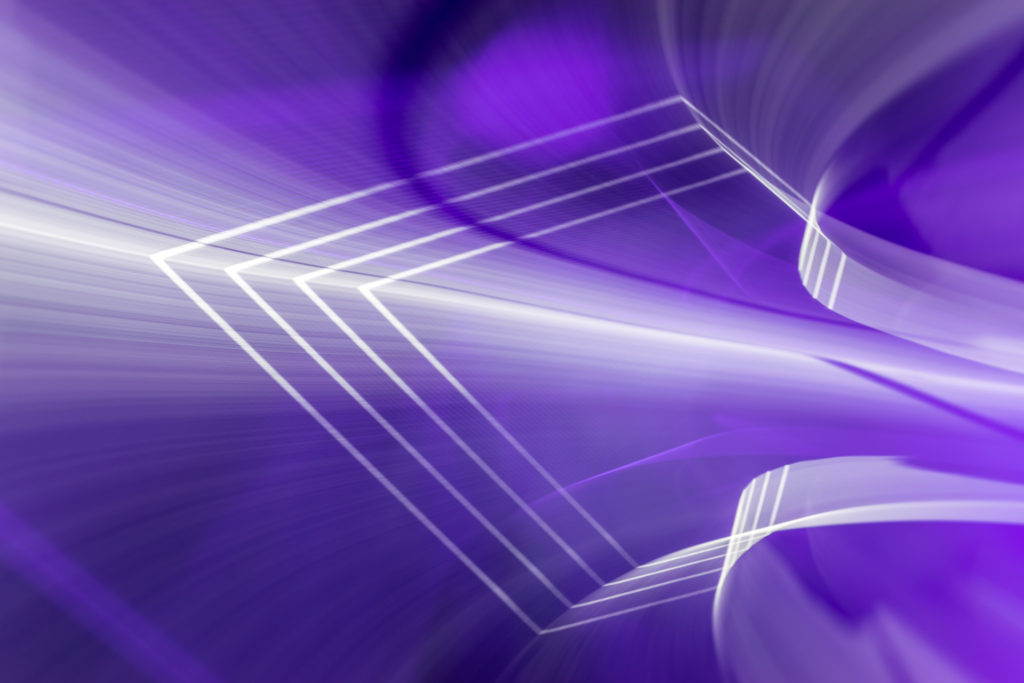
Light tunnel created with a Concentrate C5 and Ledlenser P7QC.

Colour mixing flashlights allow for a range of colours, and various colour effect modes. The lumen (lm) ratings below have been tested using RGB all on 100% output, but buyers need to be aware that many manufacturers exaggerate the lumen ratings. The Light Excursion Deluxe RGB light (100lm) is proving very popular with light painters, as it is brighter than most other RGB colour mixing lights, has lots of effects modes, plus rotary dimmer and momentary switch. The Ignis Shop Color RGB Torch* (150lm) is a bit brighter, has the same effects modes, is rechargeable, and has a more simplistic user interface. The Concentrate by Threeworlds C5 (30lm, requires padding to fit in the Universal Connector) is not very bright, has a tricky user interface, but allows for easily programmable effect modes. The Color Shine flashlight (30lm) is cheap, dim, and unreliable. It is also re-badged by quite a few different companies. Other options that I haven’t tested, but worth considering include the Neon Saber T1000, the flashlight module from the Fiberflies Pixelwhip, or the flashlight module from the GloFX Space Whip Remix. Antsonamelon are also launching their new RGB Critter flashlight on Kickstarter in October 2019.

RGB Flashlights

Selection of RGB flashlights – L to R – Ledlenser P7QC, Concentrate C5 (with padding), Color Shine Flashlight, Light Excursion Deluxe RGB, Ignis Shop Color RGB Torch.

Neutral and Warm White Flashlights
Most flashlights are available in cool white tint (approx. 6500k CCT), which can be quite harsh. If you want a more “daylight like” beam, which is much better for illumination purposes, or warmer light trails, then look for flashlights with neutral white tint options (4000-5500k CCT). Examples are the Thorfire VG10S and TK15S, Sofirn SP31 (V1), Olight M2R*, Thrunite TC12v2*, Energizer Vision HD lights, Zanflare F1* and F2, Jaxman E2, E2L and M2 (which include high CRI options), plus the Convoy S2+, M1, M2, T2, and zoomable BD4* (choose xx-3x or xx-4x / 4000-5000k options).

Flashlights with warm white (3000k CCT) LEDs are much more rare, but are available in most lights made by Convoy (choose xx-7A / 3000k option), Sofirn SF36W, and the zoomable Maglite XL50 Spectrum Series warm white model.

Flashlights

Selection of bright flashlights – L to R – Nitecore P10GT, Klarus XT2CR, 3 Convoy S2+ (in cool, neutral, and warm white), 2 Thorfire TK15S.

Conclusion
There is a large number of flashlights that will fit the Light Painting Brushes Universal Connector, at all price points. Hopefully this guide will assist those looking to purchase one or more flashlights that will meet their light painting needs.

Filed Under: Light Painting Photography

Light Painting Photography Contest Winner, July 2019

July 7, 2019 by Jason D. Page

The winner for the transportation themed Light Painting Photography Contest for July 2019 is… Jordi Radok for the above image titled Ghost Rider! Here is what Jordi had to say about the winning image!

“It’s been almost a year since we had this photo in a list of photos to do with light painting. We had not been given the opportunity, or so we thought. When we saw the theme of the Light Painting Photography contest I immediately thought about this photo, but time passed, and in the last week before the deadline we started asking friends if they knew someone with a motorcycle that we could use. In the end we got to create the photo in a custom motorcycle workshop! We shot it during their work time so we had to work as fast as possible, because they were working! We took a model mechanic and we did some tests, until we found a picture that seemed correct. The surprise was when we put it on the computer screen, the “model” had not been staying still, so the photo was horrible. Only half a skull and dark shadows were seen around the body, we had to discard the photo, and there were only two days left until the deadline…”

“The next day I remembered that my brother had a couple of old bikes to repair in a small garage. We got down to work… We cleared a little space, put aside all the tools and took one of the bikes, lined the most visible parts with black vinyl because it was originally white, we put a small skull over the fairing and prepared the tripod and camera with an angular optic and a low-angle plane. Almost without looking for it we realized that with a roof very low the roof lines gave us a very interesting perspective, and we started playing. We tried the photo the day before we had internalized the process, Eva put on the Ghost rider kit – mask, leather jacket and chains and rode on top of the bike.”


“The first thing that I did was to illuminate Eva and the bike with a warm Minimaglite lantern. Once illuminated I started with the fire effect, which is made with a black fiber optic and a Thorfire tk15s flashlight at full power with an orange gel.”

“I focused more on the front wheel and above the head, then I did a little light against the ground with the same flashlight at half power. Finally we used a bit of smoke to create atmosphere and made a very soft contra light directly from Ghost rider, which was like a statue !! This image we repeated 6 times, but when we put the last photo on the big screen we looked at each other and a huge smile came out to us both, we had just got the photo that we had imagined.”

Gear Used:
Sony a7S
Samyang 14mm

Settings:
Bulb mode
301″ Second Exposure
ISO 125
F 6.3

You can see more of our work here:
https://www.instagram.com/2pixelsart/
https://www.facebook.com/2pixelsart/

For this winning Jordi will receive a prize package filled with light painting tools from our sponsors COAST Flashlights, and Light Painting Brushes ! Please support these awesome companies that support our light painting art from, without them this contest series would not be possible!

If you would like to enter the next Light Painting Photography contest click here for all the details.
Light-Painting-Brushes-Banner

Filed Under: Light Painting Contest, Light Painting Contest Winner, Light Painting Photography

Lilly Light Painting Tutorial by Chanette Manso

March 6, 2019 by Jason D. Page

Light Painting Lilies by Chanette Manso

In this light painting video tutorial Chanette Manso shows us how she uses the 3 Foot Sparkle Fiber Optic From Light Painting Brushes to create Lilies made of Light! Check out the tutorial video and images below  Chanette has created using this light painting technique. You can make these lilies anywhere even on the rooftops of New York City! You can see more of Chanette’s work on her Instagram Here and if you want to learn more about light painting in NYC make sure to check out Light Painting New York HERE.

Light Painting Lilies by Chanette Manso

Light Painting Lilies by Chanette Manso

Filed Under: Light Painting Photography, Light Painting Video

Universal Connector Compatible Flashlights Guide – 2018

February 11, 2018 by Jason D. Page

Light Painting Brushes Compatible Lights

Selection of flashlights compatible with LPB Universal Connector. Illuminated with LPB Black Fiber Optics.

Many of you might know of the Light Painting Brushes tools for light painting. Well one of the most common questions I get is “what lights do you recommend that fit the Universal Connector”. I am personally biased because I mostly use Coast lights so I wanted to get an unbiased review. I couldn’t think of anyone better than Light Painter Stephen Knight!  Stephen is a flashlight guru with extensive knowledge of all sorts of different lights so I reached out to him and asked if he would share his knowledge!  He came back with this amazing and detailed 2018 Universal Connector Flashlight Guide! Thank you very much Stephen, Jason Rinehart, Riley Bangs and everyone else that helped put this guide together, Enjoy…

The Light Painting Brushes (LPB) Universal Connector is a great invention that allows for the connection of a wide range of flashlights (torches) to many different light painting tools. A question often asked is which flashlights are the best for use with the Universal Connector? The Universal Connector allows for flashlights with a circular shaped head diameter of between .975”/24.7mm to 1.5”/38.1mm. I’ve personally has success with connecting flashlights of down to 24.1mm head diameter. Things that need to be considered when purchasing flashlights are the required brightness, tools used, user interface, whether you want to use colours, and whether you require PWM or strobe effects. Opinions discussed in this article are based on either testing by myself, other flashlight enthusiasts and light painters, based from product information, and discussions with manufacturers. It should be noted that manufacturers do sometimes change the specifications of flashlights, and that new flashlights are released onto the market very frequently. Thanks to those who’ve assisted with providing information for this article.

Flashlight Brightness

Brighter is generally better (within reason), though even the dimmest of flashlights can still be used for light painting. However, be aware that the lower the light’s total brightness (lumens/lm) and peak beam intensity (candela/cd) will require use of a wider aperture and/or higher ISO during photography. This can impact on image sharpness or noise respectively. If you are using multiple light painting tools you will need to manage the brightness of each tools so that they match. Thankfully, most flashlights have multiple output modes (e.g. high, mid, and low) to allow this. If you are photographing in high ambient light conditions, such as around street lighting, then you will require relatively bright flashlights. Another thing to bear in mind is that the claimed brightness by manufacturers is recorded at 30 seconds, and most flashlights step-down the brightness rapidly to avoid overheating or running the batteries flat quickly.

Lights that use commonly found AA and AAA (alkaline or rechargeable NiMH) batteries are popular with many light painters, and those new to flashlights. AA/AAA zoom lights that will fit the Universal Connector include the Ledlenser P7-2017 (450 lm) and MT6 (600lm), Coast G32 (355lm), G50 (355lm), HP5R (185lm), Polysteel 200 (320lm), Polysteel 400 (375lm), and TX9R (300lm). AA/AAA non-zoom lights that fit the Universal Connector include the Coast G26 (120lm), Energizer Vision HD 2AA (400lm) and 3AAA (250lm), Zanflare F2 (200lm), and Jaxman M2 (350lm). If you are on an extreme budget, there is a wide range of cheap aspheric lens zoom lights available online (usually with highly exaggerated lumens ratings and low quality LEDs) such as the $8 Meco XM-L T6 1600LM flashlight, but these will typically only be between 80 and 230 lumens. Many cheap flashlights that will fit the Universal Connector can also be obtained from hardware stores, supermarkets, and grocery stores for less than $10, but they are usually not very bright.

Lithium ion based flashlights (usually using rechargeable 18650 batteries) allow for much higher brightness, but also result in heat! They are generally much better value for money than AA or AAA based lights, but require knowledge of the risks of using li-ion batteries. Bright non-zoom 18650 lights that are in the 1000 lumens range (+/-200lm) that can be used with the Universal Connector include the Convoy S2+, Thorfire TK15S, VG10S, and VG15S, Sofirn SP31 and SF36, Atactical/Wowtac A1S, Thrunite TC12v2, Eagtac P25LC2, Klarus XT11S, Nitecore P10GT, Nextorch TA30, and Olight M2T. These will all run close to maximum brightness for at least a couple of minutes before automatic or manual brightness step-down, allowing for use in longer light painting scenes. Zoom lights that can reach 1000 lumens include the Ledlenser P7R and MT10 (note that the step-down occurs after 30 seconds), Walther Pro SL66r, and the impressive budget Wowtac A3S. There may be a few more bright zoom lights introduced during 2018 from quality flashlight manufacturers.

Lights that fit the Universal Connector in the 1500-2000 lumens range include the Klarus XT2CR, Klarus XT11GT, and Olight M2R. These are great in high ambient brightness situations, but can step-down in brightness from around 30 seconds due to the large amount of heat produced (the Klarus XT11GT will step-down more gradually due to having a larger head). These lights may provide up to a 1 stop photographic exposure advantage compared to previously mentioned 18650 flashlights. They can also burn holes in cellophane or lower quality colour gels very quickly. I would not recommend any current flashlights over 2000 lumens (such as the Emisar D4) for use with the Universal Connector due to the excessive heat produced by the LEDs, and step-downs occurring within seconds.

Beam Profile

Flashlights have different beam profiles, and thus some are better illuminating some tools than others. A whole article could be written on this subject alone! Flashlights vary between floody beams (wide angle and less intense hotspot) to throwy beams (narrower beam angle and more intense hotspot). Zoom lights will allow for both, and whilst being very popular with light painters, they are far from being mandatory for use with light painting tools.

Zoom lights may illuminate tools more optimally at different parts of the zoom range depending on the optical design – for example the Ledlenser P7.2 illuminates LPB Plexiglass tools and Light Swords more evenly in the middle of the zoom range. For non-zoom lights, longer, narrower tools such as the LPB Light Sword are generally illuminated better by more throwy flashlights. The same goes for tools with a narrow diameter for light input such as LPB Light Pens and Light Whip. Plexiglass tools and fibre optics are generally better illuminated by a more floody beam profile that allows for a more distributed illumination of the edges or fibres respectively. However, experimenting with different beam profiles may produce interesting results.

User Interface

User interface is critical to some light painting scenes. There are three locations of switches in flashlights, the side, tail, and remote pressure switches.

Side switches are somewhat hit and miss for use with the Universal Connector. Depending on the switch design, location, and diameter of the flashlight, they may be inaccessible or difficult to press whilst in the Universal Connector. Thus caution needs to be taken when purchasing side switch lights, especially if using the side switch function is required during the photographic exposure. However, don’t completely rule out side switch lights, and many of the lights listed in this article use side switches for either on/off or mode change functionality.

Light Painting Brushes Universal Connector and Remote Pressure Switch

Using a remote pressure switch on the outside of the LPB Universal Connector.

Tail switches are more easily accessible, and allow for the light to be turned on and off, or modes to be changed during the exposure. As you should be holding the Universal Connector with one hand, you may need to use your other hand to press the switch. Some flashlights such as the Klarus XT series have dual tail switches for more functionality. Even better, especially for use with Plexiglass tools, is a remote pressure switch. This switch is connected via a cord, and can be fixed to the outside side of the Universal Connector by tape. These are great for on the fly changes, such as changing from high to strobe, and back again. Advanced multi-function remote pressure switches include the Nitecore RSW2 for use with some P series lights, and Klarus TRS1 for use with some XT series lights.

There are two other useful features that some flashlights have for light painting – mode memory, and momentary switches. Mode memory allows the light to turned on in a memorised mode (usually the last used mode). This is essential if you need to turn the light on in the required mode during the photographic exposure. Lights that have reliable mode memory include the Thorfire TK15S, VG10S, and VG15S, Sofirn SP31 and SF36, Atactical A1S, Thrunite TC12v2, and Nitecore P10GT.

Momentary switches (also known as “forward clicky” or “tactical” switches) allow for more control over on and off, with a half press of the switch. These are very useful for light drawing or light writing. Lights with momentary on high include the Ledlenser P7.2 and P7-2017, Olight M2R and M2T, Klarus XT2CR and XT11GT. Lights with momentary on all memorised (non-flashing) modes include the Thorfire TK15S, Sofirn SP31, Atactical/Wowtac A1S, Thrunite TC12v2, Fenix PD35TAC, and Nitecore P10GT.

Colours and Colour Temperatures

Many LPB tools are available with integrated high quality colour gels, reducing the need for flashlights with coloured LEDs. However, colour changing flashlights can add to creativity. The popular Ledlenser P7QC has red, green, blue, and white LEDs. It is possible to turn the light on in any preselected colour, and also easy to change between colours. The smaller Ledlenser T2QC is a slightly cheaper option, but you have cycle through the colours from off to get to the chosen option. The Coast TX100 has white, red, and blue LEDs. The TX100’s blue is more towards the lighter end of the blue spectrum which is preferred by some over the (lens flare inducing) “forensic blue” in some other lights. For very bright coloured light, the Jaxman E2L Color is available in individual red, green, blue and yellow, but an O-ring may be required around head of the light to fit the Universal Connector’s minimum dimensions. The pricey but zoomable Maglite XL50 Spectrum Series light is available in individual red, green, and blue options. For those with P60 compatible flashlight hosts, it is possible to buy coloured P60 drop-ins. If you want a flashlight that can fade between lots of colours, then the Colorshine Flashlight is a popular choice. Be aware that this light is cheap, unreliable, has terrible PWM (see next section), and is only 30 lumens. If you are lucky and get a sample that works correctly, then excellent results can be obtained in very dark locations by using wide apertures and/or high ISO.

Most flashlights are available in cool white tint (approx. 6500k CCT), which can be quite harsh, and often has hints of green, blue, or purple. If you want a more “daylight like” beam, then look for flashlights with neutral white tint options (4000-5700k CCT). Examples are the Thorfire VG10S and TK15S, Sofirn SP31, Olight M2R, Thrunite TC12v2, Energizer Vision HD lights, Zanflare F1 and F2, Jaxman M2, plus the Convoy S2+, M1, M2, and zoomable BD4 (choose xx-3x or xx-4x emitter options). Flashlights with warm white (3000k CCT) LEDs are much more rare, but are available in most lights made by Convoy (choose xx-7A tint emitter), Sofirn SF36W, and the zoomable Maglite XL50 Spectrum Series warm white model.

PWM and Strobe

Light Painting Brushes Orb on 20Hz Strobe

20Hz strobe used for creating an Orb with a LPB 22” Light Sword.

Light Painting Brushes Diamond Plexiglass Bike Flash

Bike flash effect using LPB Plexiglass Diamond.

Light Painting Brushes Plexiglass

PWM effect (cyan light trail) using LPB Plexiglass Diamond and custom light blade.

Flashing modes can add to the creativity in light painting scenes. This can be achieved via strobes, bike flashes, or Pulse Width Modulation (PWM). In the last few years there has been a trend for strobes that alternate between two frequencies. This can be creative, particularly for use with Plexiglass tools, but is undesirable for most light painting where a single frequency strobe is preferred. Lights with single frequency strobes include the Convoy S2+ (10Hz with older 3/5 mode user interface), Thorfire VG15S (10Hz), Thrunite TC12v2 (12.5Hz), Atactical/Wowtac A1S (12.5Hz), Zanflare F1 (10Hz), Ledlenser M7RX (20Hz), plus Walther Pro PL50, PL55r, PL60, and SL66r (20Hz). If the strobe is instantly accessible via momentary functionality, this can be very useful for creative light drawing. The following lights allow for momentary access to single frequency strobe – Olight M2R (9Hz), Nitecore P10GT (10Hz with 33% on time), and Nextorch TA15 and TA30 (10Hz). The Nextorch myTorch range allows for programming of the strobe frequency, though the programming software appears to be limited to MS Windows.

Some flashlights have a bike flash mode that can create interesting pulse effects. Examples are the Convoy S2+ Desert Tan (with newer Biscotti user interface), Sofirn SP31, Thorfire TK15S and TK18.

PWM is found in some flashlights and used to dim the output by pulsing the light on and off very quickly. It is usually found in lower output modes. The pulsing is fast enough that you can’t usually see it if the light is stationary, but it can be seen as a stuttering effect in the light trails during light painting. Examples of lights with PWM in lower modes include Ledlenser lights with “smart light technology” and the Klarus XT11GT. PWM is also found in many cheaper flashlights, but as these are rarely reviewed on flashlight forums it is difficult to recommend specific models. PWM is undesirable to non-light painting flashlight users, and the number of quality flashlights available with PWM is in decline – don’t throw out old lights with PWM!

Conclusion

There is a wide range of lights suitable for the LPB Universal Connector, at all price points. In fact this article only mentions a fraction of the hundreds of flashlights that will fit the Universal Connector. There is no “do everything” light, and thus I would recommend building up a collection of lights to meet as many of your requirements as possible.

Filed Under: Light Painting Photography

Light Painting Photography Contest Winner, January 2018

January 8, 2018 by Jason D. Page

And the winner for the Fiber Optic Light Painting Contest is Kim Von Coels for the awesome image above!

Kim said” I created this image with the help of my friend Domenic and the lovely Maddy in an experimental session in my spare room.

Ever since seeing Tim Gambles images where he used a transluscent chair matt as a diffuser I have been searching for something interesting I could use to shoot through, eventually finding a roll of textured anti slip plastic in the attic that I had bought years ago to make home made tubes with. I taped the plastic to a rigid frame and asked my model to stand behind it, very close with only her hands lightly touching the plastic. I then breifly lit her face with a torch from above before using a red laser pen to colour her from the sides and then a home made black fibre optic tool fashioned from a kids lamp and a blue gel to surround her with the smokey effect, brushing around her body and onto the plastic with the ends.”

The settings for the winning image were: f8, ISO 200, and a 49 Second Exposure

The Gear Used: Nikon D610, basic tripod and a Nikon nikkor 24-85mm zoom lens 1:2.

You can check out more of Kim’s amazing light painting work on her Instagram page here and Her Website here!

For this winning image Kim will receive a pize package filled with illuminating tools from our sponsors below. For your chance to win click here to see the next Light Painting Contest Theme and how to enter. 

The light painting photography contest series is sponsored by the best damn companies on earth COAST Flashlights, Neon Flexible, LED Flexible,and Light Painting Brushes ! Please support these awesome companies that support our light painting art from, without them this contest series would not be possible!
Light-Painting-Brushes-Banner

Filed Under: Light Painting Contest, Light Painting Contest Winner, Light Painting Photography

Light Painting Contest Entries, December 2017

December 23, 2017 by Jason D. Page

Here are the entries for the December 2017 Light Painting Photography Fiber Optic Contest! Everyone PLEASE VOTE in the comment section of this page to pick your top 3 favorite images, the images all have a number in the title (EXAMPLE… IF ONE OF YOUR FAVORITES IS THE IMAGE TITLED “Light Painting Contest December 2017 01″ THEN YOU SHOULD PUT THE NUMBER 1 AS ONE OF YOUR CHOICES). Voters please vote just ONE time and you must include 3 unique choices for your votes to be counted. In other words no 1,1,1, or 5,5,5, or 7,7,7,…..Please pick your three favorite IMAGES based on the image alone, thank you and enjoy. Voting ends December 30th at Midnight Eastern Standard Time.


The light painting photography contest series is sponsored by the best damn companies on earth COAST Flashlights, Neon Flexible, LED Flexible,and Light Painting Brushes ! Please support these awesome companies that support our light painting art from, without them this contest series would not be possible!
Light-Painting-Brushes-Banner

Filed Under: Light Painting Contest, Light Painting Photography

Light Painting Tutorial by Chris Bauer

December 5, 2017 by Jason D. Page

Here is a great new light painting tutorial by Chris Bauer showing how he creates supernatural and otherworldly looking light painting portraits with Light Painting Brushes fiber optics!

Filed Under: Light Painting Photography, Light Painting Video

Light Painting Interval Exposure

May 9, 2017 by Jason D. Page

Innovation is in the fabric of the Light Painting Photography Art Form and community. For many of us so is inventing and/or modifying our own tools and gadgets to create a specific effect that we are looking for. Dennis Berka is one artist that loves to create his own gadgets for light painting. Recently, while exploring new ways to capture fire in long exposures, Dennis came up with something entirely new that he calls Interval Exposure! This technique brings to mind the early Photoflash work of Gjon Mili, but instead of using a flash Dennis achieves his effect using a pretty cool invention! Enjoy.

Interval Exposure by Dennis Berka

Inspiration
At first I wanted to create a better way to capture fire in long exposures. The problem with fire in long exposures is that it usually gets burned out on the sensor. Fire has a lot of dark and bright details but they move around all the time. So I was looking for a way to prevent the bright details from burning out the dark details.

In the back of my head I had an article about the effect a rolling shutter created on fast movements and I thought this could be a good solution. But you would have to open and close the lens very fast, so putting someone next to the camera with a piece of cardboard was out of the question.

I designed a few discs with holes in them so once you let them rotate in front of the lens this would interrupt the exposure in intervals.


After the first experiments I soon realized that the wanted effect on fire could be achieved but the whole concept had the potential to do amazing things with any light source because it gives the light source an effect as if it had a strobe.

It is fascinating that no one tried this so far, seeing how simple and easy it is, but I guess you can say this for many things in life.

Structure
I took a geared 12V motor (around 720 RPM) with a PWM controller to adjust the speed and put this in a printed box. The box was easily mounted on a tripod and the axis of the motor left blank to be able to put different discs on it.

The great question is “how can someone design such a tool”. I have the advantage of using a 3D printer for my tool designs, so I was able to design and print this pretty easy. The files to print out this tool can be found on Thingiverse.

If you don’t have a 3D printer at your disposal you can use black acrylic to cut out the discs (or any other material that can be cut in stable discs of this size) just make sure the discs are balanced or they create a lot of wobble if spun fast.

As a connector to the motor axis you can use spacers for linear shafts used in mechanics. They are rings with small screws that can be attached to a shaft like the one on the motor. Simply glue one of these rings to the disc in the exact center.

There are probably a lot of other ways to do this and I am curious to see what designs others will produce!

3D view of the case design.

After a few experiments I realized that a few different disc designs were very useful for different effects.

If you create a disc that has evenly distributed open and closed segments you half the exposure which gives any light source a strobe look. The speed and amount of open and closed segments controls how strong this effect is. You can see this effect most commonly in strobed flashlights or those dimmed with PWM. But you can apply this effect to any light source! No matter if it is fire, sparklers, a lamp or car trails.
Keep in mind that the amount of openings only influences the speed of the interval-effect. If you have a large variance in motor speed you just need one disc of this type.

Disc with evenly distributed open and closed segments.

If you use a disc that is mostly closed and only has small slits in it you get an effect that can be compared to shooting movement with a strobe flash. Because of the fast and short exposures any light source or lit object will appear relatively static on the photo. But keep in mind that even with small slits you will get a certain amount of movement blur depending on the speed of movement. Any light source (torches, sparklers, etc.) appears as if they are switched on and of real fast.

The amount of open segments in this type of disc influences the frequency of exposures. If you use wider segments you get more movement blur, if you use narrower segments you get sharper photo parts.

Keep in mind that you have to create the open segments with an edge along a line from the center of the disc to its circumference. This is because the further you go from the center the faster a point on a disc rotates. So if the open segments are wider at the outside the image gets exposed correctly everywhere. If the segment was the same width along its length the outer side of the photo would get less exposure then the inner side.

Usage tips

The most important thing to keep in mind is that the exposure is interrupted. This means that you increase your exposure time depending on how many open segments your disc has. If your disc has an even distribution of open and closed segments the exposure is halved. So if you would need 5 seconds for a scene to be lit correctly you will need 10 with the disc. With discs that have small slits this effect is even stronger. I use a disc that has two 10° slits, so only 20° of the whole 360° are open. This means that only 1/18 of the disc is open, which means the exposure time is multiplied by 18. One second exposure would then take 18 seconds.

You can combine this with normal techniques. So you could light a scene normally then cover the lens and put the disc in front of the lens and let it rotate, then remove the cover to create intervalled light streaks.

Also keep in mind that there will be a small gap between the lens and the disc, so any light that hits the disc from behind can be reflected into the lens and create flares and strange lights in your photo.

At the top right you can see some strange light that were created by reflections of colored light behind the camera.

Examples

Car trails

EL wire, the normal blink frequency of most EL controllers is usually much slower.

Black fiber optics and a fast turning disc. The tips of the fiber optics create an awesome light rain effect

The “trunk” was created with EL wire and the “crown” with a blade

A pair of dance instructors helped me test out this technique shooting human movements.

A test with steel wool on Lightpainting meeting from Lightpaitning Helpdesk in Berlin.

Conclusion

Even though this technique is really simple it has a lot of potential. I have tried out a couple of different lightpainting elements with it already and found out that it is worth to try it out on any old technique you know. It can create quite amazing effects even with techniques you know for years.

I have a lot more experiments planned for this, so stay tunes for even more examples and results.

I hope a few other light painters will adapt this technique and build their own interval exposure tools. Looking forward to see your amazing photos and results using this technique!

If you have questions you can reach Dennis on his Facebook page Ryu’s Lightworks.

Filed Under: Light Painting Photography

Light Painting Facebook Learning Groups

April 19, 2017 by Jason D. Page

Recently there have been some great new groups created on Facebook specific to particular styles of Light Painting and I thought it would be good to share some of them here. These groups are great places to find inspiration, tips, and most importantly a community of like minded individuals that are happy to help you create your light painting visions. Enjoy.


Ericparelearn.com
The first is one founded by Eric Pare this group is all about light painting with the fluorescent tube guards that Eric has made famous.

Light Painting Brushes Tricks and Tips
This group is run by the Light Painting Brushes Brand Ambassadors and is a awesome group all about creating using the Light Painting Brushes tools.

LightBlading
Founded by light panting pioneer Patrick Rochon this light painting group is specific to the art of using plexiglass light painting tools also known as blades.

Fiber Optic Light Painting
Founded by fiber optic light painting pioneer Maria Saggese this group is all about the incredible effects that can be achieved with fiber optic light painting tools.

Light Paint Lab
Founded by creative madman Dan Chick this group is great for awesome ideas and being inspired by Dan’s cutting edge techniques!

Camera Rotation and Kinetic Photography 
This group is all about creating light paintings by moving your camera! Image above by CRT pioneer Chris Thompson.


Jan Leonardo/Learn
Founded by LAPP co-creator Jan Leonardo this group is for learning and sharing Light Art Performance Photography.

The Official Pixelstick Group
All about using the Pixel stick to create your digital light painting magic.

If you have a Facebook account I highly recommend checking out these groups.


Filed Under: Light Painting Photography

Time Slice Light Painting by Mitch Martinez

September 11, 2015 by Jason D. Page

This is so freaking cool! Light Painting Photographer Mitch Martinez has a tendency to “think of the most complicated and unrealistic thing that he can imagine – and then try to do it” When Mitch first decided to build his Time Slice Matrix style 48 camera rig he didn’t have a specific project in mind or even a plan of how to make it all work he just wanted to push his own creative and artist boundaries. After almost a year of development and problem solving he was finally able to get everything dialed in and start creating some incredible imagery. Check out some of this awesome 360° Light Painting work and the full interview below!


LPP ∇ Hi Mitch awesome work on this project! Can you tell me a little more about yourself and your photography background?

MM ∇ By trade, I’m a cinematographer and director of photography for film and video shoots. I’ve been in the arts in some form since 1993 – starting with music and graphic design then finally finding my way to the camera in 2003. Creating imagery is truly my passion and I film and photograph all the time whether I’m “working” or enjoying a day off. There’s nothing else that I’d rather do.
jenny_got

LPP ∇ How did you get into light painting?

MM ∇ My light painting experiences directly correlate with the time slice camera array. Since the majority of my work deals with motion imagery, cinematographers don’t have the opportunity to really do any long exposure imagery without it being a still photo, time lapse work, motion control, or stop motion animation. In 2013, I decided to put together the time slice rig and started dreaming up all of the visuals that simply couldn’t be done any other way. The three-dimensionality of the time slice rig opened a whole new world of possibilities of imagery that could be captured and created. Light painting was a very exciting aspect of visuals; to create long exposure visuals and integrate motion to see how everything looked from all angles in a 360 degree camera motion would be a wonderful merger of both worlds (still imagery and motion imagery) that is pretty much unattainable any other way.
christine_one

LPP ∇ Is the Time Slice Light Painting for something specific or is it more of an example to show the capabilities of the camera array?

MM ∇ The time slice rig was kind of like a Field of Dreams “if you build it, they will come” type of thing. I was at a point in my career where I really want to push to do something new and exciting unlike anything I had ever done before (and as much as possible, unlike anything I had ever seen). The light painting video we created with the rig was multi-purposed; in addition to showing people the possibilities of visuals that could be created with the system, I wanted to create some great art, explore new techniques and try things out that I’ve never done. It’s also amazingly fun and cool; every time I work with the rig, I’m smiling and laughing with everyone that’s in the session. I really enjoy it.
robert_fire

LPP ∇ Its incredibly cool, can you tell me more about the technical side of things. Exactly how many cameras, how much space does the entire set up take, how on earth do you get them all lined up. What are some of the challenges?

MM ∇ For the light painting set up with the time slice rig, I currently use 48 DSLR cameras on the 360 degree rig. There are a total of 154 cables which handle all camera triggering, power, setting control, and data retrieval. I have several trusses for the system but the most common light painting support is approximately 15′ diameter.

Camera registration was a huge hurdle to jump – especially since there’s no published methods that I could find on how to get 48 cameras to line up. As a result, there was a lot of trial and error testing sessions in our one team member’s basement. I now owe him an eternal life debt for letting us test and develop there over the course of many months. We couldn’t leave the rig set up permanently for testing so we had to set up and break down the rig each time we did a test session.

Set up time varies a little bit but usually ranges between four and six hours. Over time, I’ve developed the preference of having a full set-up day to do prep shots with lighting, camera registration, and any troubleshooting that might be needed. Although the system is solid, there are a lot of variables in play that I like to do full testing for to make sure everything is good to go before any filming. This is largely due to our first studio experiences while the system was still in beta testing and not really stable; lesson learned: “plan to have something go wrong the day before the shoot so you have enough time to fix it before the shoot actually happens”.
alyssa_pattern

LPP ∇ Can you tell me a little more about the lighting? What tools did you use, what was your favorite.

MM ∇ For the light painting, we’ve used almost everything that creates light: flashlights with and without various modifiers; kids toys from dollar stores; self-crafted plexiglass attachments (very much like those sold by Light Painting Brushes or Patrick Rochon’s LiteBlades); el wire; LED hoops/staffs/poi from FlowToys and SpinFX; very small flashlights, small LEDs from ebay; fiber optic tools; and larger, battery powered LED tools from a local hardware store. It’s hard to choose a favorite because like any tool, it’s really the right tool for the job at the time – evaluated by the positioning of the model, wardrobe, hair, etc. Each tool does something wonderful.

After we filmed the 360 light painting time slice shoot, I picked up a Pixel Stick from Bitbanger Labs and have been having fun with that. Programmable LED tools can do some pretty wild patterns. We’re still testing the way we feel is best to integrate the Pixel Stick with our time slice shots but will share examples in the near future.
jessica_flare

LPP ∇ Were the models also lit by hand or with strobes?

MM ∇ I love a lot of the beautiful imagery that I’ve seen lit by hand but in our video, all of the models were lit with strobes. Due to the amount of time required by some of the light painting shots, I didn’t really like some of the ghosting effects that I got when I was testing the lit by hand technique. “Lit by hand” is also a lot more complicated when filming in 360 degrees – so we went with strobes to get a nice, sharp image of the models.
kate_wings

LPP ∇ What was something unexpected that you learned from this project?

MM ∇ I learned a lot from filming the time slice light painting video and continue to learn new things each time we work with the rig. The whole project has been a unique experience every step of the way. One of the biggest learning experiences was figuring out how to do light painting trails that wrap around and through the limbs of the model without majorly blocking any of the 48 cameras; you can’t just stand in front of the subject if the light won’t reach the camera behind you – so it’s a lot of crouching and reaching and shuffling along the floor to make sure the light can be seen from 48 cameras in the 360 degree array.
tammy_jean

LPP ∇ What is your dream light painting time slice set up or scene?

MM ∇ I always have a tendency to think of the most complicated and unrealistic thing that I can imagine – and then try to do it. I currently have an idea that I need to develop test logistically in small-scale before moving it to a full-scale shoot. I can’t get too into detail about it at the moment but it’s something I’ve never seen done in a three dimensional way; And true to form, it is probably overly ambitious and wildly impractical – and I’m very excited to make it happen. 🙂
flow_one

LPP ∇ Any other Light Painters that you would really like to collaborate with in the future?

MM ∇ I’m a big fan of Patrick Scherer, Tim van Vliet, Zolaq, and Tackyshack. There are really so many brilliant light painters out there and I would love to collaborate with many of them. Honestly, I discover new light painters every week that are amazing.
maria

LPP ∇ How do we see more of your work?

MM ∇ The best way to see more from me is through my website www.mitchmartinez.com and instagram @mitchmartinez_dop.

LPP ∇ Thank you for taking the time to answer some questions and for sharing some of your knowledge with us!

MM ∇ Thank you.

P.S. Check out this awesome Inferno 360° Time Slice!

Filed Under: Light Painting Photography, Light Painting Video

« Previous Page
Next Page »

Copyright © 2026 · News Pro Theme on Genesis Framework · WordPress · Log in