Light Painting Photography

For the promotion and progression of Light Painting Art and Artist.

  • Home
  • Blog
  • History
  • Artists
    • Dean Chamberlain
    • Eric Staller
    • Susan Sims-Hillbrand
    • Vicki DaSilva
    • David Lebe
    • Troy Paiva
    • Bruno Mesrine
    • Chanette Manso
    • Patrick Rochon
    • Aurora Crowley
    • LAPP-PRO
    • JanLeonardo
    • Lightmark
    • Arturo Aguiar
    • Pete Eckert
    • Trevor Williams
    • Michael Bosanko
    • Jason D. Page
    • Nocturne
    • Brian Hart
    • Jeremy Jackson
    • Janne Parviainen
    • Jadikan-LP
    • Dana Maltby
    • Lichtfaktor
    • Dennis Calvert
    • TigTab
    • Hannu Huhtamo
  • Tools
    • Light Painting Brushes Starter Kits Introduction
    • Fiber Optics Light Painting Tools for Photography
  • Tutorials
    • Beginner Light Painting Tutorials
    • Light Painting Tutorials by Artists
    • Light Painting Tool Tutorials
    • Kinetic Light Painting Tutorials
    • Light Painting with Fire Tutorials
    • How To Light Paint A Flower
    • Light Painting Photography Tutorial: The Spiked Orb
    • How To Light Paint a Faberge Orb!
    • No More Orb Feet – Light Erases Darkness
    • The Tinfoil Light Painting Technique
    • How To Light Paint A Ghost
    • Electric Orb Light Painting Tutorial
    • Spirographs and Physiograms Tutorial
    • On Camera Light Source
    • Off Camera Light Source
    • Orb Techniques
    • Steel Wool Tutorial
    • Custom White Balance
    • Omnidirectional Light Cap
    • Gel Holder
    • Simple Orb Tool
    • 4 Ways to Add Color to your Plexiglass Light Painting Brushes
    • Driving Shots at Night
    • Wire Wool Spinning
    • El Wire Tutorial
    • Light Stencils
    • Orbs
    • Dome Tutorial
    • Battery Operated Cathode
    • Light Wheel
    • Double Wheel
    • Fire Wall Tutorial
    • Fire Rain Tutorial
    • Smoke
    • How To Light Paint with the Polaroid One Step +
    • How To Focus In The Dark
    • Light Painting Tutorial The Peacock Technique
    • How To Shoot Defocused Fireworks Tutorial
    • Drone Light Painting Tutorial
    • Light Stencil By Trevor Williams
    • Andrew Whyte Dome Tutorial
    • Light Painting Workshop by Patrick Rochon
    • Rob Turney Refractographs
    • SpiroJib by Johnny Griffin
    • Lens Swap Light Painting Tutorial
    • Camera Rotation Light Painting Tutorial
  • Videos
    • Light Painting Documentaries
      • Jason D. Page Documentary
      • Ball of Light
      • Night Photography: Finding Your Way In The Dark
      • Lightpainted Reality
      • SeeMe | In Focus : Pete Eckert
      • Pete Eckert – Dancing on The Edge of Perception
    • Dean Chamberlain
    • Vicki DaSilva
    • Patrick Rochon
    • Lichtfaktor Light Painting Videos
  • Terms
  • Links
  • Connect With Us!
  • About
You are here: Home / Archives for Jason D. Page

Camera Rotation Light Painting Photography, A Comprehensive How To Guide.

March 12, 2016 by Jason D. Page

Camera Rotation is a Light Painting technique that falls into the category of Kinetic Light Painting. Kinetic Light Painting means that the lights in the scene generally stay stationary (although they don’t have to) and the camera itself is moved to create a design within the frame during a long exposure photograph. Camera Rotation is exactly what it sounds like. The camera, while attached to some sort of device, is moved in a 360º motion during a long exposure, This process can create absolutely mind boggling geometric madness from the most mundane of subjects. The history of this technique can be traced back to 1953 and image below from Photographer David Potts.
David Potts Hennessy Neon Signs Piccadilly Circus London

David was widely recognized for his black and white documentary style photography when he began creating his colorful works. David said “Very simple. I wanted to explore what the available colour films would do.” These works slightly predate the elegant colourist compositions of legendary fellow LIFE photographers such as Ernst Haas. In his 1953 image Potts transforms the familiar London landmark into a swirling mandala of colour. “I had a Linhof 5×4 view camera I had bought from Max Dupain with a [film] back that rotated 360 degrees. I simply wanted to see what using the camera’s movements – turning the film around – would do [to Piccadilly Circus] during a long exposure.” (source)

Jump forward 63 years to now and this technique is still pretty rarely used. For this article I interviewed, Juls Boo, Jelle Schuurmans, Chris Thompson, and Johnny Dickerson a few of the Light Painters currently pioneering this lesser known technique to see exactly how they are creating their incredible Camera Rotations. Each of these Light Painting artists shared advice, the gear they use, and even walk us through how they created their favorite images so if you are inspired or gain some knowledge please let them know with a high five, a follow, and/or a thank you.

(NOTE: As with the Lens Swap article the information in the first portion is an abbreviated and combined version of the answers given by the Light Painting Artist listed above. At the bottom of the page you can read the full interview answers from each Light Painter)

INSPIRATION:
First let me give a little background of how each of these Light Painters started creating these types of images. Juls and Jelle both started rotating their images in 2012. Chris began creating his camera rotation light paintings in 2013 and Johnny in 2014. The inspiration to start doing camera rotations for both Jelle and Jules came from necessity. Juls lives in Paris, which is a pretty bright city, the lack of dark areas was forcing him to look at spaces differently to create his light paintings. While walking around the city one night he was struck with inspiration of creating rotated images.
Juls Boo IMG_8665

Jelle’s inspiration was also born from necessity in that he had visualized an image that he wanted to create, but didn’t know how to do it. He was experimenting with double exposures when he got the idea for “Tunnel Frenzy”. To create the shot below he had to find a way to rotate the image around the lens axis to get this effect he wanted, so he began experimenting eventually coming up with a rig that allowed him to realize his vision.
Jelle Schuurmans Tunnel Frenzy

Chris and Johnny both drew their inspiration from the work of Juls and Jelle. Chris says “I saw a rotated image on Flickr by Juls Boo which I found absolutely fascinating and quite literally ground breaking for me.  It resonated with me and my light painting ‘style’ I was using at the time.” Johnny was first inspired by Jelle’s Tunnel Frenzy shot he says “I was first inspired by Jelle Schuurman’s “Tunnel Frenzy” and having no clue how he lined the train tracks up so perfectly. Johnny was also inspired by Chris Thompson’s early work “with the CRT of just random things around town had me wondering how he did it.”

GEAR:
The tools for creating camera rotations for these 4 artist vary greatly. Juls and Jelle are using custom built CRT’s (Camera Rotation Tools) while Chris and Johnny are shooting with more off the shelf solutions. In true Light Painting innovation Juls took a bike from the trash and turned it into a device to rotate his camera.
Juls CRT IMG_0297

Jelle created his CRT (Camera Rotation Tool) from an industrial ball bearing and some strips of aluminum.

Camera Rotation Tool Light Painting Tutorial

If you don’t have the tools, space, time, or knowhow to build yourself one of these rigs thankfully there is a off the shelf solution! Chris and Johnny both use the Beike BK45 Tripod Gimbal that is intended for sports and wildlife photographers using long lenses. By simply turning your camera the tripod gimbal can be used for Camera Rotation.

Johnny Dickerson IMG_3093

GETTING STARTED (What to Shoot):
So lets say you have built yourself a rig or bought yourself a tripod gimbal now what? Well you need to find yourself something to shoot. Some of the favorites subjects of these artist are tunnels, bridges, and other everyday objects such as a corner of a building or angular architecture. One of the main things that all of these artist recommend looking for is something that is illuminated and surrounded by dark space. For instance a bridge, pier, or corner of a building. All of these make for incredible subjects for camera rotation, and believe me once you start rotating your camera you will look at the world through different eyes!

Camera Rotation Light Painting Tutorial

LEVEL IT OUT:
Lets say you have found the perfect subject to shoot the next thing you want to do is get everything level. When you set your tripod up you want to make sure that your legs are locked down tight and all the bubble levels are centered.

FINDING CENTER:
Generally speaking you want the camera to rotate around the center axis point of the camera lens. This can be difficult to get exactly right and is not as simple as centering the camera so don’t get frustrated. It is a mostly trial and error process but once you find the center point of a particular lens you can make some marks on your device and tripod to make it easier to find on your next outing.  Below Johnny shows us exactly how he finds center using his Gimbal:

“Luckily my Canon 60D has a flip out screen which makes it easier to see the screen to find the center of the image. I moved the camera up and down until the lens appears to line up with the knob on the Gimbal.”
Johnny Dickerson IMG_3092After spending an evening in my living room using Live View and aiming the camera at the lights on my internet modem, I found the center of the lens is just to the left of the white line of my level in Live View.
Johnny Dickerson IMG_3095With a silver Sharpie I marked the placement of the Gimbal whenever I choose to take it off, I can place it right where it was previously.
Johnny Dickerson IMG_3097Now when I prepare to shoot I use the Live View to adjust where the center of the frame will be.

This is a great way to make sure you are finding center however also keep in mind what Jelle says “My CRT is not perfectly centered at all, and in a way this is something I thought would be a problem, but I found out that a bit off center CRT can give different cool looking patterns compared to a perfectly centered CRT.

SHOOTING AND EXPOSURE:
Now you are ready to shoot. What you need to do is find the proper exposure for your scene, an important thing to remember is that bright spots that overlap will tend to over expose because you are basically doubling up on the amount of light hitting that part of the film or sensor. If you have lots of overlapping bright spots you might need to stop down to find the right exposure for your rotation as your camera is accumulating light. A proper exposure for a static shot might be too bright for a rotation.

Once you have your tripod level, you have found the center point of your lens, and the proper exposure its finally time to start rotating!

There are a few different techniques to rotation the first is simply open the shutter and start spinning, this will create a trail of lights like the image below.

Jason-D.-Page-Light-Painting-Liquor-Store

I spotted the Liquor Store on a road trip and thought it would make for a cool rotation because it was illuminated, on a corner, and it also was surrounded by dark space. I simply open up the shutter of the camera and started rotating.

GETTING PRECISE ANGLES:
Another technique is all about angles. For this rotation you will need some way to measure precise angles during the rotation. For instance say you want to have a 8 stop rotation that means you are going to stop the rotation every 45º. There are a few ways to do this. If your camera has a built in electronic-level/virtual-horizon like Jelle’s D750 then you can use that. If you don’t have a level built in you can attach a Angle Finder like Johnny’s here:

Johnny Dickerson IMG_3090

Or you can use your cell phone with a digital level app attached via the hot shoe mount like here:
Jason-Page-CRT

Once you have a way to measure your angles you can then stop the rotations exactly where you want making precise movements and geometric pattern in your images. To make images like the examples below you will also need to cover your lens between the rotations. To begin start the exposure with the lens covered at 0º take the cap off and expose for the predetermined amount of time for a proper exposure (say 5 seconds), put the cap back on turn the camera to 45º remove the cap for another 5 seconds replace the cap, rotate and repeat the process for the full 360º rotation. Using the same Liquor store as an example from above these are some different rotations using the lens cap technique stopping on different angles and distances.

Light-Painting-Jason-D.-Page-Liquor-Store

And here are a few more examples of this technique from Johnny, Jelle, Chris, and Juls.

Camera Rotation Light Painting Tutorial

I hope this has given you enough information to get started. Camera rotation is a very rewarding form of Light Painting Photography, the process can create stunning images out of a simple subject. I hope you will give it a try. Some advice from these artist is to be patient, persevere, think outside the box, and just make your life easy and buy a gimbal…

For the next section each of the artist is going to talk about how they created their favorite camera rotations, at the very bottom of the page you can read the full interviews from each artist for even more detailed information.


Chris Thompson Peak-District-CRT-rfs

Chris Thompson
My favorite so far has been during a collaborative shot with another light painter, Tim Gamble, using two tripods.  The main subject in this case, Tim, was focused and composed on Tripod 1 without a CRT, noting focus point, focal length and Tim’s positioning for later.  The camera is then transferred to Tripod 2 with a CRT, this one is then aimed off centre so that the centre of the subject is on the left hand third of the frame when the camera and tripod 2 are located on the right of centre.  This may sound complicated but all we then do is open the shutter on Tripod 2 and rotate the CRT while I spin an LED lit acrylic tube in a drill at the same time for one full 360 degree revolution on the CRT.  The lens cap is then placed on and the camera moved back to Tripod 1, adjusting the previously noted focus, focal length and making sure Tim is on his marker.  I then spin steel wool on a drill behind Tim with more LED lights in the mix.  Hope this hasn’t confused anyone!


Juls Boo IMG_2569

Juls Boo:
I love this picture because in it there are all the ingredients I like in light painting. A pinch of urban exploration, light buddies and an environment favorable to share our passion for the light.

This image was shot during a night in a former paper mill. I was with Alexis Pichot and Stéphane Babatasi, I set up my Gyrocam with an old control array of a huge machine in the center of my frame, slightly on the left. Then I show my buddies where we can stand up and each one of us take part in this image by posing and by illuminating. The center of the frame is a little lower than the feet of the models, so they are no overlay.

When illuminating you need to stay focus on the subject and the remaining part of the picture should not be too bright because of the overlays.

Johnny Dickerson IMG_1925

Johnny Dickerson:

My favorite so far has been a carnival ride called “Fireball”. Being a ring of light, I was hoping by rotating it 6 or 8 times it would resemble an atom. It didn’t disappoint! I aimed the center of the lens near the edge of the ring of light. I exposed it for about 5 or 6 seconds (counting in my head), lens cap, then adjust the Gimbal 45 degrees then repeat, giving me an 8 way rotation. It ended up being about a 3 minute exposure (in the middle of a crowded Fair) but it was well worth it!


Jelle Schuurmans Tunnel Frenzy


Jelle Schuurmans

My own personal favorite is one of my very first ‘real’ CRT shots I did in 2012, this was the first time it worked out just like I had in my mind and planned.

4 way rotation, 5 exposures in total. 4 times lighting up the inside of the tracks with green, and 1 time with light blue light for the silhouette in the back and spill light on the outer sides of the tracks. The orange is from the street lights above this tunnel.

1- I start with lining up the normal horizontal shot. In this case I set the center focus point on the horizon where the two tracks meet. This will be the overall center rotation point of the final image. I use live-view to check the alignment of the setup by rotating the camera while using a flashlight to light up the scene.

2- Now I set the main camera settings, usually ISO 100 and Aperture 8-11. I do some test shots on how long I have to light up the insides of the tracks with a green flashlight, 10 seconds in this case.

3- Open shutter.

4- Use green flashlight, after 10 seconds I put the lens cap back onto the lens. Now I rotate the camera 90 degrees. Remove the lens cap and expose for another 10 seconds using the green flashlight and put lens cap back on the lens. Repeat this 2 more times. In total you rotate the camera 4 times, ending back in the same position as the first shot. So you will have the base starting exposure, plus 3 exposures each 90 degrees rotated. Put lens cap back on the lens after the last 10 second exposure.

4- Position the camera horizontal again (that was the last rotation). Remove the lens cap for a 10 seconds exposure of a person standing on the tracks, back lit with a blue flashlight. Put lens cap back on the lens.

5- Close the shutter.

6- Check the final image.


FULL INTERVIEWS HERE:

LPP ∇ How long have you been doing Camera Rotation Light Paintings?

CT ∇ I started experimenting with the technique around the end of 2013.

JULS ∇ I started in 2012, but with just a rotation angle of 90°, at that time I was using rotation only with my tripod head, associated with some zooming. At the end of the year I did a picture of the Tour Eiffel I liked it very much and I thought about building something that could rotate 360°.  I don’t have any tools and any competence in engineering I was looking for something simple. From time to time I was thinking about it. In 2013 I built my tools, I called it “gyrocam” from Ancient Greek “gyro” https://en.wiktionary.org/wiki/gyro-

JD ∇ Since the beginning of 2014

JS ∇ In October 2012 I build my own custom CRT
LPP ∇ How did you get started, what was the inspiration? Was there an image in your head that you wanted to make or did you just stumble into by some divine fate?

CT ∇ I saw a rotated image on Flickr by Juls Boo which I found absolutely fascinating and quite literally ground breaking for me.  He may not have been the first to make an image like this but it certainly resonated with me and my light painting ‘style’ I was using at the time.

JULS ∇ Since I live in a very bright city I was often disappointed by the few dark places I can found, so I looked for another technique to do light painting. I get my inspiration from experimenting when I walk at night in Paris.

JD ∇ I was first inspired by Jelle Schuurman’s “tunnel frenzy” (https://www.flickr.com/photos/jelle-s/8139659777/in/dateposted/), and having no clue how he lined the train tracks up so perfectly. Then Chris Thompson’s early work with the CRT of just random things around town had me wondering how he did it. And then the mind blowing shots of Tim Gamble can provide inspiration for any light painter! I’m not so mechanically inclined so once I heard someone say the “Gimbal Tripod Head” works very similar I bought one right then and there!

JS ∇ I was experimenting with double/multi exposures and then I got this idea of a possible shot (“Tunnel Frenzy”) a ‘tunnel with railroad tracks, but then with tracks on the sides and ceiling as well’. I knew I had to find a way to rotate the image around the lens axis to get this effect I wanted, so I started building and experimenting, what ended up in my custom built CRT. After a few test shots with it I finally created that shot I had in my mind, “Tunnel Frenzy”, so I was very happy with this result and that inspired me to continue and experiment even more with light painting photography and tools like the CRT.


LPP ∇ What gear are you using? Gimbal, CRT, or something different?

CT ∇ I am currently using a Beike BK45 Gimbal, a device intended for sports and wildlife photographers.  When I first started out on the rotation journey, I developed, with my brother’s help, a camera rotation tool.  We made several versions, some really “Heath Robinson” contraptions looking back but we finalized a design we were happy with.  For me, my CRT is still the best way to rotate an image.

JULS ∇ I use a trash bike found in the street… During year 2013 I improved it but it’s still the pedaling mechanism of an old bicycle. I mount on it a tripod ball head.

JD ∇ I use a Gimbal Tripod Head.

JS ∇ Custom build CRT, from a heavy duty ball bearing and some metal/aluminum strips. Later I’ve added two heavy metal parts to get it stable and for a more smooth rotation effect.


LPP ∇ I find the most difficult part is finding the sweet spot to get an image centered, how do you get your images centered? Are there any tip you can share?

CT ∇ To start off with an evening’s camera rotation, I fix the camera and align by eye and take a test shot or two and adjust accordingly.  A CRT is maybe not a device for someone with OCD!  On my CRT, I have etched a line on the camera support plate meaning that I am more or less calibrated right away.  In the past, I have used a spacer such as a block of wood milled to the right size and place it along the back of the camera’s LCD screen and align from there.

JULS ∇ I give a try and after a look on the camera back screen I adjust.

JD ∇ Luckily my Canon 60D has a flip out screen which makes it easier to see the screen to find the center of the image. I moved the camera up and down until the lens appears to line up with the knob on the Gimbal.  After spending an evening in my living room using Live View and aiming the camera at the lights on my internet modem, I found the center of the lens is just to the left of the white line of my level in Live View. With a silver Sharpie I marked the placement of the Gimbal whenever I choose to take it off, I can place it right where it was previously. Now when I prepare to shoot I use the Live View to adjust where the center of the frame will be.

JS ∇ My CRT is not perfectly centered at all, and in a way this is something I thought would be a problem, but I found out that a bit off center CRT can give different cool looking patterns compared to a perfectly centered CRT. So in my case I takes more time to align and center and set the right position of the CRT, but nothing that a bit of trial and error cant fix. Otherwise I just go for it and see what happens.


LPP ∇ How do you get everything level, are there some tricks or tips that you can share?

CT ∇ I start by making sure the tripod is level on the spirit level bubble and the legs are locked tight, not likely to move etc.  Before I align the CRT I make sure the camera itself is level using the built in level meter.  Not every camera has a built in level gauge so I find it best to use a smartphone.

JULS ∇ I have enough place to use a tripod ball head to adjust my camera on my pedaling mechanism. Coupled with an old Pentacon 135mm (216mm with my APSC) it’s easier to calibrate exactly my tool and to put the rotation center at the frame center. After calibrating it I often use a wide angle lens.

JD ∇ I use an Angle Finder. They are about $8 at your hardware store. It has an magnetic base which is good, but once you start rotating it around you have to readjust it accordingly. There are apps out there for your phone (clinometer on Android), but I can’t mount it to my camera as it would clip the Gimbal on the 180 degree mark. There are digital angle finders out there as well but they are a little more expensive than what I use. Also wide angle lens tend to be the best. I use a 14mm Rokinon which is also good for rotating because I can lens cap between each rotation and not interfere with the focusing.

JS ∇ My D750 has a built-in electronic-level/virtual-horizon what can be really useful for CRT use. On my old D90 I used a spirit-level connected to the hot-shoe. Besides this I do several test shots in all directions to see if everything is level enough


LPP ∇ What do you use to get precise angles? Is it an app on your phone, a actual level or something different?

CT ∇ I fix a smartphone such as an iPhone / iPod / Android device to the top of the hotshoe on the camera with a couple of cheap gadgets available off eBay.  These smartphones usually have an angle gauge which is accurate enough for the job.  Personally I use an old iPod touch rather than my big expensive iPhone 6s Plus!

JULS ∇ I’m not looking at precise angle, I can only stop my tool with 6 different angles… Since long I have in my mind an idea to improve this but I’m still procrastinating.

JD ∇ Same as above but depending how I want to rotate a subject, I have to split the rotations within 360 degrees. For example a rotation of 4 is every 90 degrees, a rotation of 6 is every 60 degrees.

JS ∇My D750 has a built-in electronic-level/virtual-horizon what can be really useful for CRT use. On my old D90 I used a spirit-level connected to the hot-shoe. During exposure I use small markings on my CRT to know where I have to lock the CRT for the different exposures.


LPP ∇ What is your favorite “Thing” to do a camera rotation of?

CT ∇ I usually prefer to go shooting CRT in city environments and try not to go for the “obvious”.    I look for everyday objects such as a corner of a building or angular architecture and rotate it.  I also like to combine zoom pulling with the CRT at various angles, proper kinetic photography in my opinion!

JULS ∇  I did a lot of tour Eiffel and urban landscape but in fact I prefer the way it looks with people. I realized some family portraits.

JD ∇ Obviously! Light Paint with it! (see img_1824)

JS ∇ I am always in search of the next (personal) thing/effect/challenge so I don’t have one favorite thing to CRT, but I guess my own favorite CRT shots are with tunnel/bridges and the depth and leading lines it can create.


LPP ∇ I know since I started doing these a year or so ago I look at things completely different now. Is there something specific you look for when looking for a place or object to shoot for a camera rotation?

CT ∇ I like to shoot in areas where there may be lights surrounded by dark areas in order to create a cleaner CRT image.  I tend to aim for a corner of a building where I can only see a small amount of subject in the viewfinder and keep all the other areas in the frame dark so I don’t “light paint” or overexpose that part of the frame during the rotation process.

JULS ∇ When I’m in town I pay attention to keep a small dark place in my frame to include “traditional“ light painting. It’s easiest when it’s at the center of the frame since the camera will turn around.

JD ∇ I would say there has to be something bright surrounded by a dark space. So that way, when you rotate the frame the light area will overlap on top of the dark area i.e. campfire and city skylines.

JS ∇ For me a CRT is a tool just like any other, it all depends and how you use it, sometimes the most crazy or weird ideas have the best effect so trying to have an open mind and thinking outside the box is key.


LPP ∇ What is your favorite Camera Rotation that you have ever created and can you walk us through step by step how you created this image?

CT ∇ My favorite so far has been during a collaborative shot with another light painter, Tim Gamble, using two tripods.  The main subject in this case, Tim, was focused and composed on Tripod 1 without a CRT, noting focus point, focal length and Tim’s positioning for later.  The camera is then transferred to Tripod 2 with a CRT, this one is then aimed off centre so that the centre of the subject is on the left hand third of the frame when the camera and tripod 2 are located on the right of centre.  This may sound complicated but all we then do is open the shutter on Tripod 2 and rotate the CRT while I spin an LED lit acrylic tube in a drill at the same time for one full 360 degree revolution on the CRT.  The lens cap is then placed on and the camera moved back to Tripod 1, adjusting the previously noted focus, focal length and making sure Tim is on his marker.  I then spin steel wool on a drill behind Tim with more LED lights in the mix.  Hope this hasn’t confused anyone!

JULS ∇ I love this picture because in it there are all the ingredients I like in light painting. A pinch of urban exploration, light buddies and an environment favorable to share our passion for the light.

This image was shot during a night in a former paper mill. I was with Alexis Pichot and Stéphane Babatasi, I set up my Gyrocam with an old control array of a huge machine in the center of my frame, slightly on the left. Then I show my buddies where we can stand up and each one of us take part in this image by posing and by illuminating. The center of the frame is a little lower than the feet of the models, so they are no overlay.

When illuminating you need to stay focus on the subject and the remaining part of the picture should not be too bright because of the overlays.

JD ∇  My favorite so far has been a carnival ride called “Fireball”. Being a ring of light, I was hoping by rotating it 6 or 8 times it would resemble an atom. It didn’t disappoint! I aimed the center of the lens near the edge of the ring of light. I exposed it for about 5 or 6 seconds (counting in my head), lens cap, then adjust the Gimbal 45 degrees then repeat, giving me an 8 way rotation. It ended up being about a 3 minute exposure (in the middle of a crowded Fair) but it was well worth it!

JS ∇ My own personal favorite is one of my very first ‘real’ CRT shots I did in 2012, this was the first time it worked out just like I had in my mind and planned.

https://www.flickr.com/photos/jelle-s/8139659777

4 way rotation, 5 exposures in total. 4 times lighting up the inside of the tracks with green, and 1 time with light blue light for the silhouette in the back and spill light on the outer sides of the tracks. The orange is from the street lights above this tunnel.

1- I start with lining up the normal horizontal shot. In this case I set the center focus point on the horizon where the two tracks meet. This will be the overall center rotation point of the final image. I use live-view to check the alignment of the setup by rotating the camera while using a flashlight to light up the scene.

2- Now I set the main camera settings, usually ISO 100 and Aperture 8-11. I do some test shots on how long I have to light up the insides of the tracks with a green flashlight, 10 seconds in this case.

3- Open shutter.

4- Use green flashlight, after 10 seconds I put the lens cap back onto the lens. Now I rotate the camera 90 degrees. Remove the lens cap and expose for another 10 seconds using the green flashlight and put lens cap back on the lens. Repeat this 2 more times. In total you rotate the camera 4 times, ending back in the same position as the first shot. So you will have the base starting exposure, plus 3 exposures each 90 degrees rotated. Put lens cap back on the lens after the last 10 second exposure.

4- Position the camera horizontal again (that was the last rotation). Remove the lens cap for a 10 seconds exposure of a person standing on the tracks, back lit with a blue flashlight. Put lens cap back on the lens.

5- Close the shutter.

6- Check the final image.

From my more recent CRT work I like this one a lot, it’s a pretty tricky shot to setup/lineup and I had to come up with to me new technique for creating the “double exposed door effect”

https://www.flickr.com/photos/jelle-s/20807079871


LPP ∇ What is the best piece of advice you can give for someone wanting to give the form of Kinetic Light Painting a try?

CT ∇ My current thinking is that both camera and subject should move during the exposure, the effects can be quite radical and unexpected.  That makes it all the more fun for me!

JULS ∇ This is a creative discipline, it changes the way of seeing our environment. It may seem difficult at first but by persevering it quickly gets interesting results. Simply give it a try!

JD ∇ I would say be patient! It can be labor intensive and easily multiply the length your light paintings, but the finished result will be worth it

JS ∇ Invest some money and buy a Gimbal to begin with (just a cheap one will do just fine) and just start experimenting with it, no rules, no right or wrong, just see what you can come up with and try to go from there.

Filed Under: Light Painting Photography

Half Pix Stick, PixelStick Hack by John Griffin

March 9, 2016 by Jason D. Page

Light-Painting-Johnny-Griffin-01

Getting ready for a night of Light Painting takes a little bit of work and it takes some preparation. We have all been there, getting ready for a night out and now we need to decided what tools to bring. The fact is, the easier our Light Painting tools are to use the more likely we are to use them. Take the PixelStick, arguably the most technically advanced light painting device created to date, however this tool takes a tiny bit of work to set up. I know there are a few of you PixelStick owners that have left this light painting tool behind because you didn’t want to have to tighten down those screws and put that “thing” together. Well fear the screw twisting and plugging cables no more because John Griffin, creator of the SpiroJib, has shared a clever “Hack” to make a PixelStick ready to use right out of the bag. Check it out below…

Here are a few shots Johnny created recently while sharing the Light Painting Art Form with his local School.


Filed Under: Light Painting Photography, Light Painting Video

Daytime Light Painting?

March 5, 2016 by Jason D. Page

LEE FILTERS Logo
Adding to their line of High Quality Neutral Density Filters the (Big Stopper and Little Stopper), LEE Filters is introducing the new Super Stopper! The Super Stopper will offer a whopping 15 Stops of ND madness! As an example, say to get a proper exposure during the day you shoot a shutter speed of 1/125 of a second, boom a quick snap shot… NOW in those exact same lighting conditions with the Super Stopper on the front of your lens you would leave the shutter of the camera exposing for 4 freaking minutes. Now you are going to have to use some really, REALLY bright light sources to Light Paint and bust those photons through the 15 stops of diffusion but holy crap does this beast open up some possibilities! I for one am pretty excited. Availability and pricing have not been announced YET, but via DPReview says it will be available “Soon” and price around $175.00. Keep an eye out on the LEE website for details. Check out the chart below and while we wait here is a video about the Little and Big Stoppers to enjoy:
Light Painting Photography Super Stopper Exposure Guide

Filed Under: Light Painting Photography

Eric Paré’s 360º Bullet Time Light Painting Photo Booth at Adobe MAX

March 2, 2016 by Jason D. Page

360max-banner-bts-b-jpg-rc7w

Light Painting Photographer Eric Paré has been absolutely killing it recently, putting out wildly gorgeous images and collaborating with industry giants like Adobe. This week Eric has taken over Adobe’s Instagram page, (yes I know there will be some tears shed but some of Eric’s work is edited, ?) He has also released a BTS video showing his LIVE unedited Light Painting work in the 360 Bullet Time Light Painting Photo Booth that he set up at Adobe MAX last year! With over 1000 participants over the 3 day event Eric shot nearly 4000 sets of images on a 32 camera array exposing many new people to the Light Painting Art Form! Check out the super cool 360º gifs and full video below… Congrats on all your success Eric!


Project created for Adobe in Los Angeles, California during AdobeMAX 2015.

For this event, 32 cameras were used in perfect sync. Each picture is lit by hand in about one second. We met nearly 1000 participants and created over 4000 pictures over the three days of the event, meaning over 128000 images.

Created with the help of Russell Preston Brown, Kim Henry, Jeremy Lloubes, Tony Stranges, Ed McDonough, Johan Silva, Guillermo Castellanos, Matthias Thomas Lamotte and Ange Amargier.

For even more 360 action check EricPare.com/360

Filed Under: Light Painting Photography, Light Painting Video

National Parks At Night

February 29, 2016 by Jason D. Page

National-Parks-At-Night

National Parks at Night is a series of Night Photography workshops starting in May of 2016. While the emphasis of these workshops will be night photography there will also be a portion dedicated to Light Painting. The workshops have the expressed goal of “Ensuring every night photography adventure workshop attendee in our National Parks at Night program has the time of their life and learns more about night photography with personalized teaching”

The instructors include:
Gabriel Biderman, Tim Cooper, Matt Hill, Lance Keimig, and Chris Nicholson.


So far there are 5 workshop locations on the agenda:

ACADIA 2016
ARCHES 2016
CRATER LAKE 2016
DEATH VALLEY 2016
ZION 2016

With plans of 50+ National parks in the works, this is just the beginning! Check out http://www.nationalparksatnight.com for all the info.

Filed Under: Light Painting Photography

Find Your Own Way, Patrick Rochon Light Painting Video Part 2

February 24, 2016 by Jason D. Page

Light Painting Patrick Rochon
Here is the second video from Light Painting Photographer Patrick Rochon for Blend 285. Check out the first part HERE.

The campaign encourages you to find you own personal way in life, to be original and create your own reality.
In collaboration with BLEND 285, Amex Team Advertising, Bob Eye View, Suzy Johnston + Associates / Artist Representation, Patrick the Light Painter and with the great talented model Juliana Casas Villamizar. Supported by the 360 software of Eric Pare Studio and Matthias Thomas Lamotte.

Filed Under: Light Painting Photography, Light Painting Video

Light Painting at Australia’s White Night Festival

February 17, 2016 by Jason D. Page

White-Night-Melbourne
White Night Melbourne 2016 is an overnight festival in Melbourne Australia that takes place from 7pm-7am this Saturday 02/20/2016. The event is described as “a journey of discovery through the heart of Melbourne with music, food, film, art, and light. Bring your family and friends and enjoy an urban adventure at Australia’s only all night celebration of culture and creativity. With so much on offer, including exhibitions, street performances, illuminations, installations, film screenings, music, dance and interactive events, there really is something for everyone.” The exciting part for Light Painters or people simply interested in the Art Form is that Light Painting Photographers Anita G and Andy Phillips are creating “a hub for camera-carrying photographers of all skill levels who want to congregate, share images, learn tricks of the trade, or explore the latest in light painting techniques”. Participants will use their own cameras and Anita and Andy will be provided Pixelsticks, Light Painting Brushes and an array of home made tools to create some magic!

If you are in the Melbourne this should be an awesome event! Andy and Anita will be set up in the Wonderland precinct, next to ArtPlay on Birurung Marr and they will be there for the entirety of the event from 7pm to 7am! Make sure to check it out and Click HERE for all of the details!

Filed Under: Light Painting Photography

Find Your Own Way, Patrick Rochon Light Painting Video

February 17, 2016 by Jason D. Page

Patrick Rochon Light Painting Blend 285

Here is some awesome new work from Light Painting Artist Patrick Rochon. Patrick recently traveled to Thailand to create a promotional video for Blend 285. The campaign encourages you to find you own personal way in life, to be original and create your own reality.
In collaboration with BLEND 285, Amex Team Advertising, Bob Eye View, Suzy Johnston + Associates / Artist Representation, Patrick the Light Painter and with the great talented model Juliana Casas Villamizar. Supported by the 360 software of Eric Pare Studio and Matthias Thomas Lamotte.

Filed Under: Light Painting Photography, Light Painting Video, Patrick Rochon

New Light Painting World Record

February 11, 2016 by Jason D. Page

Light Painting World Record 900 orbs postion 2

Congratulations to Light Painters Satwik Sharma, Ankur Bansal, Sanchit Kapur, Shobhit Tiwari, Jeswin Rebello and Arun Pandit for now holding the official Guinness World Record of 900 Light Painted Orbs in a single exposure as seen in the above image!

First let me give a little back story on the Light Painting Guinness World Record… The quest to get a Light Painting World Record all started back in 2011 with Andrew Wells when he single handily created 100 Orbs in a single image in his Century of Light Orbs Project. Andrew should have had the first ever Light Painting World record in the Guinness Book back in 2011 however he didn’t have all of the documentation that Guinness requires. Andrew might not have made the book because of technicality but he was the first. Then in 2014 a group of Light Painters (myself included) set out to break Andrew’s record and to “officially” get the first Light Painting Guinness World Record in The Big Book! Together the East Coast Light Painters created 200 Orbs in a single image. Now the record has been shattered with 900 Orbs in a single image from a group of 6 Light Painters from India! The Indian Light Painters created 900 orbs in a single exposure using a very smart approach and some good old DIY Light Painting innovation, read on for all the details from group member Dr. Satwik Sharma!

LPP ∇ Congratulation on being the new Guinness World Record holder for the most Light Painted Orb in a Single Photograph! Can you tell me who all were involved in creating the record?

SS ∇ We were a team of 6 guys. Myself (Satwik Sharma), Ankur Bansal, Sanchit Kapur, Shobhit Tiwari, Jeswin Rebello and Arun Pandit
Light Painting World Record Group Shot

LPP ∇ How many orbs did you create in the record breaking image?

SS ∇ In the record breaking image we made 900 orbs. Though we did create a second image that day, and in that we made about 1450 orbs. But sadly, both the cameras recording the video, were interrupted mid-way, so we couldnt submit the footage from it to Guinness.
Light Painting World Record 1500 orbs postion 2
Light Painting World Record 1500 orbs postion 1

LPP ∇ How many attempts did it take?

SS ∇ This was our second attempt. In our first attempt we managed close to 600 orbs (594 to be precise). But me, along with a couple of team mates, were not satisfied with the pictures we got. So thought of making the attempt again. And with a new attempt, the target number of orbs was also increased to a minimum of 900. In our second attempt we did a trial run first, and made 210 orbs in that trial run. Adjusting the exposure we made the final run, and succeeded in making 900 orbs. In the second attempt the number was raised to 1500. Sadly, the batteries started to run out, by the end of the second attempt bringing down the number of orbs to about 1450. So we abandoned the third attempt.

LPP ∇ I know that you had tried to break the record once before in a different way. Can you tell me about that experience?

SS ∇ To be frankly speaking, our first attempt was heavily influenced by the ideas of the East Coast Light Painters World Record. So we tried replicating those tools, and those methods. And thankfully, we had the help of my Alma Mater, Sainik School, Kunjpura. We gave a crash course of light painting and making orbs to about 100 students over there (or as much as we can teach in an hour). After dinner, we had them gathered at the school grounds, and we did our attempt. The most amazing thing about this failed (partially) attempt was the enthusiasm and energy of the students. They seemed to be even more eager to break the record than we were. I still remember what one of them said to me after the attempt “Bro, This was an awesome experience! Why don’t you come back in couple of months with more preparation, and we will make a record of 2000 orbs” It still gives me the goosebumps. That was the level of enthusiasm I saw in the eyes of the students. And it is something, I would love to see again and again. To teach them the joys of waving lights in the dark, and see those lights magically form Art.
Light Painting World Record 1st attempt final pic

LPP ∇ Thats really cool I would say that was a success just for the experience! The idea of making the orbs smaller was a really smart way to go about breaking the record how was the idea of making the miniature light orbs introduced?

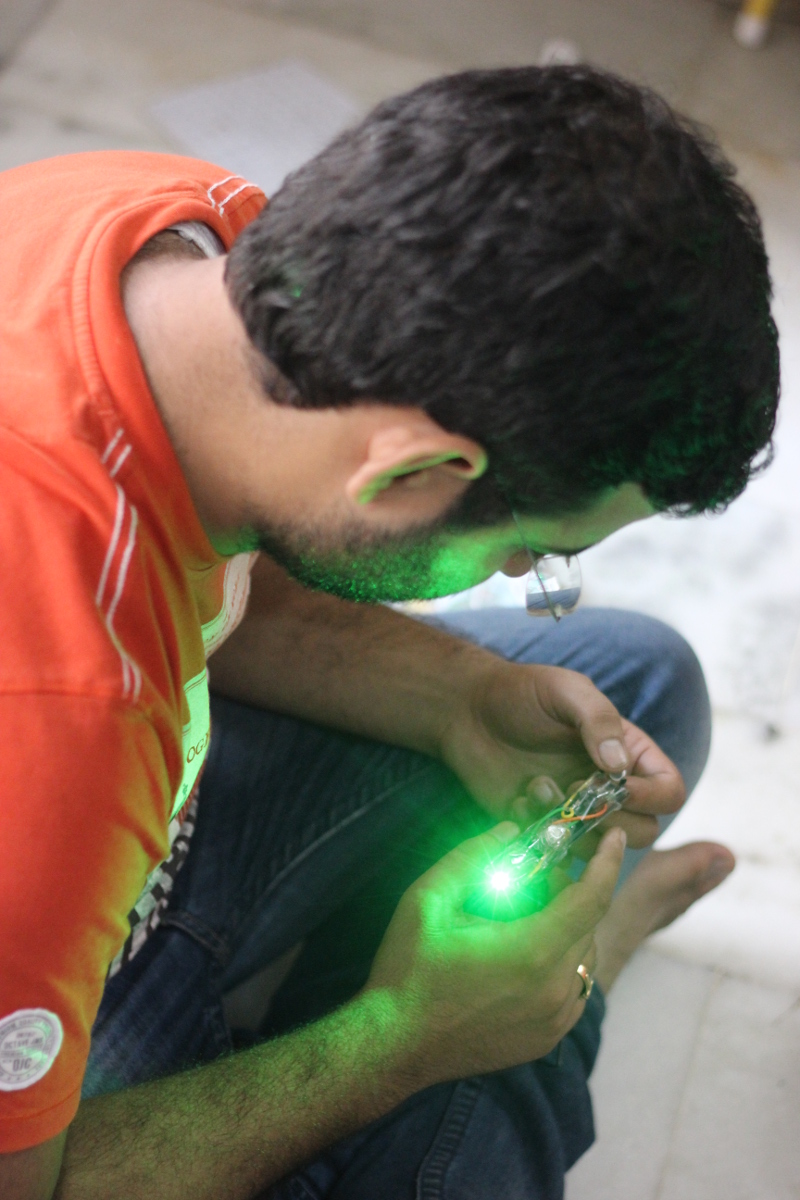
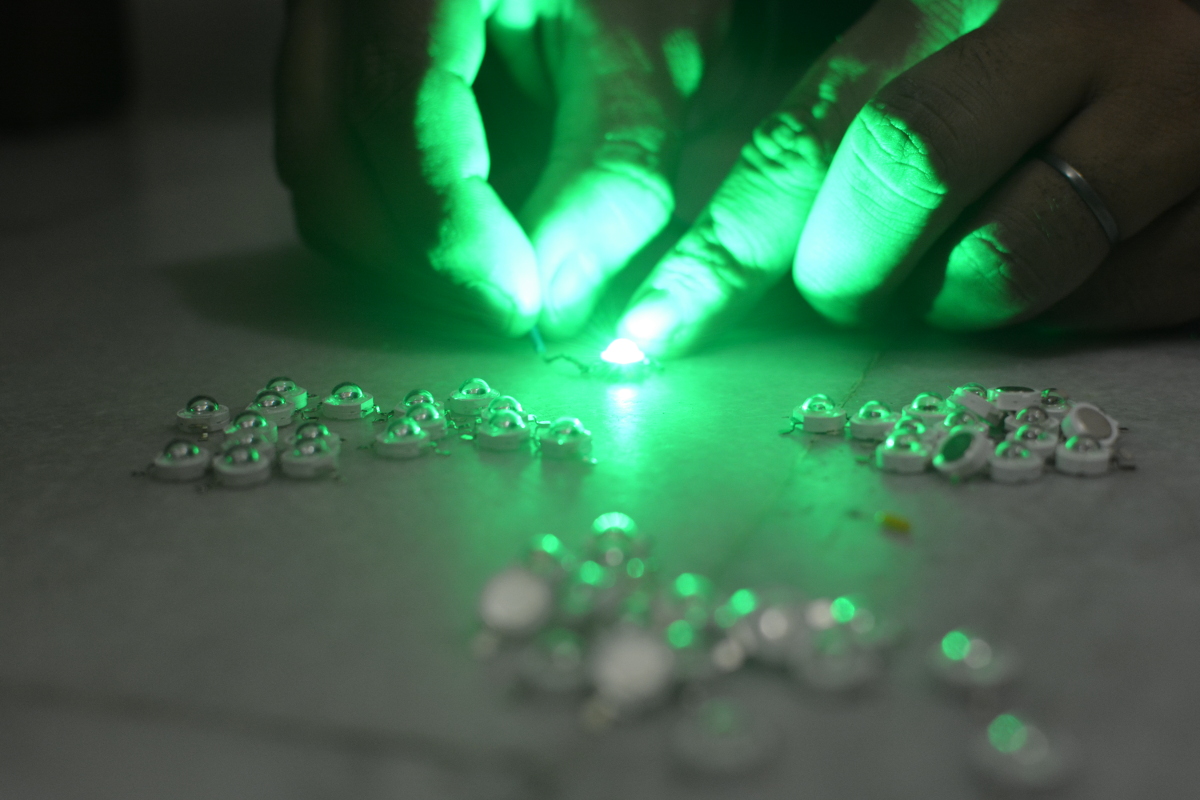
SS ∇ After that attempt, we started analysing the shortcomings. Where did we go wrong, and how can we improve upon them. One thing was sure, the way we had gone about with the first attempt, that way was good for only about 300-400 orbs. Because as the number or orbs start to increase, the orbs at the back start to become less distinguishable from the nearby orbs. As I was adamant on creating a minimum of 500 orbs, we needed an elevated platform of about 150 feet to overlook a big flat surface, to get the proper angle. But, as we could not find any place like that, we moved to the next logical choice. Decrease the size of the orbs. The radical idea of reducing the size of the orbs was proposed by Ankur Bansal, and it was readily accepted by the group. But, as we had never seen a tool which would create miniaturized orbs, let alone create more than 500, it presented a new set of problems. So after brainstorming for a couple of days, we came up with the design of the tool, and started working on it.


LPP ∇ Can you tell me a little more about the tool you guys built, it looks like a piece of DIY Light Painting genius… was it computer controlled, hand controlled, or a bit of both?

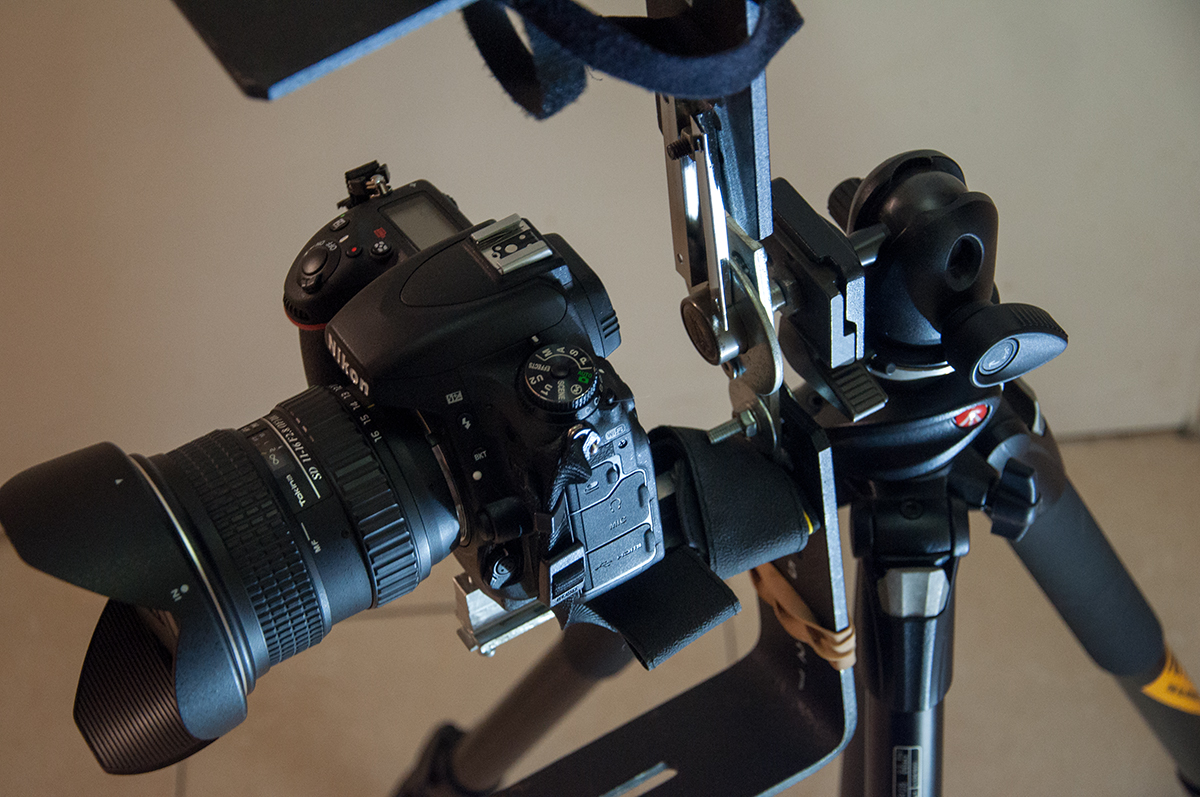
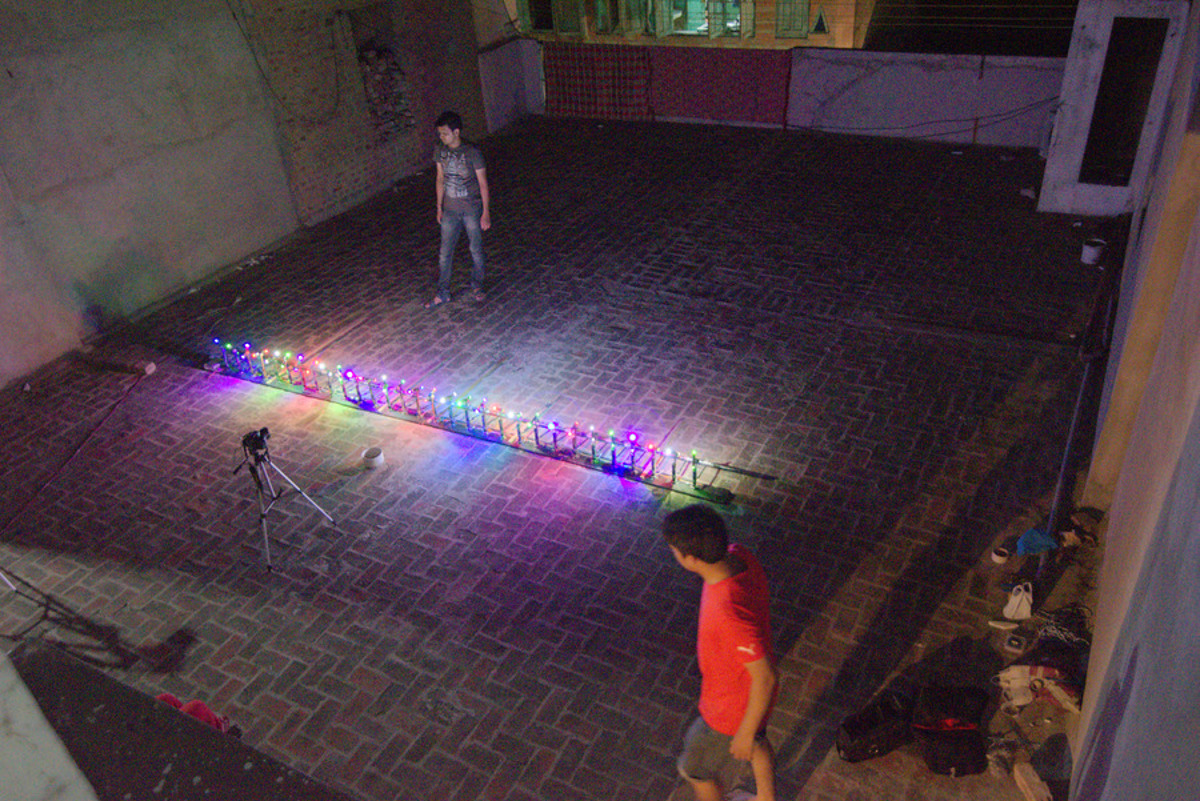
SS ∇ From the outset, we had planned to make the attempts with as much frugal resources as we can. For the two attempts we made, our total expenditure did not cross the $200 mark (excluding the air tickets, ofcourse). With such a shoe-string budget, using a computer controlled tool, was out of question. Also, it was out of the area of our expertise too. Our tool was made of wood, PVC, and simple DC motors. And was controlled manually only.

Light Painting World Record Tool 06

LPP ∇ So who did what in the group, how many people did it take to operate the orb tool and how long did each orb take to make?

SS ∇ Out of the six of us, Me, Shobhit and Jeswin, were handling the cameras. I was on the highest perch, while Jeswin was on the other platform. Shobhit was on the ground, clicking pics and making video for use in the video presentation. Ankur, Sanchit and Arun were involved in manually making the orbs and moving the tool in unison. The tool made 30 orbs at a time, in about 30 secs. It also needed to be moved to the next marked location, after making a row of orbs. We made a total of 30 rows of light orbs.

Light Painting World Record Tool 03

LPP ∇ What was the most difficult part of the process?

SS ∇ The most difficult part of the process was the complete lack of knowledge on how to go about it. We would create one tool, build it up from scratch, test it, and after finding one fault or the other, junk it. Also wiring up the whole tool was a mess. DC motors we got our hands on were not standardised. One would run faster than the other, the other would be slower. It was a complete nightmare. And above all, we had no mechanism whatsoever to control the speed. So it was just a game of mix and match, trying all sorts of combinations to get the motors running at optimal speeds. On top of that we made the mistake of using aluminium core wires. Aluminium having higher resistance than copper, would make the matters even worse. The current and voltages just seemed to vary at every single point.

LPP ∇ I know you needed to have a high angle to capture all the orbs how was the location selected?

SS ∇ By the time we started looking for a location for our second attempt, we had decided on miniaturizing the orbs. So we just needed a flat surface with some kind of platform with a minimum height of 25 feet. We found a flat ground, with double-storey houses on three sides giving us a height of about 35 feet on one side and about 20 feet on the other. That was sufficient for our attempt, and few test pictures from these vantage points just proved it.

Light Painting World Record Tool 04

LPP ∇ How long was the exposure for the final image?

SS ∇ The exposure of the final image was 830 seconds.

LPP ∇ What was the best part of the experience?

SS ∇ The best part of the experience. Now that is a difficult one. In our first attempt it was definitely the smiles on the faces of the students. In the second it was the bonhomie developed between people from different distant parts of India, who had gathered in a small town in North India, with one goal in mind. 900 ORBS!! (or more)

LPP ∇ Thank you for taking time to answer these questions and Congratulation again! You guys crushed the record! I guess the East Coast Light Painters better get to work 🙂

SS ∇ Thank You.

Filed Under: Light Painting Photography, Light Painting Video

Light Painting Inspirational Artists Compilation Part II

February 10, 2016 by Jason D. Page

Light Painting Screen Shot of Alexandr Gnezdilov

Part II of the of Inspirational Light Painting Artist series featuring Light Artist from all around the world created by Jannis Sid. P.S. I was honored to be included in this 🙂

This is the second part of my compilation of Inspiring Light Painting Artists. Again not a competition of any kind or top something list. There is so many great light painters out there and the fact that their work is not featured here doesnt make them any less great of significant. My purpose for this compilation was to get more people inspired to got out and try more stuff with some of this artworks that have been an inspiration for me.

Huge thanks for all music to George “ Bandoek” Apostolakis. You can check more of his music here:
http://bandoeknoises.tumblr.com
bandoek.bandcamp.com

A little info about the artists:

Alexandr Gnezdilov / Russia

Nuremberg based Alexandr Gnezdilov started lightpainting with a normal, non dslr camera. He is a perfect example that light painting is about creativity and experimenting even with simple tools. Great unusual combinations of colours and shapes are defining his artworks.

http://www.lightpaint.in

Jason D Page / USA

When you search in google about light painting you are for sure gonna land in his site. One of the coolest people in light painting, I believe the first who started creating and selling tools for light painting. His page is full of resources and inspiration and its worth to follow no matter if you are beginner or advanced in light painting. His work is also very inspirational, trying always new techniques and mixing nature elements with light painting.

http://www.jasondpage.com
https://lightpaintingphotography.com

Mart Barras / UK

If i would be giving any titles he could easily get “The master of indoor light painting”. Not that he hasnt produced a huge body of works outdoors too , but his creativity indoors has definitely took light painting for me to a different level. Unique use of toys / objects together with light painting techniques .. Definitely one to follow

https://www.flickr.com/photos/martinbarras

Dan Chick / USA

Dan is a Denver based photographer with many years experience. Experimentalist is a term he describes himself with. Open mind , trying to share his craft and learn more way to express it ,he is the creator of many visually stunning images. He also started a dedicated site about light painting with tutorials and more.

http://www.danchick.com
http://www.hackthelight.com

Chris Searle / UK

Another one of the new era of artists, Chris is one of the people I discovered in flickr. Great geometrical awareness , perspective and highly creative ideas, he is another great example of what experimenting together with creativity can do.

https://www.flickr.com/photos/108404544@N07/

Tim Gamble / UK

Based in Manchester , Tim has the “creative eye” . He started last year one of those 365 days challenges and thats how i discovered him in flickr. Great vision and use of various techniques and ways to achieve always visual satisfaction. He teams up often with other UK based light painters and collaborate in even more complex experiments.

https://www.flickr.com/photos/fadetoblacklp/

Chris Bauer / USA

Another american photographer , Chris has his own style. Light painting addict, he finds joy in creating an imagined image in a single exposure. Thought him i learned the use of manual lenses during one shot and his work has been always inspiring.

http://www.thefloweroflight.com
https://www.instagram.com/chrisbauer_lightpainter/

Sergey Churkin / Russia

A man with a vision. He is the creator of LPWA ( Light Painting World Alliance) a global organisation bringing together light painting artists from all over the world with the goal of making light painting more known to everybody. He has been experimenting himself with different techniques and styles.

http://www.lpwalliance.com/
https://www.flickr.com/photos/chukos/

Chris Thompson / UK

Another brit with a huge body of light painting work. Various use of tools and techniques his stuff are both impressive to watch and inspiring. With the amount of work his is creating I think he must be constantly out lightpainting!

https://www.flickr.com/photos/fastchris/

Horyma / Russia

Horyma is a project created by Igor and Irina, Moscow based artists . Started in 2004 they have created a vast amount of work with light painting. Their mix of theatrical atmospheres, costumes and light is amazing and very dramatic.

http://www.horyma.ru

There were more artists that i wanted to be included in these videos , but for different reasons I couldn’t at this point. You can check some of their great stuff here:

Dana Maltby aka TCB /Usa
http://www.twincitiesbrightest.com/index.php?/tcb-who/

Rewolf Pezi / France
https://www.facebook.com/PeZiPeZa?fref=ts

Julien Breton: / France
http://kaalam.fr

Ivan Lucio Boluda / Spain
http://ridersoflight.com

Filed Under: Light Painting Photography, Light Painting Video

« Previous Page
Next Page »

Copyright © 2026 · News Pro Theme on Genesis Framework · WordPress · Log in