Light Painting Photography

For the promotion and progression of Light Painting Art and Artist.

  • Home
  • Blog
  • History
  • Artists
    • Dean Chamberlain
    • Eric Staller
    • Susan Sims-Hillbrand
    • Vicki DaSilva
    • David Lebe
    • Troy Paiva
    • Bruno Mesrine
    • Chanette Manso
    • Patrick Rochon
    • Aurora Crowley
    • LAPP-PRO
    • JanLeonardo
    • Lightmark
    • Arturo Aguiar
    • Pete Eckert
    • Trevor Williams
    • Michael Bosanko
    • Jason D. Page
    • Nocturne
    • Brian Hart
    • Jeremy Jackson
    • Janne Parviainen
    • Jadikan-LP
    • Dana Maltby
    • Lichtfaktor
    • Dennis Calvert
    • TigTab
    • Hannu Huhtamo
  • Tools
    • Light Painting Brushes Starter Kits Introduction
    • Fiber Optics Light Painting Tools for Photography
  • Tutorials
    • Beginner Light Painting Tutorials
    • Light Painting Tutorials by Artists
    • Light Painting Tool Tutorials
    • Kinetic Light Painting Tutorials
    • Light Painting with Fire Tutorials
    • How To Light Paint A Flower
    • Light Painting Photography Tutorial: The Spiked Orb
    • How To Light Paint a Faberge Orb!
    • No More Orb Feet – Light Erases Darkness
    • The Tinfoil Light Painting Technique
    • How To Light Paint A Ghost
    • Electric Orb Light Painting Tutorial
    • Spirographs and Physiograms Tutorial
    • On Camera Light Source
    • Off Camera Light Source
    • Orb Techniques
    • Steel Wool Tutorial
    • Custom White Balance
    • Omnidirectional Light Cap
    • Gel Holder
    • Simple Orb Tool
    • 4 Ways to Add Color to your Plexiglass Light Painting Brushes
    • Driving Shots at Night
    • Wire Wool Spinning
    • El Wire Tutorial
    • Light Stencils
    • Orbs
    • Dome Tutorial
    • Battery Operated Cathode
    • Light Wheel
    • Double Wheel
    • Fire Wall Tutorial
    • Fire Rain Tutorial
    • Smoke
    • How To Light Paint with the Polaroid One Step +
    • How To Focus In The Dark
    • Light Painting Tutorial The Peacock Technique
    • How To Shoot Defocused Fireworks Tutorial
    • Drone Light Painting Tutorial
    • Light Stencil By Trevor Williams
    • Andrew Whyte Dome Tutorial
    • Light Painting Workshop by Patrick Rochon
    • Rob Turney Refractographs
    • SpiroJib by Johnny Griffin
    • Lens Swap Light Painting Tutorial
    • Camera Rotation Light Painting Tutorial
  • Videos
    • Light Painting Documentaries
      • Jason D. Page Documentary
      • Ball of Light
      • Night Photography: Finding Your Way In The Dark
      • Lightpainted Reality
      • SeeMe | In Focus : Pete Eckert
      • Pete Eckert – Dancing on The Edge of Perception
    • Dean Chamberlain
    • Vicki DaSilva
    • Patrick Rochon
    • Lichtfaktor Light Painting Videos
  • Terms
  • Links
  • Connect With Us!
  • About
You are here: Home / Archives for Light Painting Photography

Welcome Light Painting Artist TigTab

June 11, 2011 by Jason D. Page

I would like to ofically welcome light painting artist TigTab to the LPP Bright Talent Family…Check out her profile HERE.

Filed Under: Light Painting Photography

New Ford Light Painting Videos

June 8, 2011 by Jason D. Page

Well they are not really new unless new means about 5 months old but they are new to me dammit. Hope they are new to you too check it out TVP has produced 4 new FORD light painting spots.

Check out other Ford Light Painting Videos HERE

Filed Under: Light Painting Photography Tagged With: Light Painting Video, Luma2solator, Lumasol, Lumatosolator

Light Painting Workshop with Patrick Rochon and Aurora Crowley

June 4, 2011 by Jason D. Page

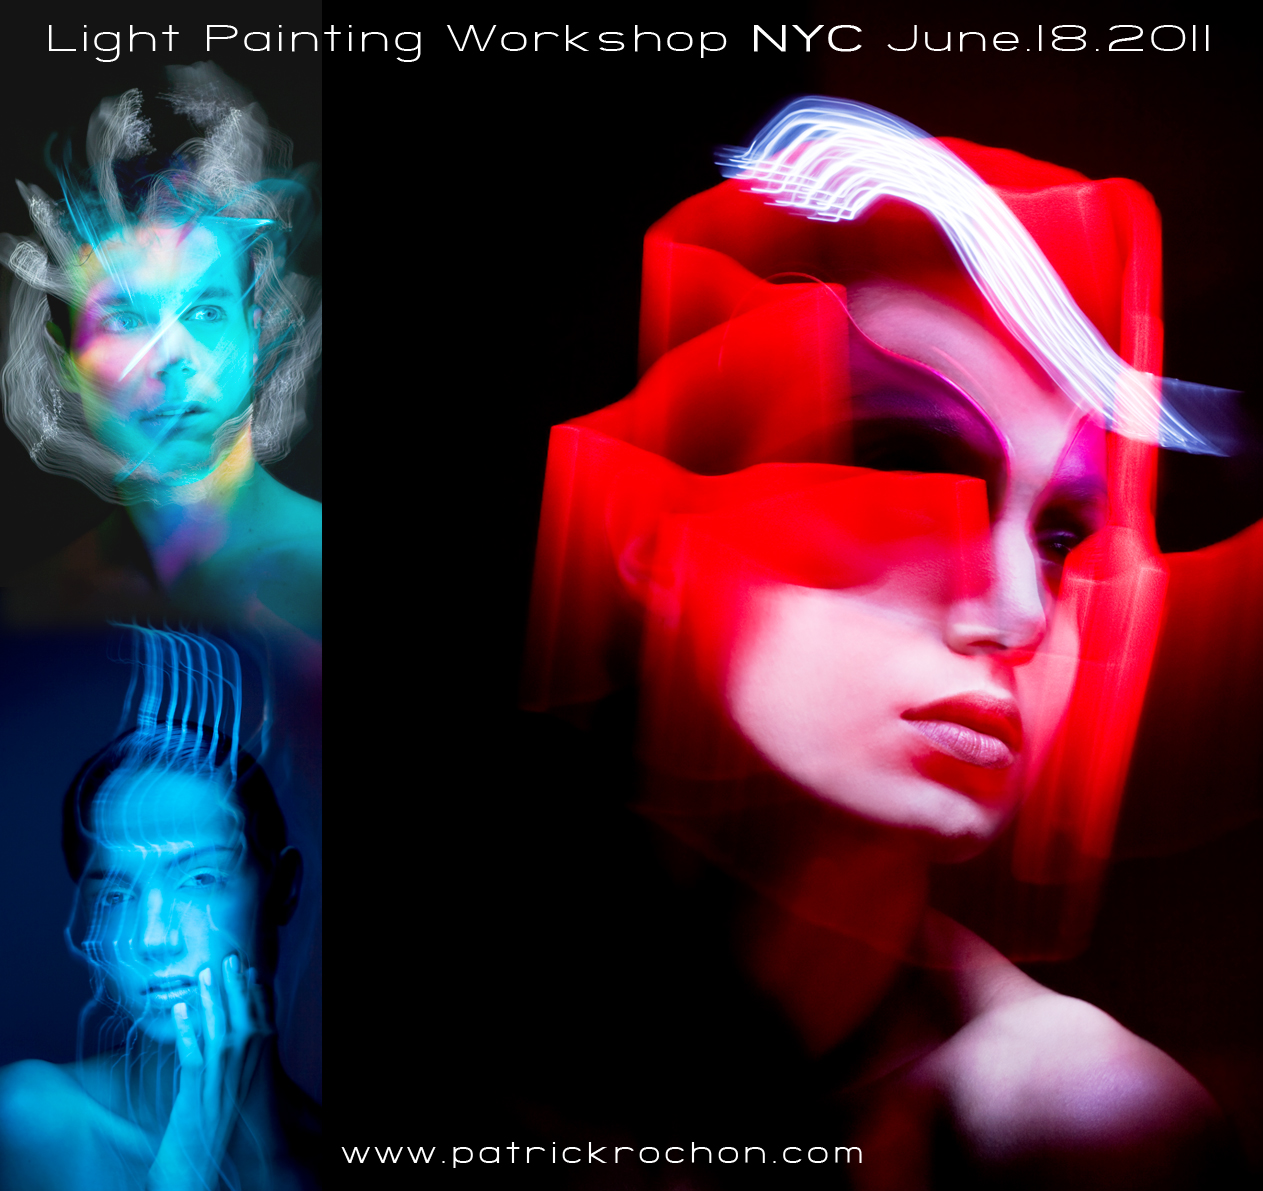
If you are gonna be in New York and you are a budding photographer and/or a super awesome light painter you will NOT want to miss this! Two of the WORLDS BEST light painters, Patrick Rochon and Aurora Crowley, are putting on a light painting workshop. Damn this makes me want to load up the credit card and take a trip….


One full day light painting workshop – Basic portrait and fashion light painting.

Discover the magic by Patrick Rochon, award winning light painter. 19 years of experience.

Limited 12 places only. Every level welcome. Fee: 375$

June 18 2011 from 10 am to 7pm. 8th Ave, btw 38 & 39 street.

With special guest Aurora Crowley, light painting fashion specialist: http://auroracrowley.com/

In collaboration with Lindsay Adler studio.

www.lindsayadlerphotography.com


*Reservation by email: info@patrickrochon.com

*Deposit Paypal necessary: 150$


To Bring:

-SLR camera ready to do long exposure (30 sec minimum). For Bulb setting, remote or cable release is better.

-Tripod.

-Any handheld portable lights you have such as flashlights, flashes, laser pointers.

-We will use reflective paper, plastics and color gels to build tools so if  you have anything like this bring it to the workshop.


Looking forward in creating magic with you. -Patrick

————

Schedule:

History of light painting.

Light Painters from around the world now.

My own examples and my process.

Light painting individual activity. Strokes and backgrounds

–Lunch–

Light painting, group activity. Portrait 2 by 2.

Portraits, the big challenge of light painting. Basic lighting for portrait, tips and tricks.

Building and testing tools.

Live demonstration by Aurora Crowley.

Light painting activity with live professional model.

Projections of today’s photo + Q & A

Feedback – Closure.


Filed Under: Light Painting Photography Tagged With: Aurora Crowley, Patrick Rochon

New Chris Benbow Light Painting Tutorials

May 28, 2011 by Jason D. Page

Chris Benbow has been busting A** producing some really great light painting video tutorials. Check out these two newbies….

P.S. Chris’s wife Laura has been behind the camera filming these for everyone to enjoy and learn from, much like my own lovely wife she helps a lot and deserves some credit as well sooooo thanks Laura….

Click an image to get smart….

Filed Under: Light Painting Photography Tagged With: Chris Benbow, Light Painting Tutorial, Light Painting Video

May Contest Entries

May 24, 2011 by Jason D. Page

Here are the entries for the May contest. Everyone PLEASE VOTE in the comment section of the page to pick your top 3 images, the images all have a number in the title. When voting remember the theme of this months contest was to create a landscape light painting composition! This is gonna be a tough one to judge….


Filed Under: Light Painting Contest, Light Painting Photography Tagged With: light painting con

Light Painting Cars by Andrew Whyte

May 21, 2011 by Jason D. Page

Ever wanted to know how light painting artist Andrew Whyte creates his car images? In this how to that he put together Andrew breaks down some of his shots.  Check out Andrew’s website HERE for more images and information.

How to… lightpainting cars

With a portfolio of car images shot pretty-much entirely at nighttime I get emails and forum PMs pretty much daily looking for tips and techniques about lightpainting cars. It’s reached the point where I can’t answer each one individually but here’s a summary of some of the most common answers I’ve given, all wrapped up into one neat post with pics. 

First off, a bit of background. It’s taken me years to get into PS so one of the reasons I started lightpainting is because you *can* get great results in a single frame straight out the camera. Doesn’t have to be like that if PS floats your boat, just saying. Budget needn’t be an issue either, with many of my photos being lit with ghetto solutions. Worried about light spill? cereal box and black duct tape around your £4 LED camping lantern. Can’t reach high enough? more duct tape, this time holding your light to a broom handle. Whatever it takes.

The other thing is that for me, LP is all about the reflected highlights – those white lines you get defining the car’s form and making it look very studio-lit and contrasty. But there are some occasions where that effect won’t work or can’t work so at these times you need to do something different.

Right, so let’s look at some pics, starting with some older ones using primitive light tools. I’ve picked photos to demonstrate certain tools/ techniques rather than because they’re necessarily great images. On that basis not really looking for C&C on the pics but will try and answer if there’s any questions.

Scirocco – single 5min exposure at f/4.

This was lit with a round LED parasol lamp. You’ve prob seen them for a few quid in ASDA or wherever, about 8″ round and a hole in the middle for the parasol to stick through. You can see a bit of light leakage in places but mostly the light was concealed by a small cardboard box to prevent the light itself appearing in shot. Worth noting the overexposed areas on the bonnet don’t precisely coincide with the highlights – this is your first clue when it comes to understanding where light falls and how to get your highlights where you want them.
—–

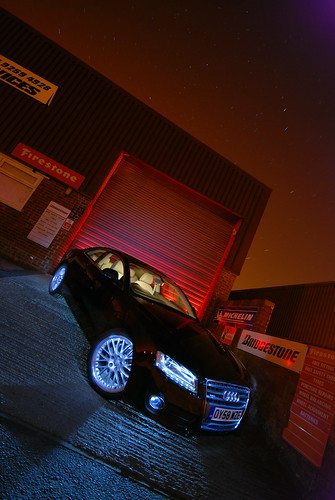
A5 – single exposure (I forget the exif)

Wheels and grille were picked out with a small torch. Garage door was lit with flash and a red gel. I used several bursts of flash at low power to try and light the car- notice, it did nothing, there’s no detail at all in the side panels. Meanwhile…
—–

A5 – single exposure

…more details in the side of the car here though still not perfect, and a narrow rather than broad pinstripe – this was lit with a large 3w LED Maglite with the reflector taken off. Just walked from one side to the other, between the car and camera. To some extent the higher you hold your light, the higher up the car the reflection appears (see the Seat pic further down).
—–

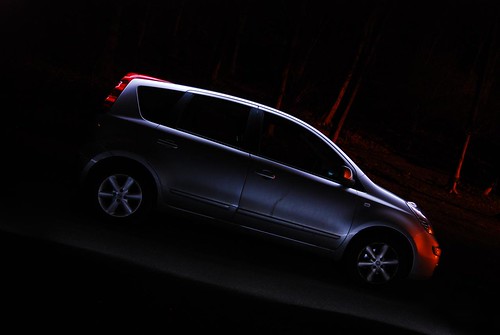
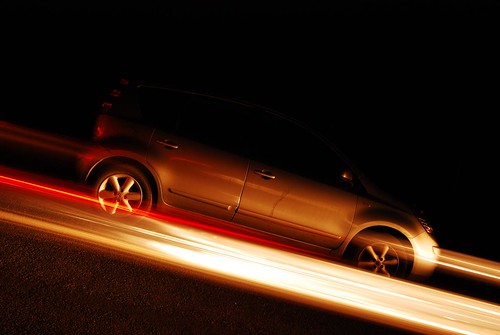
Nissan Note – composited (in camera, using Nikon [I]Image Overlay[/I] function, see flickr page for specifics)

Key here is seeing how the light affected each frame and adding more to suit. The light was a 12v cold cathode which didn’t provide a lot of light so I had to get really close to the car, hence the spread isn’t that great in each frame. Again I shrouded the light to prevent it being seen in the frame. Background wasn’t up to much so I passed behind the car flashing the cathode on and off to give that block finish, and timed the last frame for a passing car.
—–

Lamborghini Diablo – single exposure 4mins f/9

Generally speaking, the darker the colour the better it reflects the highlights of your light source. So, with this bright colour I didn’t even bother trying a light drawn around the car. Instead I used a powerful LED torch with its reflector still in place. The technique is pretty much the same as with speedlights: position yourself at several places around the car during the extended exposure. Using a torch (instead of flashes) means you can see exactly where your light is reaching and adjust position accordingly. I remember mostly lighting forwards from the rear of the car so I could keep the black areas of ducts nice and dark. Aside from the watermark this is unedited – hence tripod shadow still in frame haha
—–

Lamborghini Gallardo – 20 sec f/10

The relatively high f/stop was because I wanted to limit spill so only the highlights shone through, defining just the edge of the car. Again it meant the light had to be really close to the car. The light was simply (but carefully) moved from one end of the car to the other. Notice where the light does spill onto the ground there’s just a short area of shadow before the car, telling you the light was slightly behind where its reflection appears. This was with a 12v flouro, about a foot long- quite a friendly light source in that it’s portable and fairly bright and also gives a nice narrow highlight instead of the broad lines that can be left by softboxes.
—–

Seat Leon

This was a softbox image – massive torch inside one of those portable fold-up thingies. The light spreads really nicely and you can control how much you light your subject by walking faster or slower (or by how close/ far away you are). In this shot I walked along the top of each of the embankments you see. The distance meant more of the scene got lit but the height ended up leaving highlights on the side windows which I normally try and avoid. The highlight on the windscreen is much broader than on the panels but I’ve now worked out by feathering the light (that is, angling the softbox up or down) you can reduce the width of the reflection.

The other thing to say is about angle of incidence/ reflection. When you’re shooting straight on to your car (front/ rear/ side) you can pass through from one side of the frame to the other, starting and finishing a couple of foot either side of the car. You’ll get a highlight right the way across your subject. As soon as you move away from straight on, you need to start walking way, way past your subject if you want the highlight to continue right to the end of the panel(s). Light on the road in the Seat pic above shows I walked prob a full car length past the rear of the Leon and the highlight just reaches the back of the rear wing.

And now a final word on shadows: moving along the car with a light tends to eliminate what we think of as natural shadows and can leave the car looking very pasted in. If you’re into PP the best way around this is with a frame for the ground level that retains a shadow from somewhere – you can create this with your own light or use the shadow from a nearby streetlamp or whatever.

If you like to leave your images untouched then the only way I’ve really come up with is to light underneath the car from behind which, although not always as convincing, has the benefit of adding fantastic texture to the surface. Bear in mind though, unless you’re shooting on pale concrete it takes a lot of light to brighten up a dark road surface!

Well, that’s all I can think of unprompted and I hope it’s useful. If you’ve read it through and still have questions, fire away in the comments and I’ll try and answer publicly for the benefit of future readers.


Filed Under: Light Painting Photography Tagged With: Andrew Whyte

Chris Benbow Spinning Wire Wool Tutorial

May 17, 2011 by Jason D. Page

A basic tutorial to wire wool spinning by Chris Benbow.

Chris was also kind enough to supply the readers of LightPaintingPhotography.com with all of his detailed camera and rigging information. Thanks Chris.

Camera: Canon EOS 5Dmkii
Lens: Sigma 15mm Fisheye
Shutter Release: Hähnel Wired Release

Camera Settings
ISO: 500
Aperture: F/3.2
Shutter Speed: BULB -88 Seconds on continuous mode-
Wire Wool: Oakley Steel Wool (Wire Wool comes in 3 textures –Fine, Medium, Coarse- Fine burns best, Coarse won’t even light)

Filed Under: Light Painting Photography Tagged With: Chris Benbow, Light Painting Tutorial, Light Painting Video

Need Funding for a Project… Or have a ton of Money to Give Away?

May 13, 2011 by Jason D. Page

If you are like most of us artist you probably have grand ideas but you have no money in your pocket. You might work a job that sucks that allows you the time you need to work on your light painting but all it does is pay your bills. Meanwhile all the grand ideas keep surfacing in your head but you need cash…Well fear no more artist welcome to KICKSTARTER.  Here are the basics.

Kickstarter is the largest funding platform for creative projects in the world. Every month, tens of thousands of amazing people pledge millions of dollars to projects from the worlds of music, film, art, technology, design, food, publishing and other creative fields.

A new form of commerce and patronage. This is not about investment or lending. Project creators keep 100% ownership and control over their work. Instead, they offer products and experiences that are unique to each project.

All or nothing funding. On Kickstarter, a project must reach its funding goal before time runs out or no money changes hands. Why? It protects everyone involved. Creators aren’t expected to develop their project without necessary funds, and it allows anyone to test concepts without risk.

Each and every project is the independent creation of someone like you. Projects are big and small, serious and whimsical, traditional and experimental. They’re inspiring, entertaining and unbelievably diverse. We hope you agree… Welcome to Kickstarter!

Click here to find out more.


Do you have a radical idea for a light painting project but lack the funding to get it off the ground?

Filed Under: Light Painting Photography Tagged With: funding

Canon TC-80N3 Hack

May 11, 2011 by Jason D. Page

Did you upgrade your camera to the new 60D from the 40D or the 30D only to find out that the Canon TC-80N3 shutter release that you had purchased no longer works? Well have no fear Light Painting Artist Trevor Williams is here to save your day… check out this tutorial on how to hack that little sucker…. CLICK HERE

Filed Under: Light Painting Photography, Light Painting Tutorials Tagged With: tdub303, treveor williams, tutorial

Cracklight District

May 10, 2011 by Jason D. Page

The creative minds that brought you CFYE are putting together an international light painting show and exhibition. The 18th of June, during Nuit Blanche, CFYE will present the Cracklight District event! From 19:00 ’till 02:00 everyone is welcome to check out the Cracklight District Light painting exhibition in Amsterdam with works from light painting artists from all across the globe! When you’ve soaked up enough inspiration at the exhibition you’re welcome to participate in our light painting workshops for a small fee. The workshops will be held in the perfect setting, so be prepared!

Check out the WEBSITE.

Filed Under: Light Painting Photography

« Previous Page
Next Page »

Copyright © 2026 · News Pro Theme on Genesis Framework · WordPress · Log in