
The second Edition of Light Art Digital Magazine is out and it is full of amazing images interviews! Download it for free right here!
For the promotion and progression of Light Painting Art and Artist.
The second Edition of Light Art Digital Magazine is out and it is full of amazing images interviews! Download it for free right here!

Light Painting is GROWING! Just launched last friday is more proof of this with the first ever magazine dedicated to the Light Painting Photography Art Form! Light Art Digital Magazine was created by Sasa Lightpainting and Ramsés Pacheco Light Painter, these guys did a tremendous job on this very first issue! The magazine will be published quarterly and sets out to “be a meeting point, a showcase, a reference and a opportunity of artistic diffusion for light painters around the world”. We are all looking forward to the future of this publication! Please head over to their website where you can download the magazine for FREE in both English and Spanish!
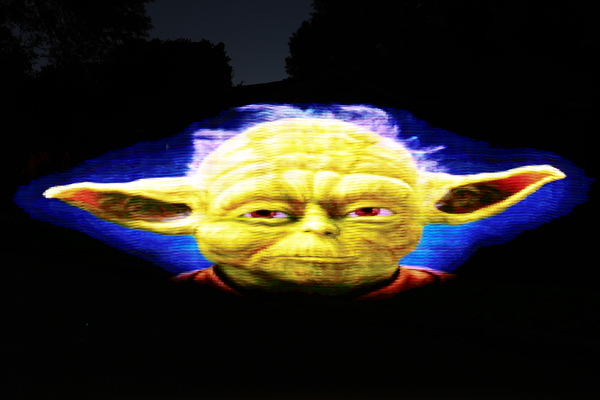
Light painting photographer, Digital Light Wand Inventor, and all around genius Michael Ross a.k.a TxPilot has given yet another gift to the light painting community. Building off some upgrades made by Flickr handle is0-Mick, Mr. Ross has reinvented what is possible with this amazing light painting tool! Here’s whats new…
The new Digital Light Wand’s have up to 60 LED’s per meter as opposed to 32 on the old models and they have been upgraded with all the following menu items that can be manipulated in the field:
1 – File Selection
2 – Brightness setting
3 – Initial Delay time
4 – Frame Delay (how long each pixel frame is displayed)
5 – Dual Delay (adjustment for interlace offset, depends on the speed the wand is normally used)
6 – Left to Right or Right to Left
7 – Number of times to repeat the same file
8 – Repeat delay (delay between repeats)
9 – Push On/Off Mode (Push button to start, repeats until button is pushed again.) (Great for pattern repeats)
Check these sample images and keep reading below for even more details!


LPP ∇ Hey Mike I see you upgraded your Digital Light Wand, can you tell us whats new….
MR ∇ The Digital Light Wand has gone through some changes since the first one I created three and half years ago. There have been a few varying designs based on the original and each of them made the use of the tool in the field more convenient. The most recent changes incorporate some new LED strips that have been made available recently that feature a higher density of LEDs per meter and full color manipulation compared to the original Addressable LED strips. These new strips now have 52 and even 60 LEDs per meter compared to the 32 LEDs per meter of the original. The color range is also much easier to deal with from a programming standpoint and there are a full 2.1 million colors easily available in these new strips.
LPP ∇ Sounds awesome what inspired the upgrade?
MR ∇ A guy that goes by the name of iso-mick on flickr changed the original design a while back and incorporated an SD card along with an LCD display so that several BMP files could be stored and played back on demand while in the field without having to reprogram the strip between each use! So taking iso-mick’s work, I have made some changes to the programming code to allow two of the higher density LED strips to be placed side by side with an offset to gain a greater resolution in the final image. Without getting into the technical challenges that this represents in making this work for a variety of light painters, I made some further changes to the programming code to allow for making fine tuned adjustments in the field. There are several variables that can occur such as how fast the wand is moved during the creation of a light painting photo. There are also other variables involved such as the preference of moving the wand from right to left instead of from left to right and of course just dealing with different levels of ambient lighting. Once a light painter is comfortable with specific settings on the new version of the Digital Light Wand, they can choose those defaults and only make minor adjustments between uses.
LPP ∇ Whats up with the software does it work with for us Mac users too?
MR ∇ There are versions of the Arduino software for Windows, MAC, and Linux so as long as you can format an SD card to the proper format and create 24-Bit BMP files of the images you want use, then you should be good to go!
I have the Arduino code ready to download on my website along with detailed wiring diagram, parts lists, and basic assembly instructions. And if you run into any issues, just post a question on the blog. There are plenty of others willing to help out with it!
LPP ∇ Awesome work Mr. Ross, Thank you for sharing!
Michael Ross, a.k.a. TxPilot is a light painter and self proclaimed geek, nerd, and techie. He has a passion for creating new light painting tools. Michael is the creator of The Digital Light Wand, it is a programable LED light strip that can create just about any design a light painter can think of. Michael recently uploaded a lengthy and detailed tutorial showing other light painters how to create his greatest invention to date. Below is a interview I did with Michael about this insane light painting tool.

LPP ∇ First give me a little of your back ground how long have you been light painting?
MR ∇ I got started in Light Painting about 2 years ago. The typical long exposures with Sparklers on the 4th of July story. I really got deep into it when I ran across a light painting by TigTab on Flickr. It just blew me away and I had to learn more.
LPP ∇ We have all been there…lol, when did you get into photography?
MR ∇ I have been into photography on an small scale all of my life, but at the start of 2009 I made a decision to try to learn to master it.
LPP ∇ So I saw your massive tutorial recently about how to make the digital light wand, when did you first create this tool?
MR ∇ I had the idea of creating it when I first started to get into light painting. But it was around October of 2009 that I ran across the addressable light strip and I knew I would be able to make it work with that. I experimented with the electronics for a few months and finally had a break through with it in December of 2009.
LPP ∇ Can you explain a little bit about what it is and how it works?
MR ∇ Without getting into the technical details. The light strip is an RGB LED strip that will take software commands. Each LED can be controlled separately for the color mix and on and off state. I used the Arduino Mega Microcontroller board to connect to the strip to send the commands to it to control the colors and on and off sequencing. I then created a spreadsheet program that I use to “visualize” the image that I want the light strip to make and it generates the software code needed to make it happen. Once the software is downloaded to the microcontroller and power is turned on, the strip will play the sequence.
LPP ∇ Holy s@#!, so are you an electrical engineer, mad scientist, of just really smart?
MR ∇ Ha! I have been called a “Mad Scientist” on more than one occasion! I do have a background in electronics as I was an Avionics Tech in the Navy. My Grandfather and Father also were into electronics heavily.
LPP ∇ What inspired the original idea? Were you trying to accomplish a specific image or just exploring the possibilities of light painting? With your original concept I mean…
MR ∇ I have been known to think outside that is outside the box a lot. I am constantly thinking of new ideas and tools that will work with Light Painting and at this point I have a list of ideas so long it will take a lifetime to complete them all! Ha. The original idea was to be able to create a tool that I can use to light paint the Mona Lisa in the air! I haven’t reached that goal yet but I will!
LPP ∇ WOW I really like where your headed with this idea! That takes me to my next question, The tool looks like it can do just about anything what are the limitations of the Digital Light Wand?
MR ∇ There are several things that I would like to improve with this tool, the two major limitations are the color range for each LED and the “Resolution” or basically how far apart the LEDS are from each other. I already have version 2 AND 3 designed in my head and the parts have been sitting under my desk at home now for a year. Just have not had the time to work on them yet.
LPP ∇ Cant wait to see what you can come up with in the next version of this little monster…. Recently flickr has given some exposure to a guy that goes by the name mechatronics for his work with something similar have you seen his images?
MR ∇ Yes, I have seen his images and the tool he created. One of my employees told me about it the day he made his announcement on Reddit.
LPP ∇ Some folks in the LP community feel like maybe he ripped your idea and didn’t give you the credit you rightfully deserve for being the originator of this idea, whats your take?
MR ∇ I don’t really feel that way. He basically had the same vision I did and created a tool that is similar but different in a lot of ways. When he made his announcement, I guess some others must have steered him my direction. He contacted me via email and we are talking about combining our efforts and creating a single tool that will give everyone the best of both worlds! Both of the designs have advantages that the other does not have.
LPP ∇ Thats good to hear…. It is awesome that you made the tutorial for everyone to try to create their own but for those of us who will electrocute ourselves do you plan on making any for SALE?
MR ∇ I don’t know if I will market them. My goal with the tutorial was to try to make it as detailed and easy to follow that anyone with some basic DIY skills could build one. I will keep working towards that and by releasing the way I did, I am really hoping that some others will take it and add to it to make it even easier to build and use. At this point I am looking forward to moving on to some other projects for Light painting that I think will even put this one to shame!
Oh… and no one should worry about being electrocuted with this. There is no way any part of this tool could hurt anyone. Unless you were hit by it that is!
LPP ∇ Thanks for taking the time to answer some questions we are all looking forward to seeing your next invention!
MR ∇ No problem at all. It was my pleasure.
To view the entire Digital Light Wand tutorial visit Michael’s website HERE

Check out this video of the blissful Light Painting duo of Cenci Goepel and Jens Warnecke, better known as Lightmark, on a Light Painting expedition to Greenland where they created the beautiful image below, titled “No. 66”.

“Making of” from Lightmark No. 66
For more information visit: www.lightmark.de

A moon of light in the noon of night
“Lightmark,” the body of work by Cenci Goepel and Jens Warnecke, was created by photographing moving light sources at night. The resultant ethereal images inhabit a dramatic and often eerie landscape. Long exposures—sometimes up to an hour—are required to allow torchlight to take form and for the very low level of ambient light, usually from the moon, to illuminate the scenery.
Seen through the viewfinder, the landscape often appears as solidly black. Using a digital medium format camera for their photography, Goepel and Warnecke focus on photographic techniques rather than post processing to achieve the results they are aiming for.
The couple travels across the world to find hidden landscapes that are yet to be captured and portrayed through the Light Painting Art Form.
“Light Painting is an art form. It is the intentional movement of light, through space, over time. The Light Painting Art Form is captured using the photographic technique of Long Exposure Photography. Just as a canvas captures the brush strokes of a traditional painter, the camera is the instrument used to capture the movement of Light, through space, over time that is the Light Painting Art Form”
– Jason D. Page
Light Painting Artist Laura Delprato does an excellent job of diving deep into what she calls the “4th Space” narrative. In this profound interview, Laura shares her theory on what Light Painting is. She explains why it’s its own unique Art Form, separate from traditional photography. Laura dives into the theory of 4th Space Narratives, spatial-temporal awareness, and how Light Painters transform place into space. Most importantly, she provides the Light Painting Art Form with the language we can all use to explain the magic behind it.
I believe this is one of the most important videos we’ve ever uploaded. If you’d like to help grow the Light Painting Art Form, please share this interview. Listen closely and use the language that Laura provides to help others understand the beauty of Light Painting.
Light Painting Image Credit:
Richter, Tobi. “The ‘Stretch’ Toyota Yaris.” Digital Image. Facebook, Published Feb 7th, 2014. Accessed May 1, 2014.
Want to begin your journey into Light Painting? Learn the basics here.
Browse our collection of Light Painting tutorials to dive deeper.
Light Painting Artist Patrick Rochon is known for his innovative Light Painting Portraits, commercial Light Painting Work and his free flowing Light Painting Katas. Patrick’s Light Painting Videos showcase his skill and craftsmanship working in a 3-dimensional space. Patrick has also produced an excellent Light Painting Video Workshop series that he has released completely for free. It can be found in the Tutorial Section of the Light Painting Photography website. Make sure to check it out and learn more about his incredible Light Painting work!
Light Painting Photographer Patrick Rochon took time away from the digital world to dive deep into Light Painting. Focused on learning the deeper meaning of what we, as Light Painting Artists, do. Patrick created a powerful new video Manifesto sharing what he has learned on his journey with LIGHT!
Patrick Rochon teamed up with the creative design team at Infinity to create a beautiful automotive advertising campaign!
“Light Painting Kata” – Patrick Rochon gives a beautiful explanation of his Light Painting work.
Light Painting Kata by Patrick Rochon

How To Focus in the Dark is one of the most common questions that I get and the reality is that you can’t focus in the dark. Your camera needs to be able to see some contrast or definition in the scene to be able to focus. You will need to have some sort of light source to be able to either illuminate your scene, your subject you are going to light paint or the place in the scene that you are going to be creating your light painting.
In this video tutorial I show you two different techniques for getting sharp focus in your Light Painting Photography, both techniques require a light source. The first focusing technique is using a flashlight to illuminate the scene and then pulling focus from there. For the second focusing technique you will place your light source next to the subject or where you intend to stand then pull focus on that illuminated subject or area.
There are two things that I have learned since posting this video that can make your focus even better. The first is that when you shoot on a tripod you should turn off your image stabilization. This is something I had never done, but apparently if you leave image stabilization on, your camera can interpret subtle movements as camera shake and slightly change focus.
The second thing I’ve learned is the difference between a parfocal lens and a varifocal lens. I’ve used these same two focusing techniques for at least 20 years with every camera and lens setup I’ve owned and never had trouble getting sharp focus — or at least sharp enough for me. But after I posted this video, I received a comment from @Scar pointing out that the zoom technique only works with a parfocal lens.
After doing some research, I found that a varifocal lens changes focus at different zoom lengths. I had never noticed this when creating Light Painting Photography, possibly because I’m shooting in the dark and moving — and my expectation of focus may be different than someone shooting sports, for example.
So here’s the refined technique: If you’re using a varifocal lens, frame your shot exactly how you intend to shoot it (DO NOT ZOOM IN), then use your camera’s digital zoom focus assist to pull focus. Once you’ve focused, turn off the assist and start shooting.
Huge thanks to the community for sharing your insights — it means a lot that I can post a tutorial and end up learning even more from all of you. Thank you! 🙏
Learn the Basics of Light Painting | See All Light Painting Tutorials
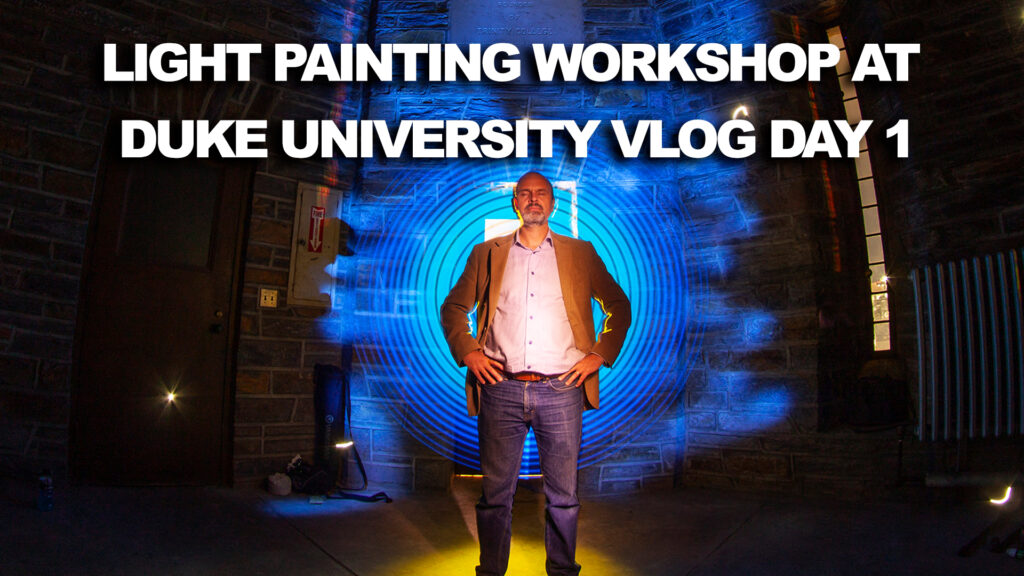
This Light Painting VLOG documents the first Light Painting workshop held at Duke University. In this episode I travel from my aunt and uncles house in North Carolina to Duke university to meet up with my fellow Light Painters. We take a tour of The Chapel and see some of the areas that not many guest get to see. We Light Painted in the chapel for a short amount of time with Angelina voices filling the air. I did a really bad job vlogging because I was in awe of just about everything from the architecture to the next generation 3d tech enology.
A very special THANK YOU goes out to Duke University and August Burns who put an extraordinary amount of work into making this workshop happen!
Light Painting is the compression of Time, Space and Movement of Light onto one single photographic frame, LIGHT PAINTING IS MAGIC! All of my Light Paintings are created in real time captured to the camera in one single photographic frame.
The Tools that we use are from: https://lightpaintingbrushes.com
You can follow me at:
https://Instagram.com/jasondpage_lightpainter
https://Facebook.com/jasondpage
https://Twitter.com/LightPainterJDP
Collect my digital Light Paintings at:
https://LightPainting.ThetaDrop.com

In this episode of the Light Painting Photography VLOG I travel to Arkansas to meet up with fellow Light Painter and Light Painting Tool Wizard Johnny Griffin. Johnny shows me a few of his favorite Light Painting Locations and we settle on shooting at Natural Dam for some Light Writing and reflections!
Light Painting is the compression of Time, Space and Movement of Light onto one single photographic frame, LIGHT PAINTING IS MAGIC! All of my Light Paintings are created in real time captured to the camera in one single photographic frame.
Follow Johnny at: https://Instagram.com/johnnygriffin_imagenation
The Tools that we use are from: https://lightpaintingbrushes.com
You can follow me at:
https://Instagram.com/jasondpage_lightpainter
https://Facebook.com/jasondpage
https://Twitter.com/LightPainterJDP
Collect my digital Light Paintings at:
https://LightPainting.ThetaDrop.com


