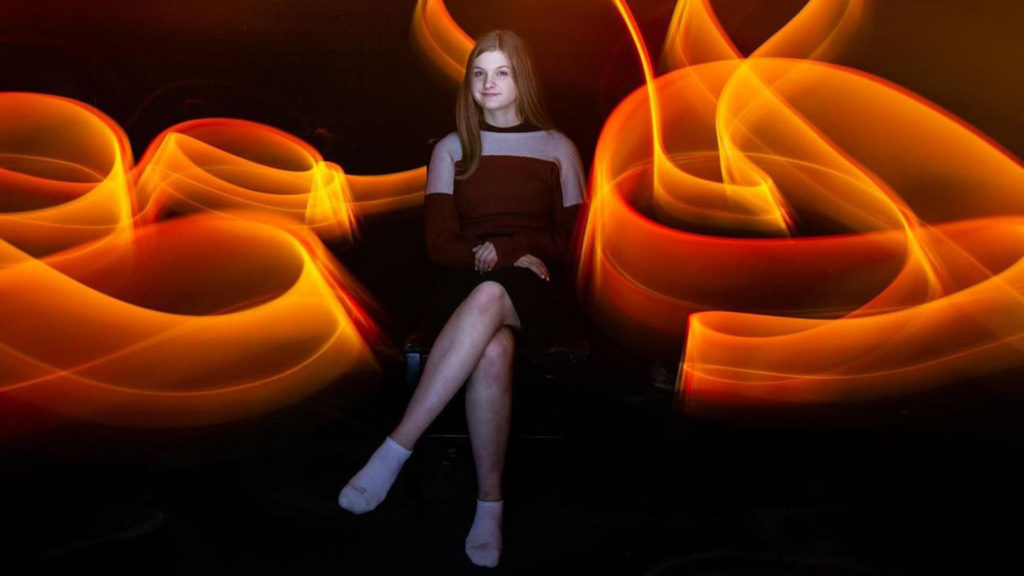
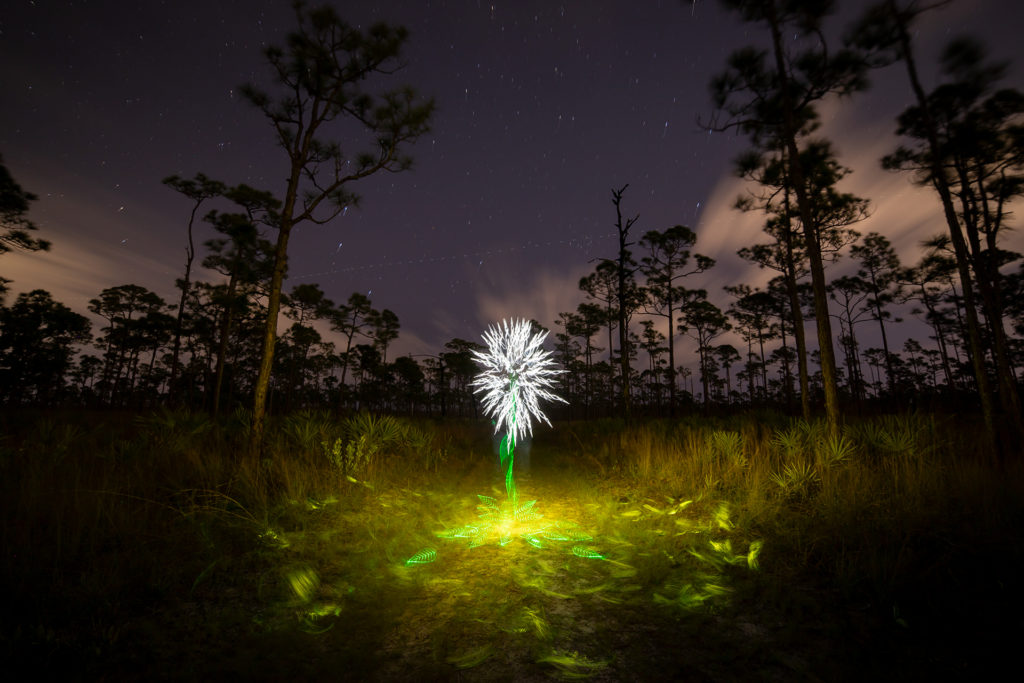
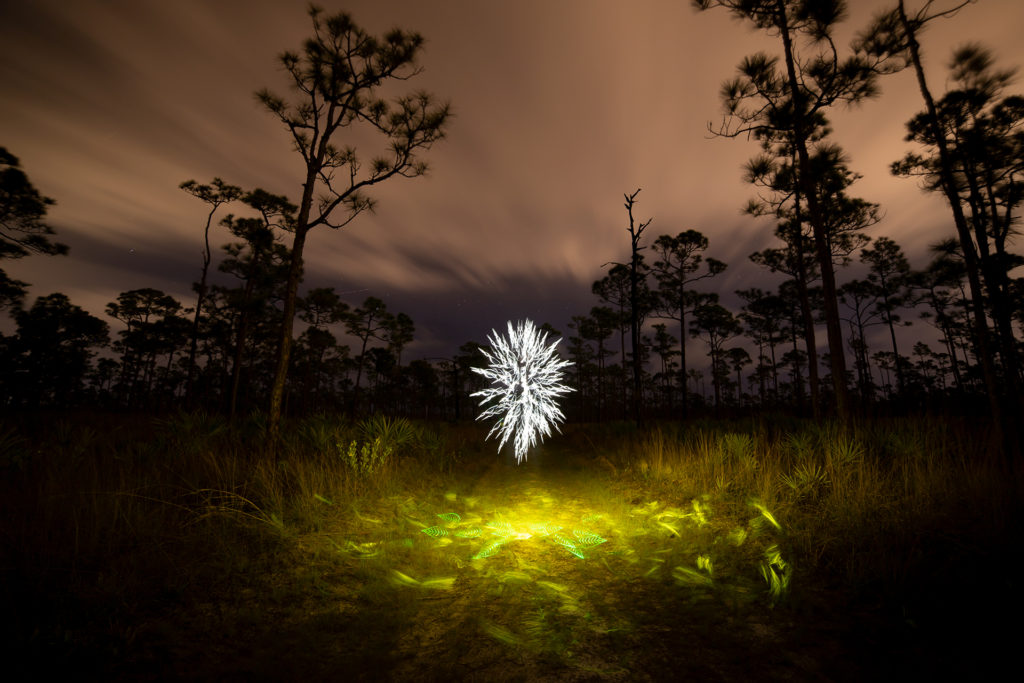
![]()
In this Light Painting Photography Tutorial I show how to create some unique and vivid colors in your Light Painting Photography work by adding some Liquid chalk onto your Plexiglass! These Liquid Chalk markers can be a little bit messy but they go on and most importantly come off of your Plexiglass Light Painting Tools really easy! In this tutorial I used these Liquid Chalk Markers and Plexiglass tools from Light Painting Brushes! Check out the video and images below!
How To Light Paint a Dandelion

In this Light Painting tutorial I show How To Light Paint a Dandelion using tools from Light Painting Brushes. The camera that I use is the Canon 6D Mark ii and the Rokinon 14MM Manual lens. The manual lens was important in creating this image because I changed the aperture during the exposure. The camera settings that I used were ISO100, F16 for the Flower portion of the image, then I changed the aperture to 2.8 to illuminate the scene and allow the background to expose. The total exposure time for this image was 440 seconds. It was all created in real time and captured to the camera in one single photographic frame. If you are new to Light Painting check out this detailed tutorial showing how to light paint a flower here: HOW TO LIGHT PAINT A FLOWER


Camera Rotation Photography Tutorial

In this tutorial video I talk all about Camera Rotation Photography. Camera Rotation is a form of Kinetic Light Painting in that the lights in the scene stay stationary and the camera is what moves to create the color and design within the frame. The Camera Rotation Tool that I use in this video is a 360º Panoramic Tripod Gimbal and it is as simple as it gets when it comes to a CRT. As with all light painting the possibilities are limitless, I hope you enjoy the video.
Here are the links to what I used if you want to build your own Camera Rotation Tool:
Gimbal: https://amzn.to/2LZFTnO
Hot Shoe Phone Holder: https://amzn.to/3u3Axsz
Tripod: https://amzn.to/37iDzj4
Want to learn more about Camera Rotation Photography check out this tutorial from some of the best and also this great Facebook Group on Camera Rotation Photography!
Rotating Sunset to Create Pyramids In The Sky
![]()
In this Light Painting Photography Tutorial I show how to create Pyramids In The Sky using only the ambient light from the setting sun and camera movement. This is a different and unique way to photograph a sunset. The images you see in this video are not edited or layered they are created in real time and captured to the camera in a single exposure! By rotating the camera on a camera rotation tool along with the technique of lens capping these images are built in camera. This is a form of Kinetic Light Painting, in that the camera moving is what creates the design within the image instead of the lights moving. Technically the light from the sun is moving but we are just gonna call it Kinetic Light Painting. Pyramids in the Sky is just scratching the surface with what is possible with this form of Light Painting Photography, if you would like to learn more about this form of Kinetic Light Painting Photography and specifically Camera Rotation Photography please check out this tutorial here: https://lightpaintingphotography.com/light-painting-tutorials/camera-rotation-light-painting-tutorial/
Important tips/steps to keep in mind:
1. Looks for a high location with a clean horizon without any buildings or lights.
2. Wait for the sun to go down, that is when the best colors appear in the sky to photograph.
3. Find you center point then rotate your camera to about the 60º mark.
4. Start your exposure, remove your lens cap then quickly replace it.
5. Rotate your camera about 20º and repeat the process until you have rotated your camera about 120º
6. Stop your exposure and see the Pyramid you created!
In the article linked above there are some examples of Camera Rotation Tools but if you want to skip the read and just get to the point the 360 Degree Panoramic Gimbal Tripod Head is the best off the shelf solution for a camera rotation tool that I know of: https://amzn.to/3a7lxAK
You will also want a hot shoe phone holder to check your angle using a level app: https://amzn.to/3caTJOJ
The Exploding Orb Light Painting Tutorial

This light painting video is going to be a new format for some of the Light Painting Tutorials on the YouTube channel that you will see on this channel going forward, filming them in this way will allow me to create a lot more work while also filming more light painting tutorials with this voice over format. If you have not subscribed yet what are you waiting for ya silly goose, all you have to do is CLICK HERE then click on the Red subscribe Button. I will still be making more of the traditional light painting tutorials and light painting volts but this is something new and I am really curious to know what you think of it so if you have read this far please leave a comment down below and let me know what you think of it!


